Setting up for the first time? Start with the backend (section 13), then the admin panel (section 14), then come back to section 1 for the app. The app and admin panel both need a running backend.
1. Prerequisites
For optimal compatibility and performance, we highly recommend using the exact versions listed below.
Flutter SDK
Min: 3.44.x
Java Version
Java 21.0.9
CocoaPods
Min: 1.16.2
Xcode
Min: 16.x
Supported IDEs
Android Studio / VS Code
Important: It is highly recommended to use Java 21.0.9 for your Android projects to avoid build errors and ensure optimal compatibility with the app's dependencies.
Need Help? If you are facing any version-related issues, please reach out to us directly! We are happy to help you. Go to the Support Section →
2. Environment Setup
Select your operating system below to view the setup instructions.
Android Studio Setup
Download Android Studio from the official page. We recommend setting your system Java environment to Java 21.0.9.
Run the downloaded executable (e.g., android-studio-ide-<version>-windows.exe) and follow the installation wizard.
Launch Android Studio and allow it to download additional SDK components.
Optional: Set up an emulator through the AVD (Android Virtual Device) Manager.
Extract the zip file to a location on your machine (e.g., C:\flutter).
Add to System Path: Right-click "This PC" > Properties > Advanced system settings > Environment Variables. Find the "Path" variable, click Edit, and add your flutter\bin directory path.
Open Command Prompt and run flutter doctor to verify installation.
IDE Configuration
Open Android Studio.
Go to File > Settings > Plugins > Marketplace.
Search for and install both the Flutter and Dart plugins.
Need Help? If you are facing any environment setup related issues, directly reach out to us! We are happy to help you. Go to the Support Section →
3. Change Android Package Name
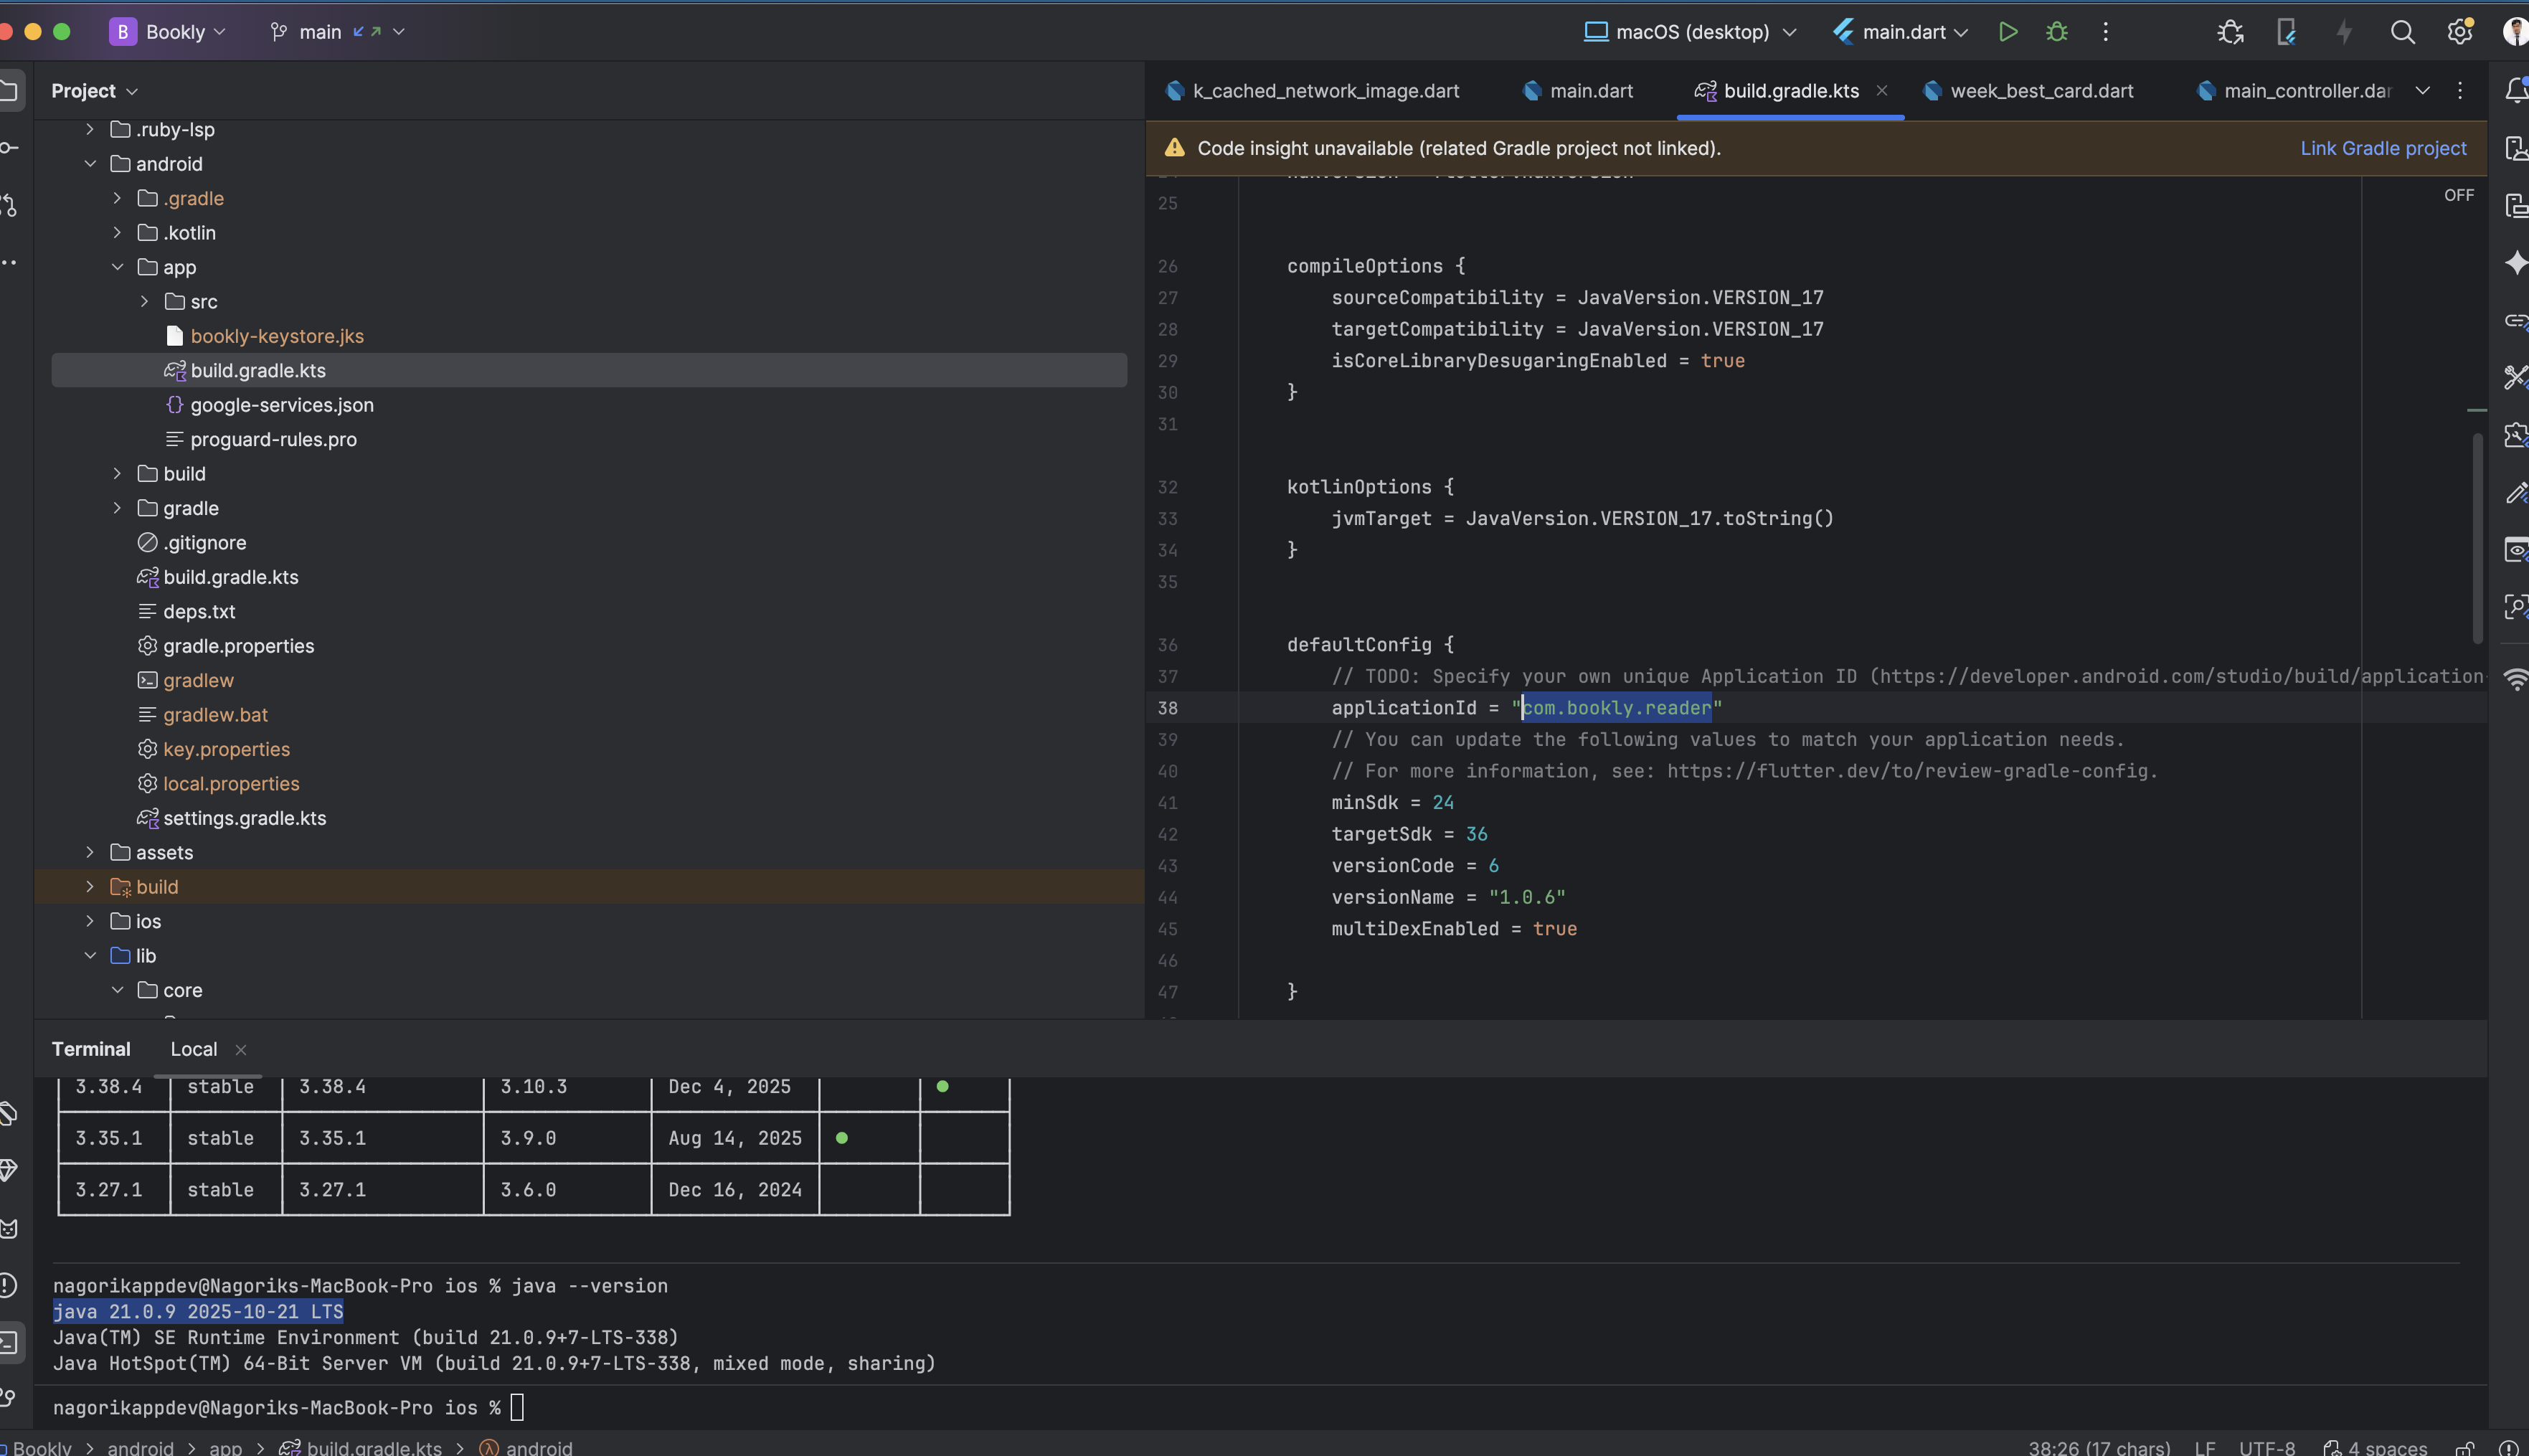
First, you have to find out the existing applicationId. You can find it out from the top of the /android/app/build.gradle.kts file.
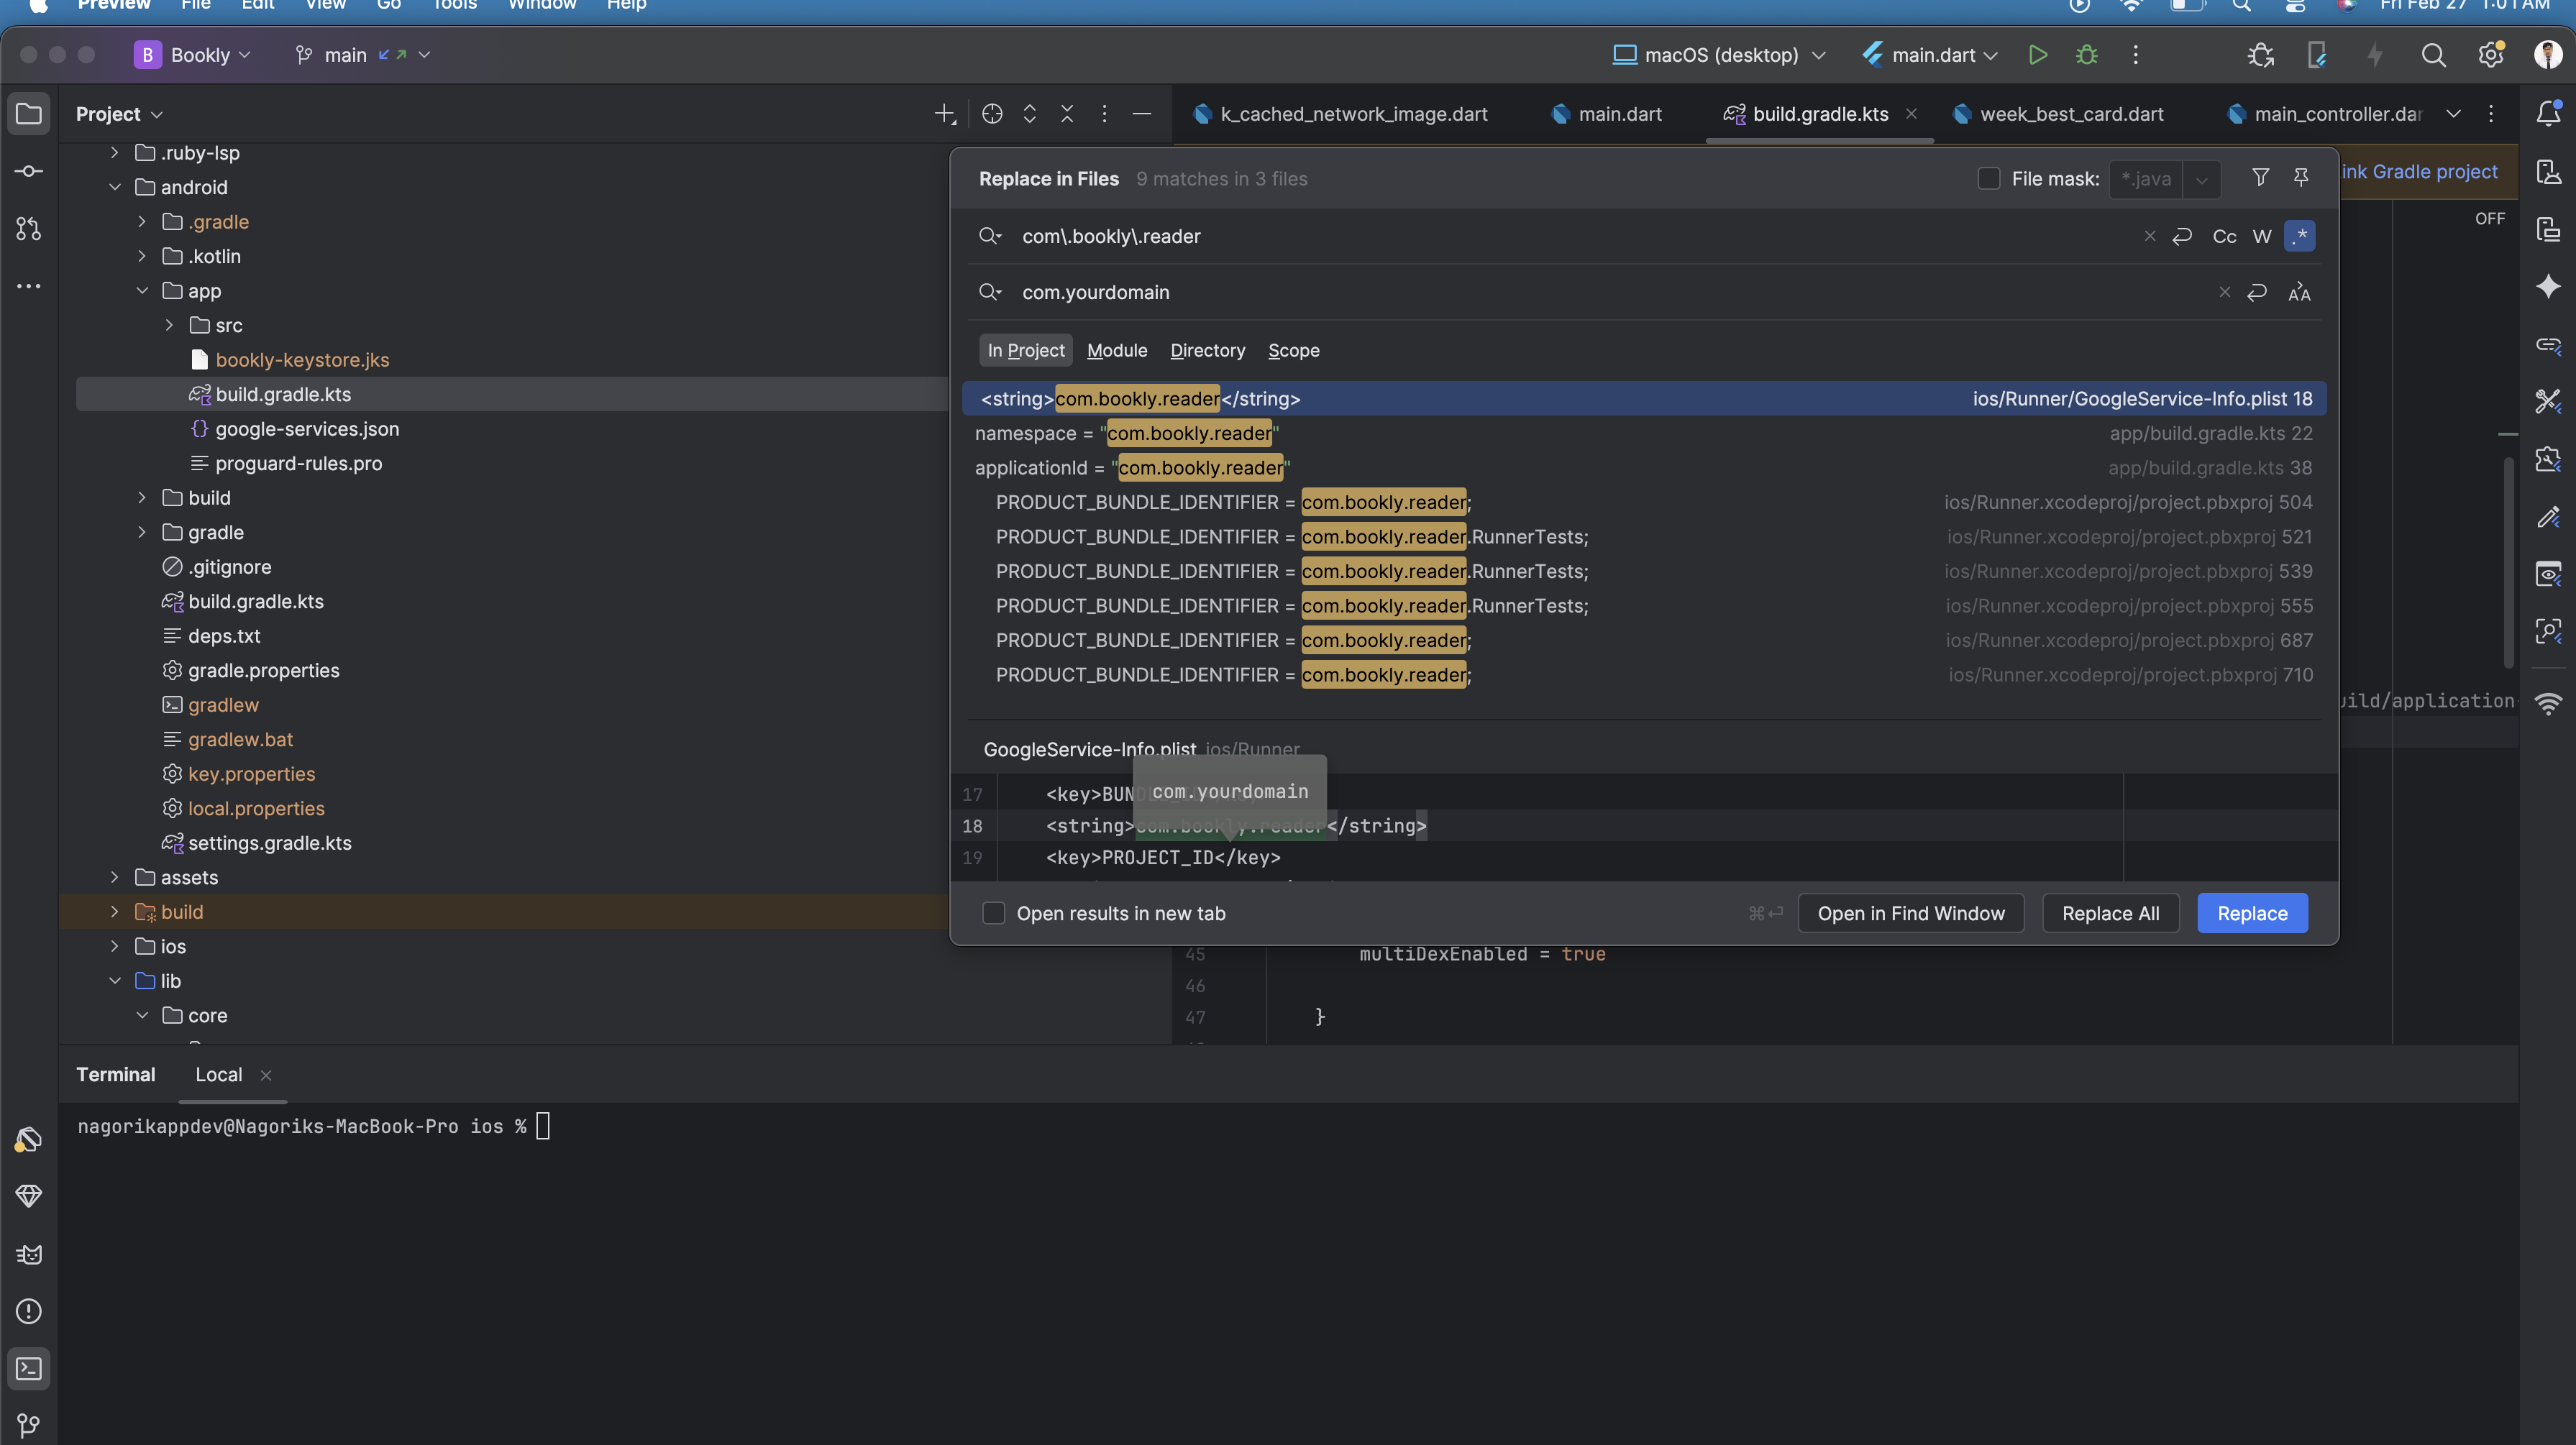
Now select the application ID and press command + shift + r or for Windows ctrl + shift + r, place your preferred package name in the replace input box, and then click on the Replace All button.
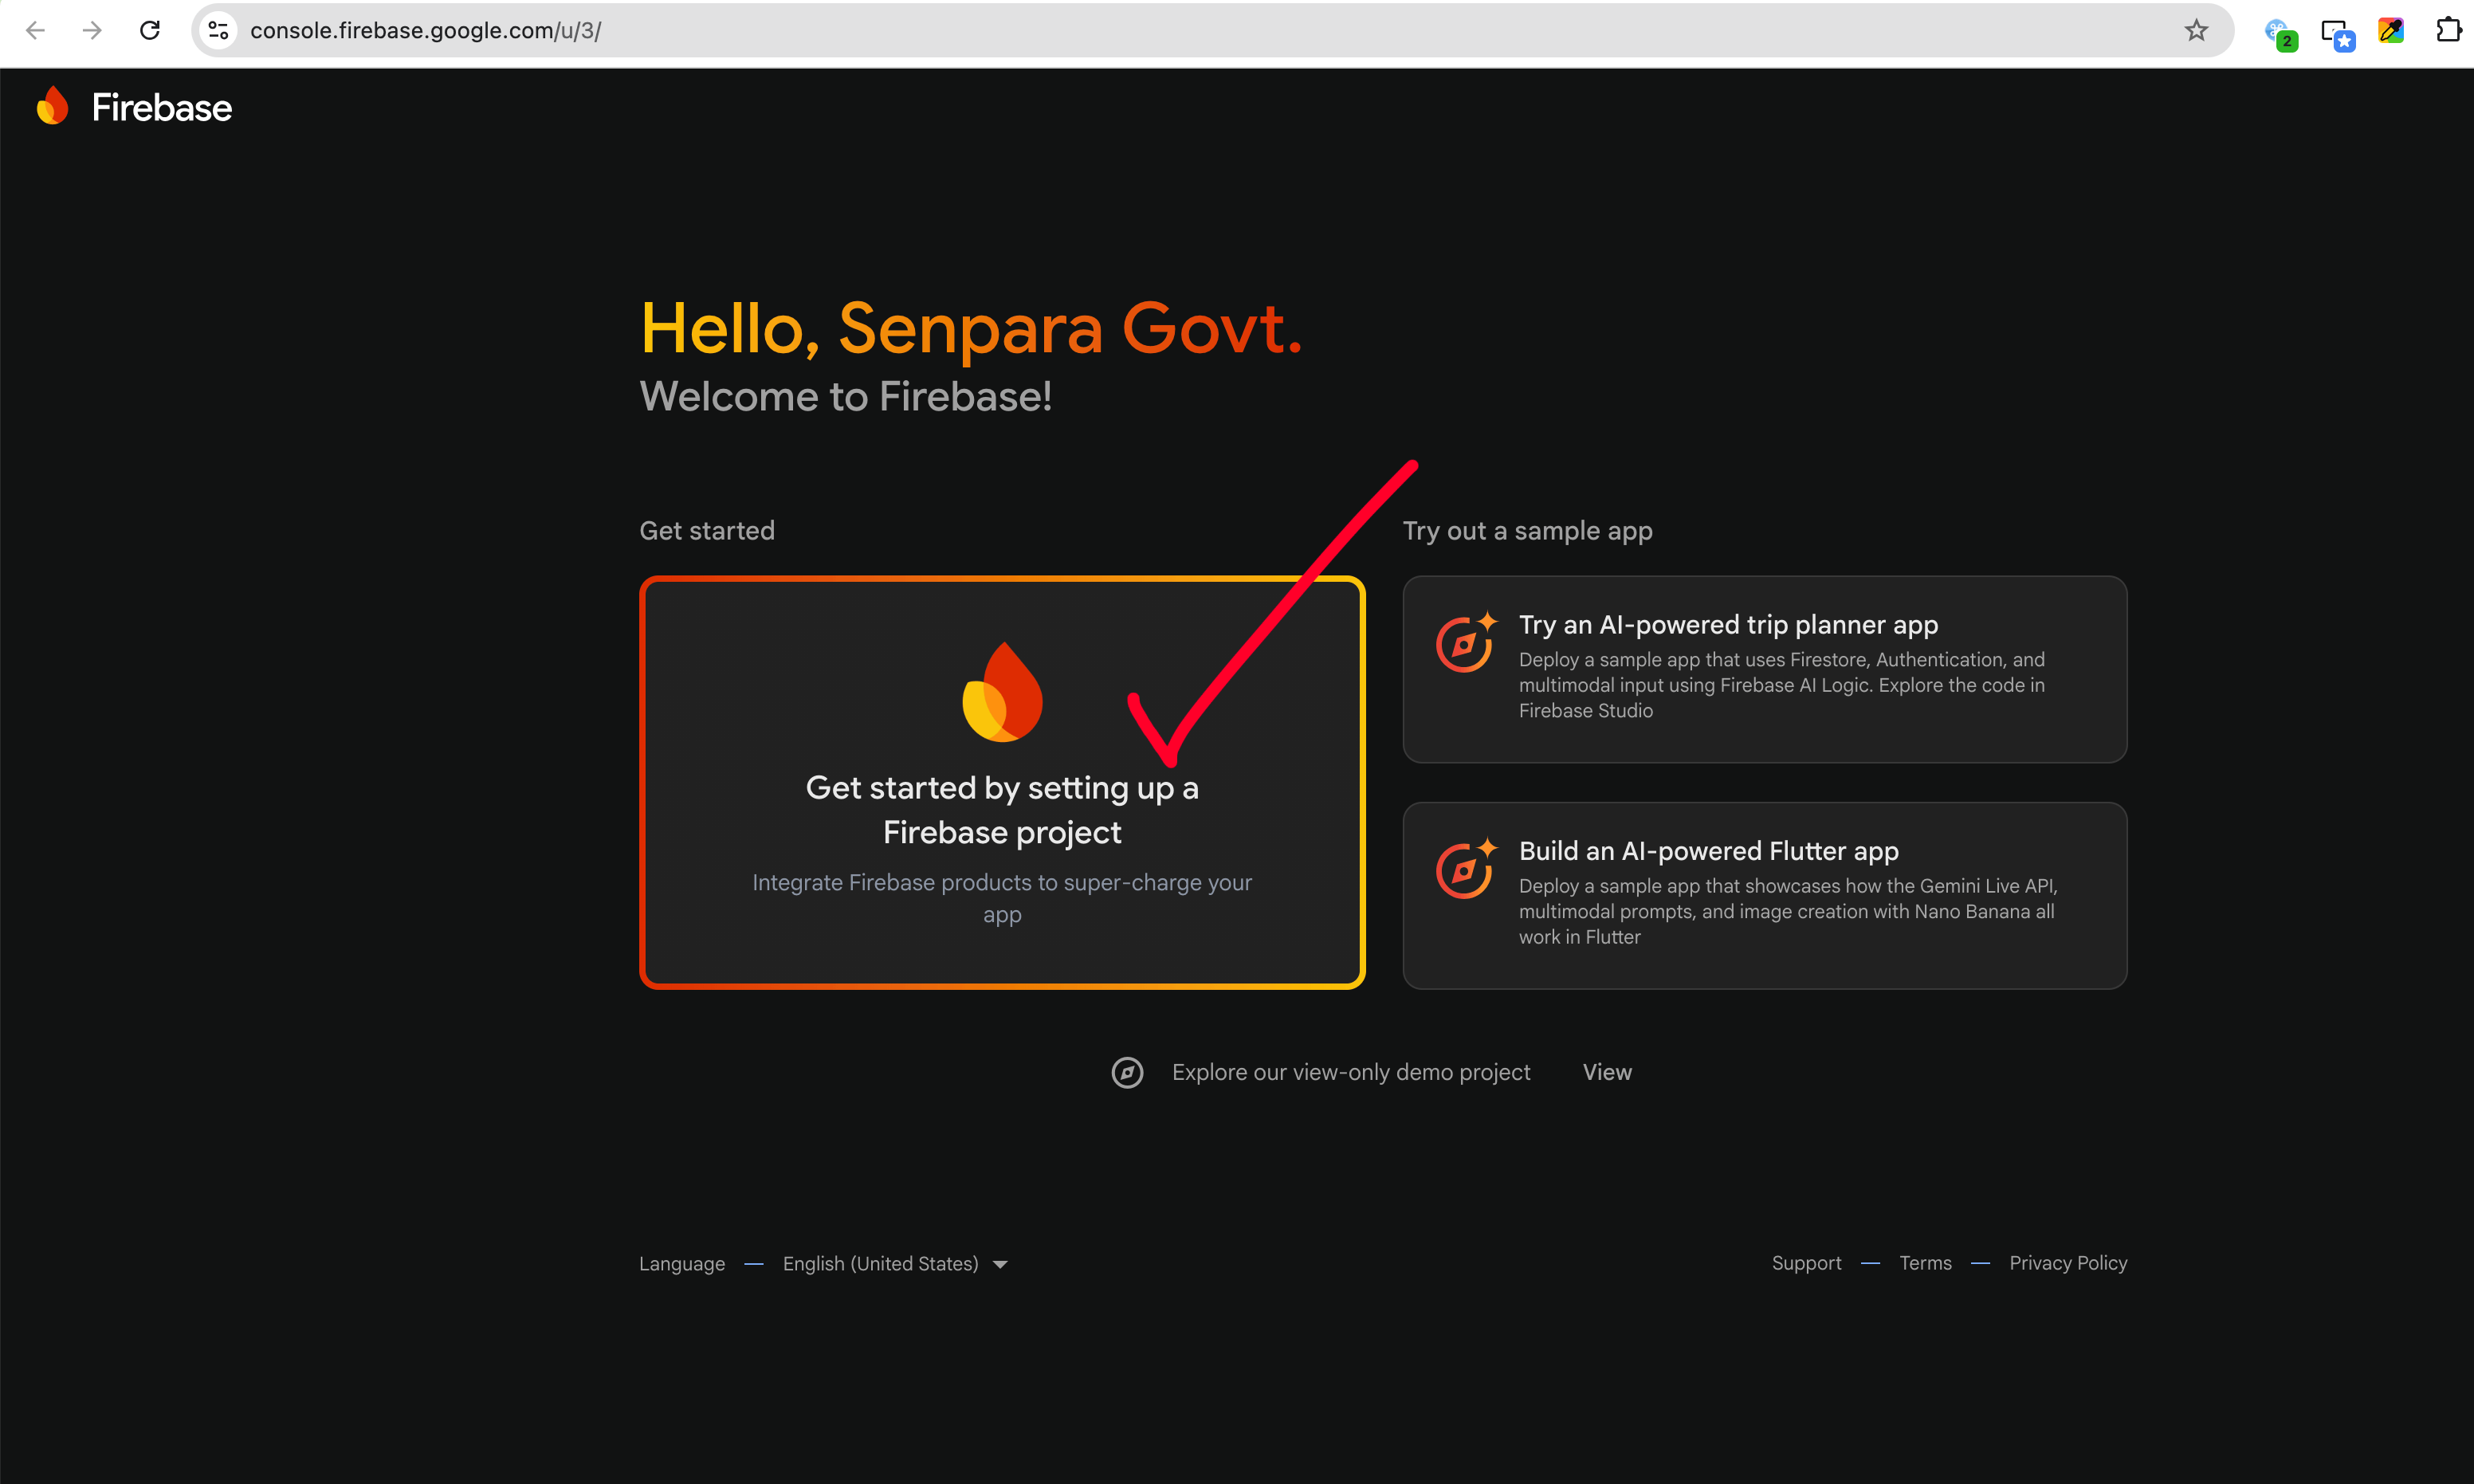
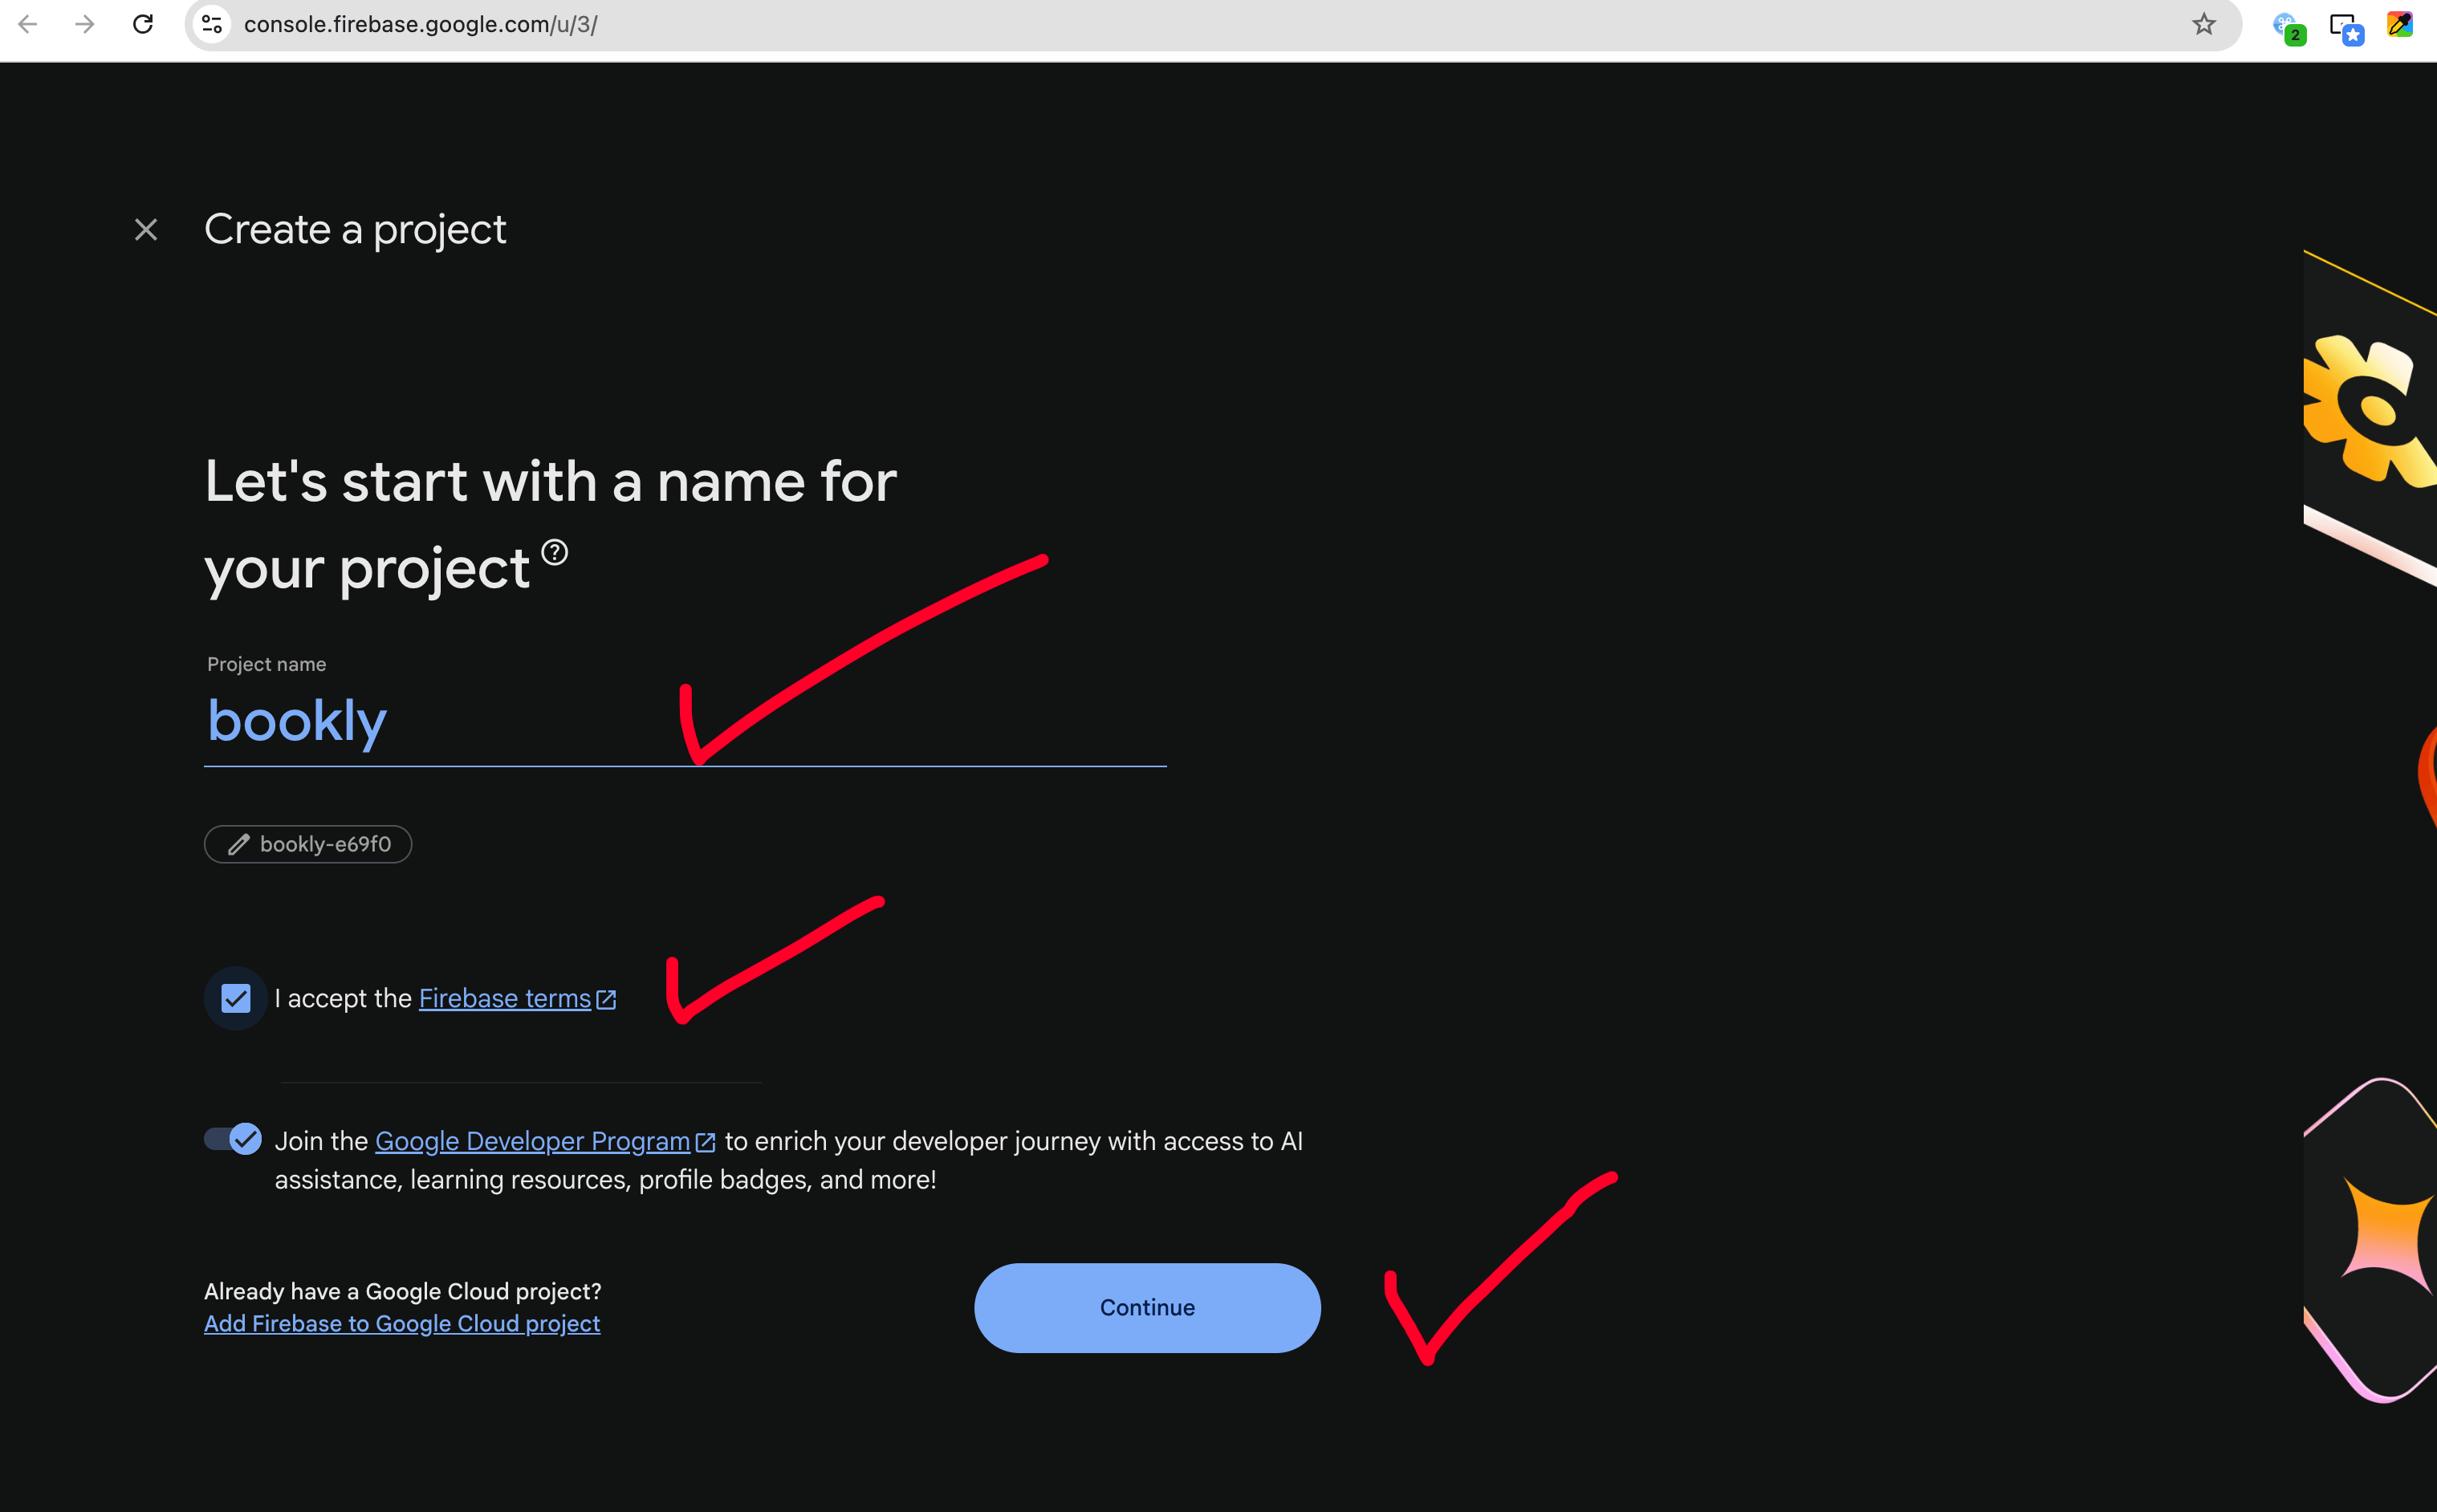
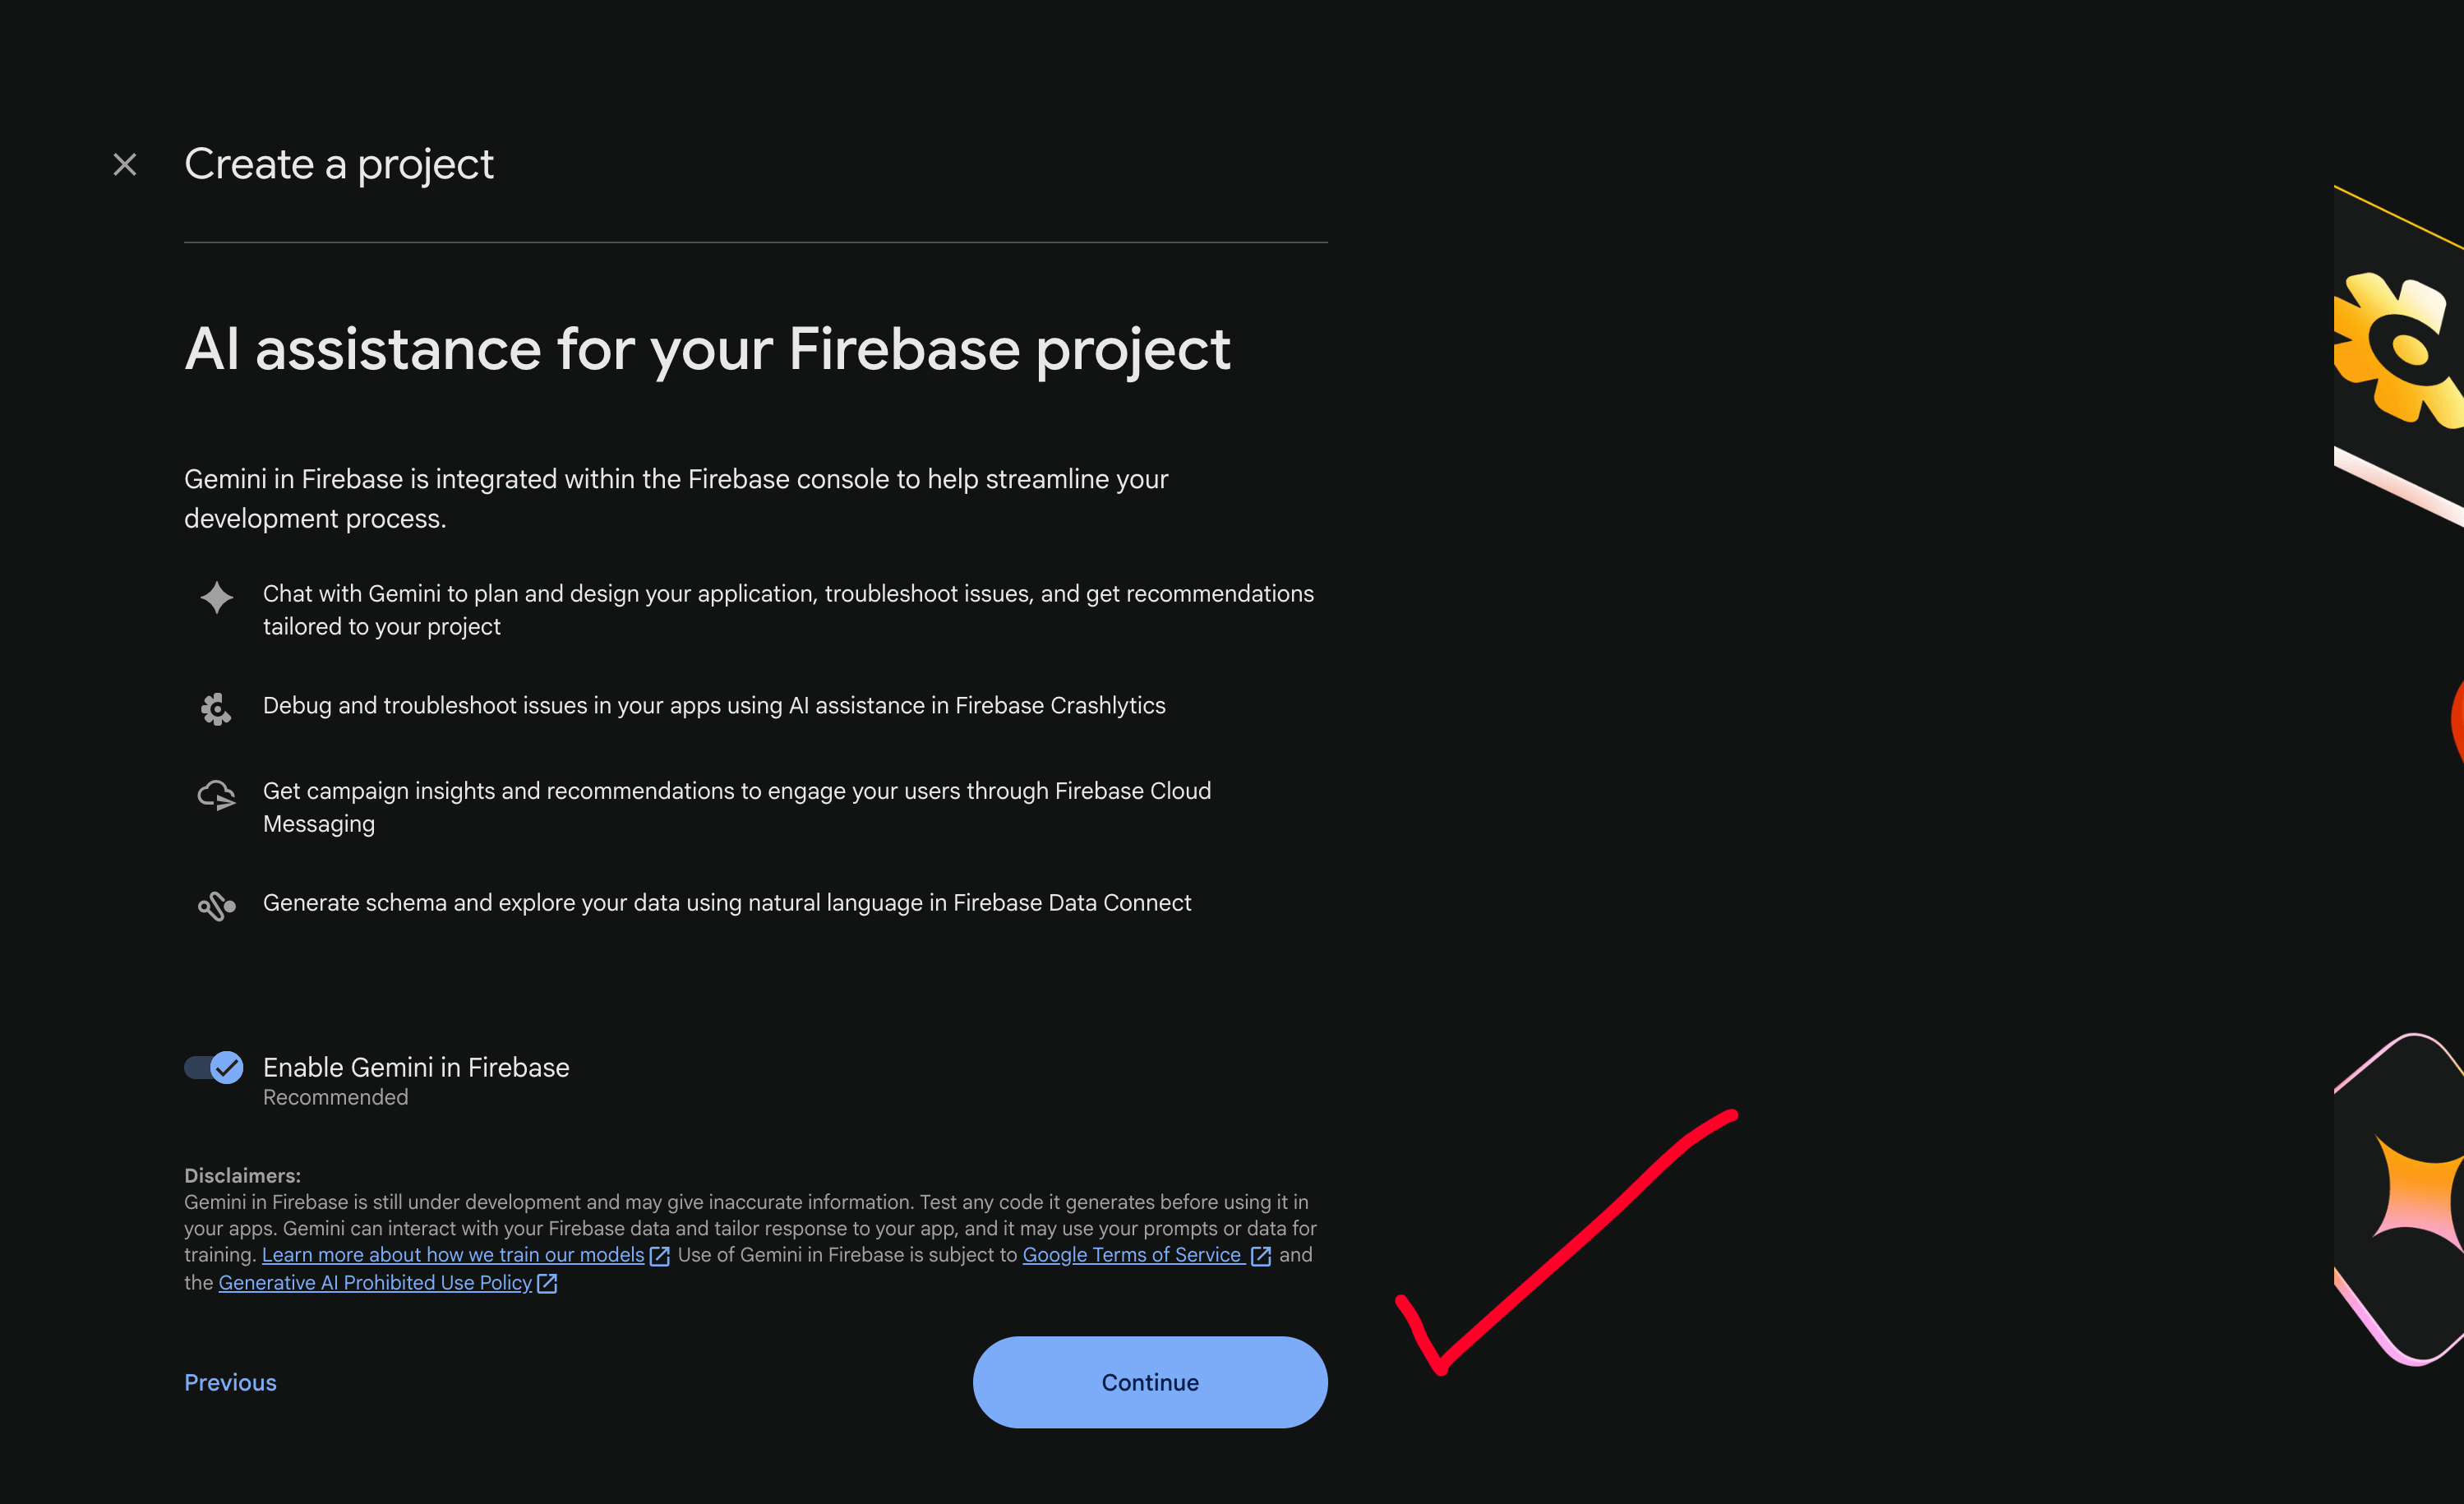
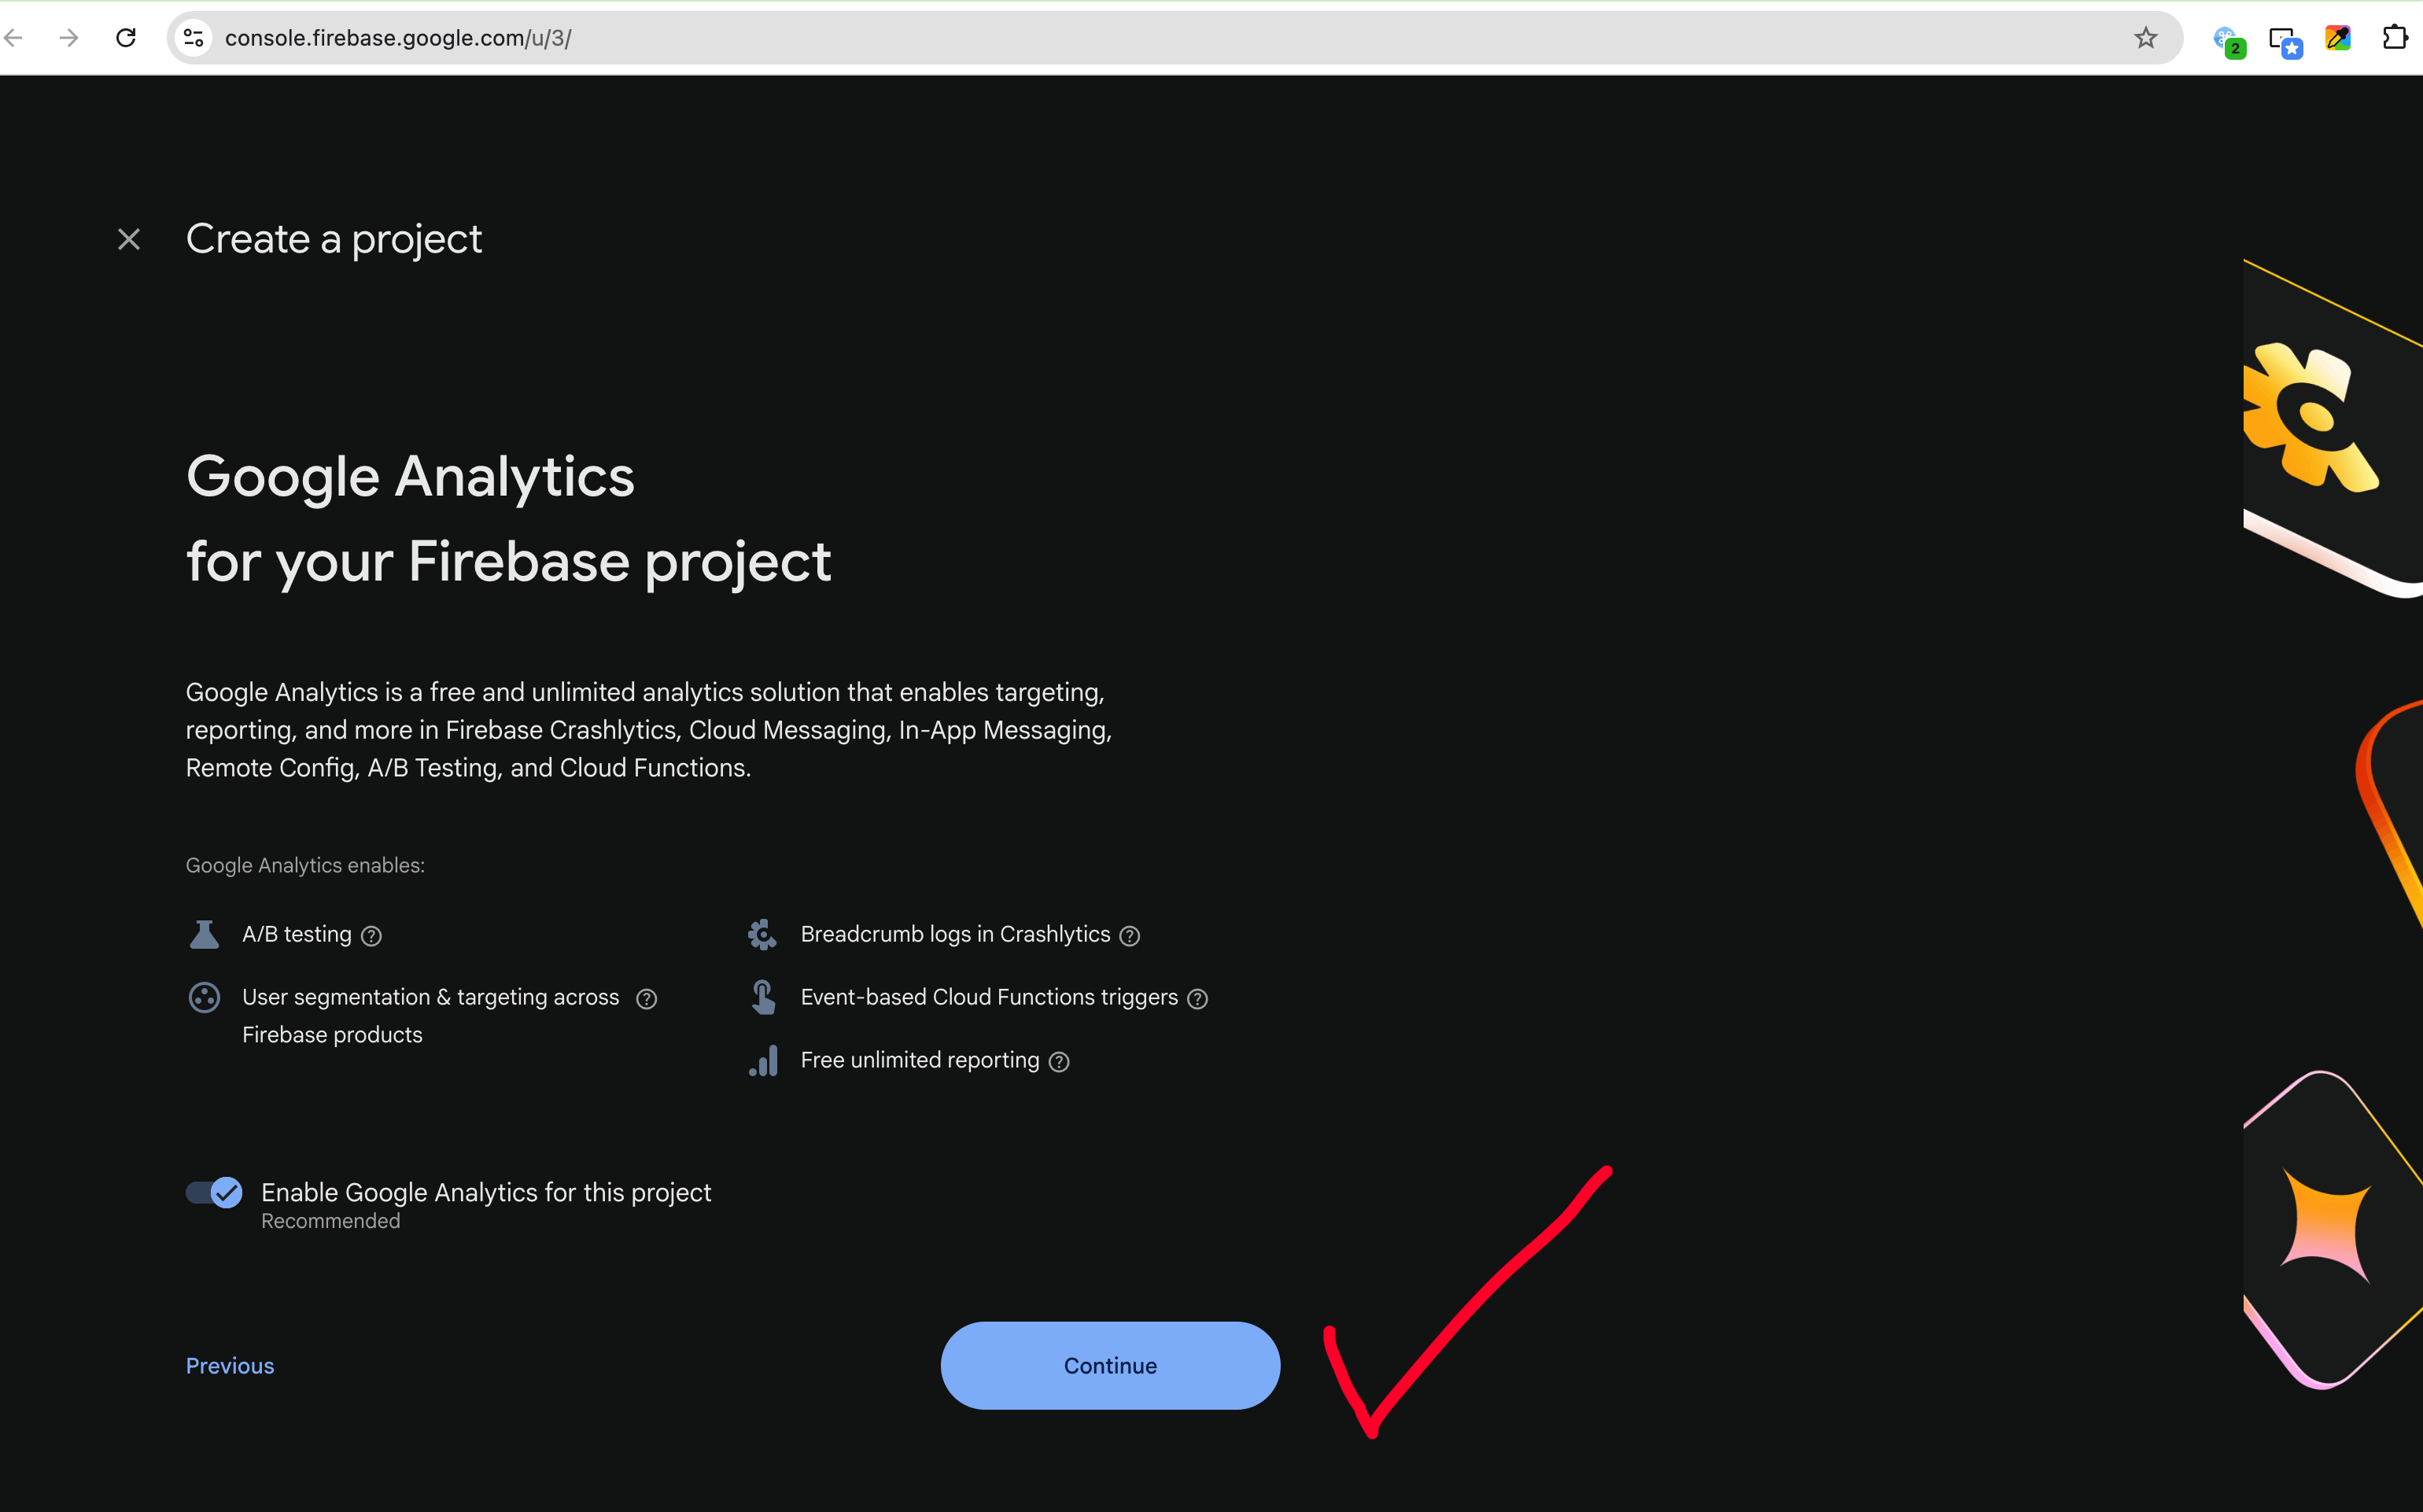
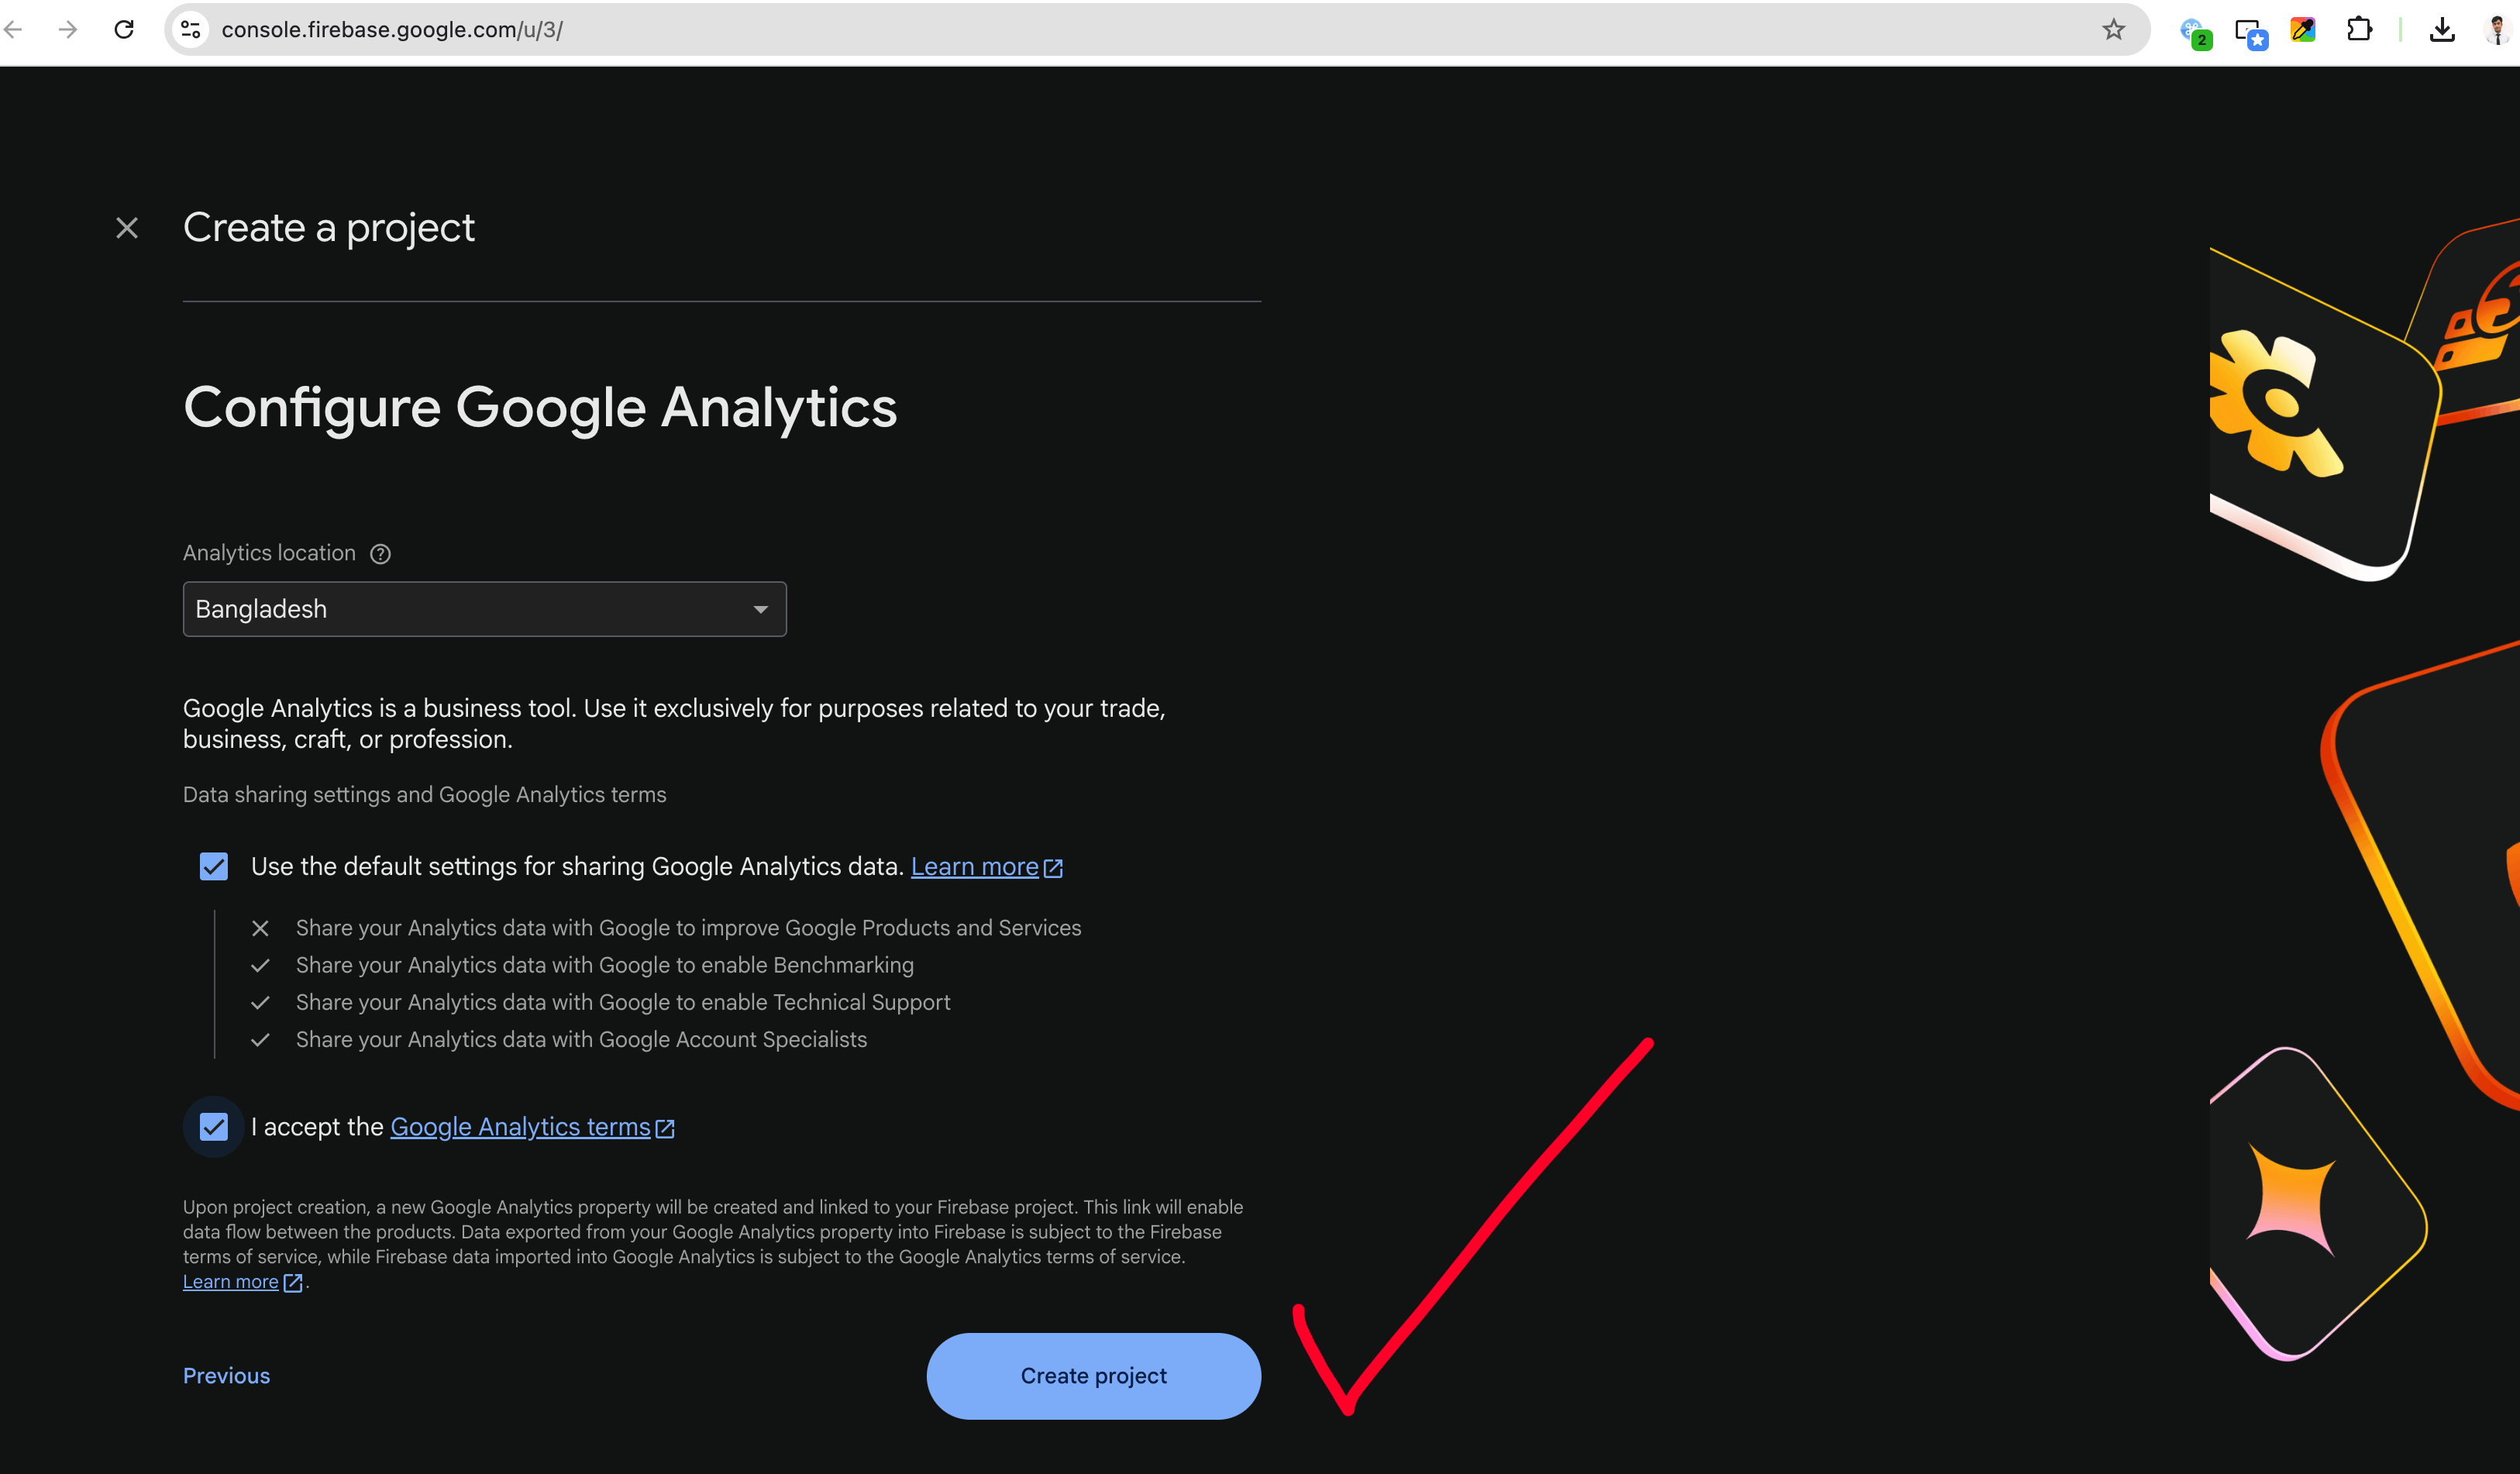
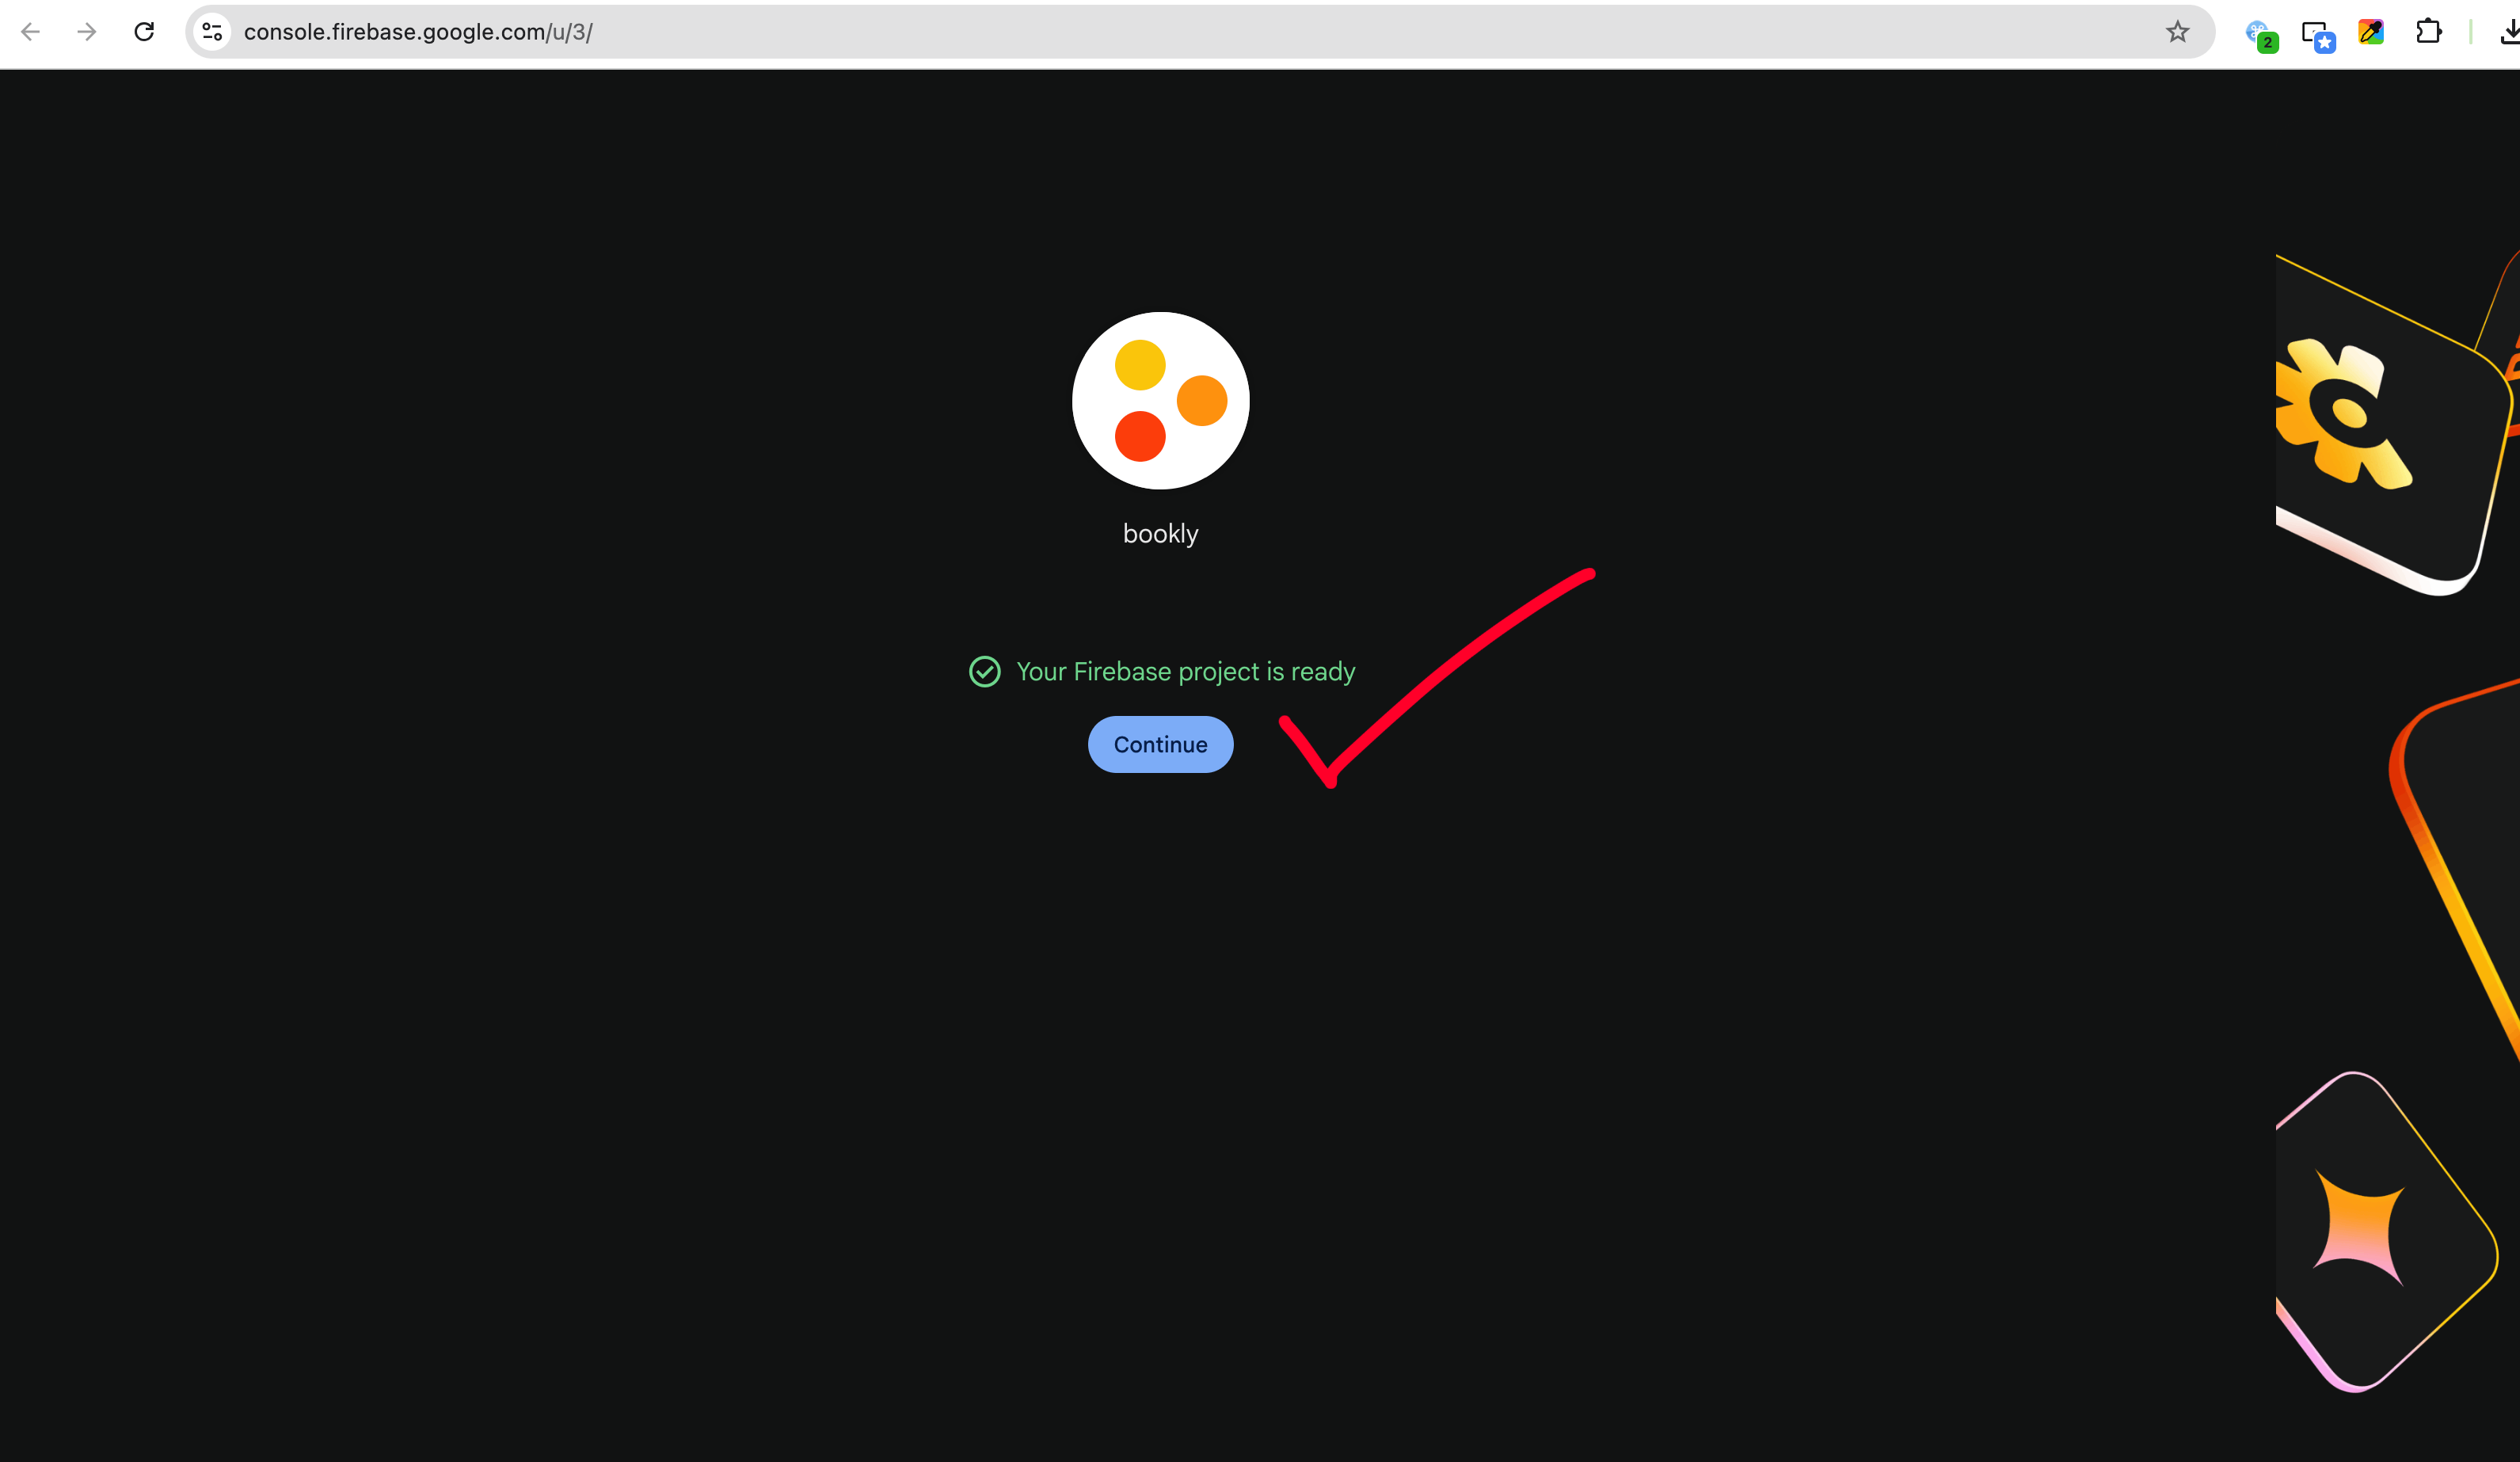
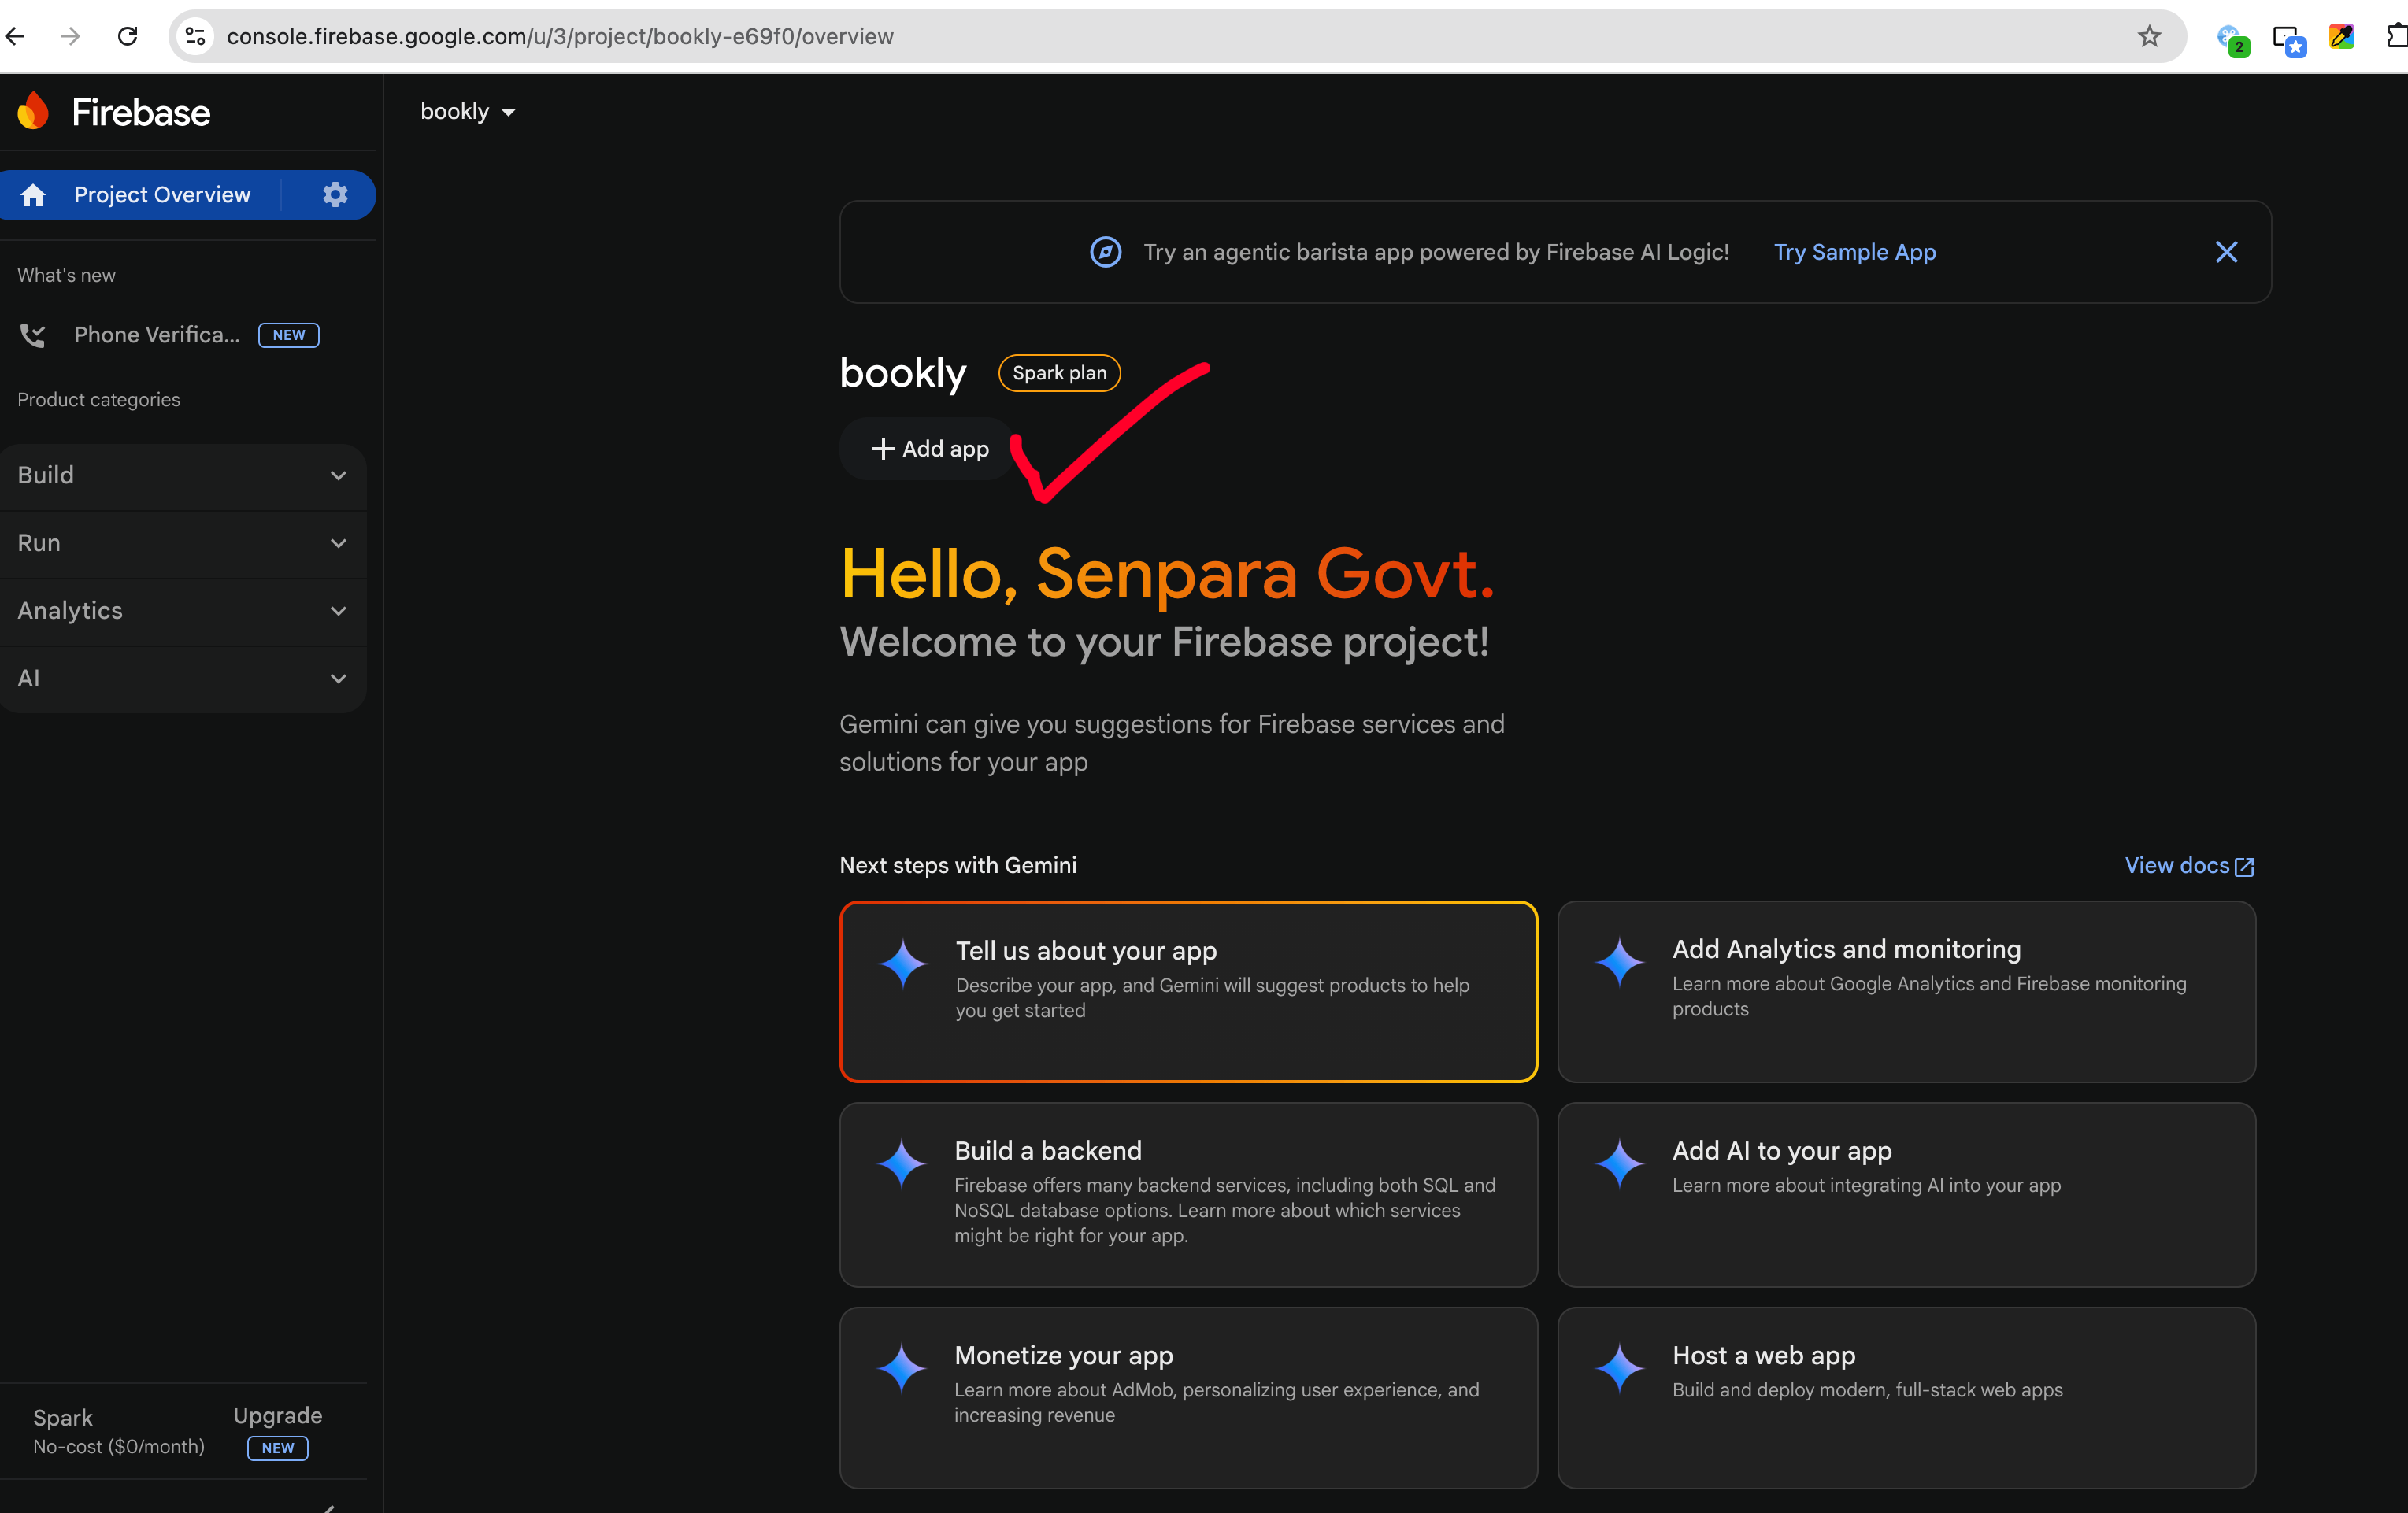
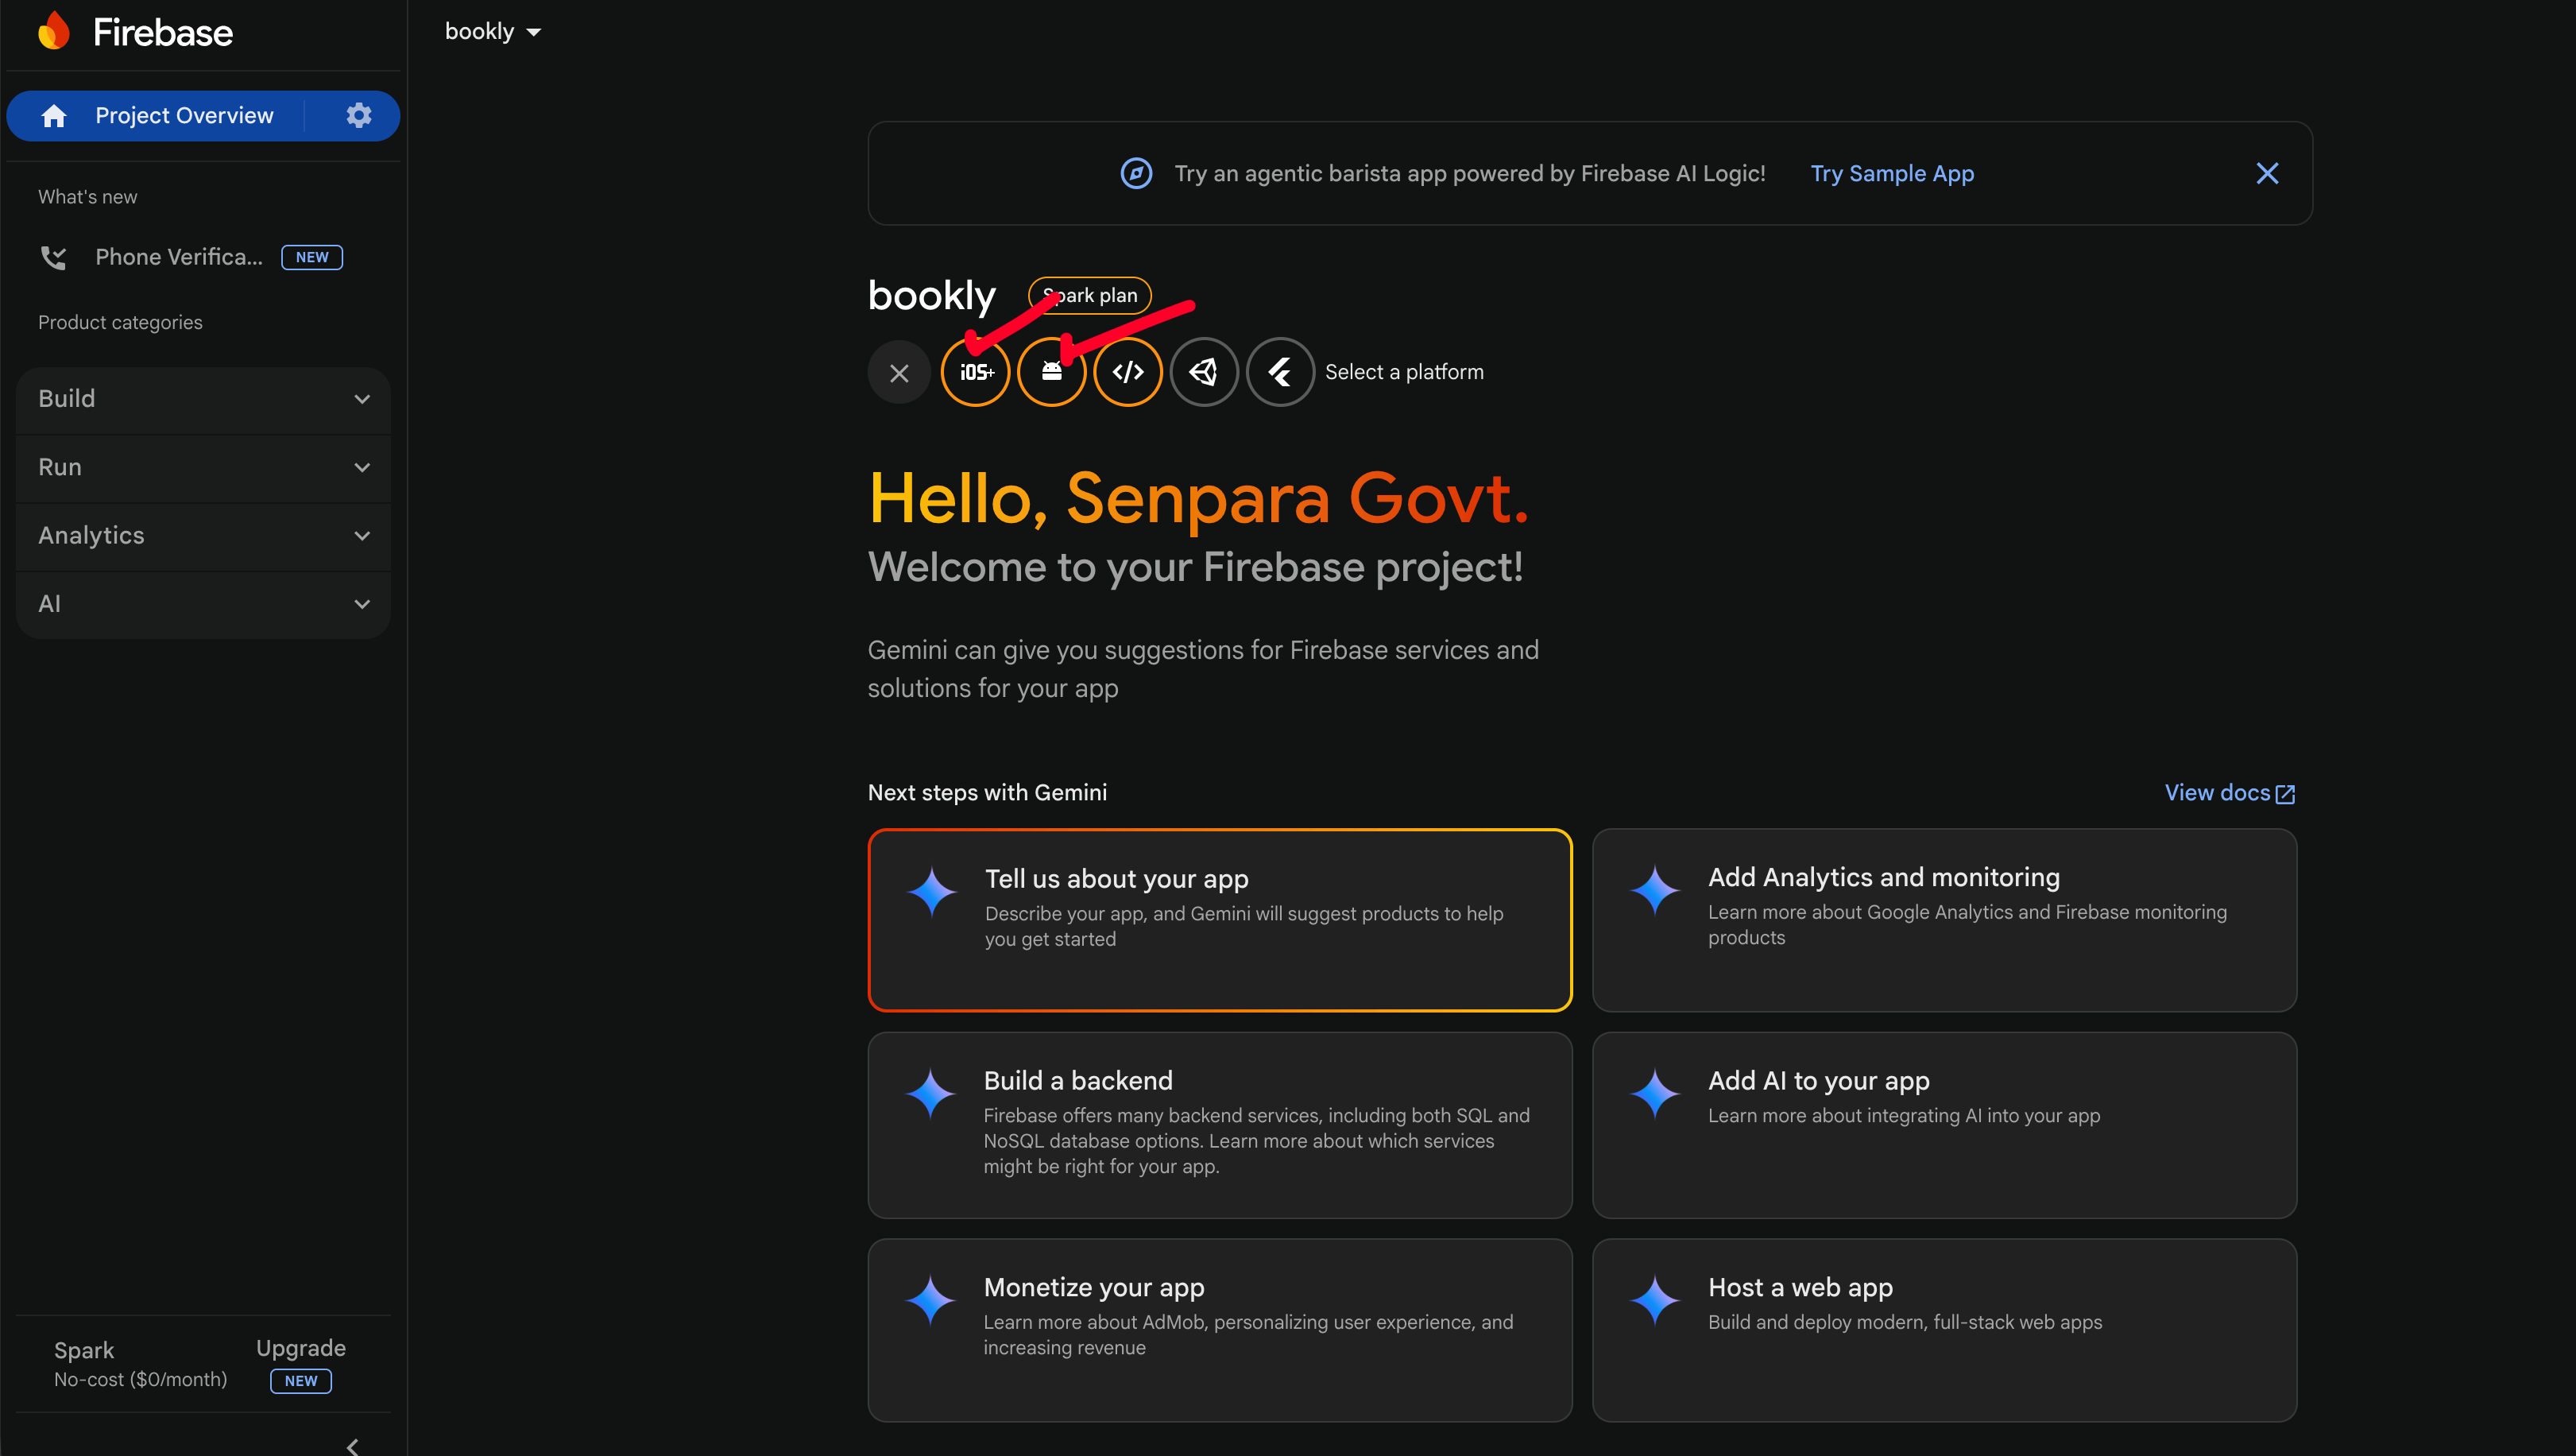
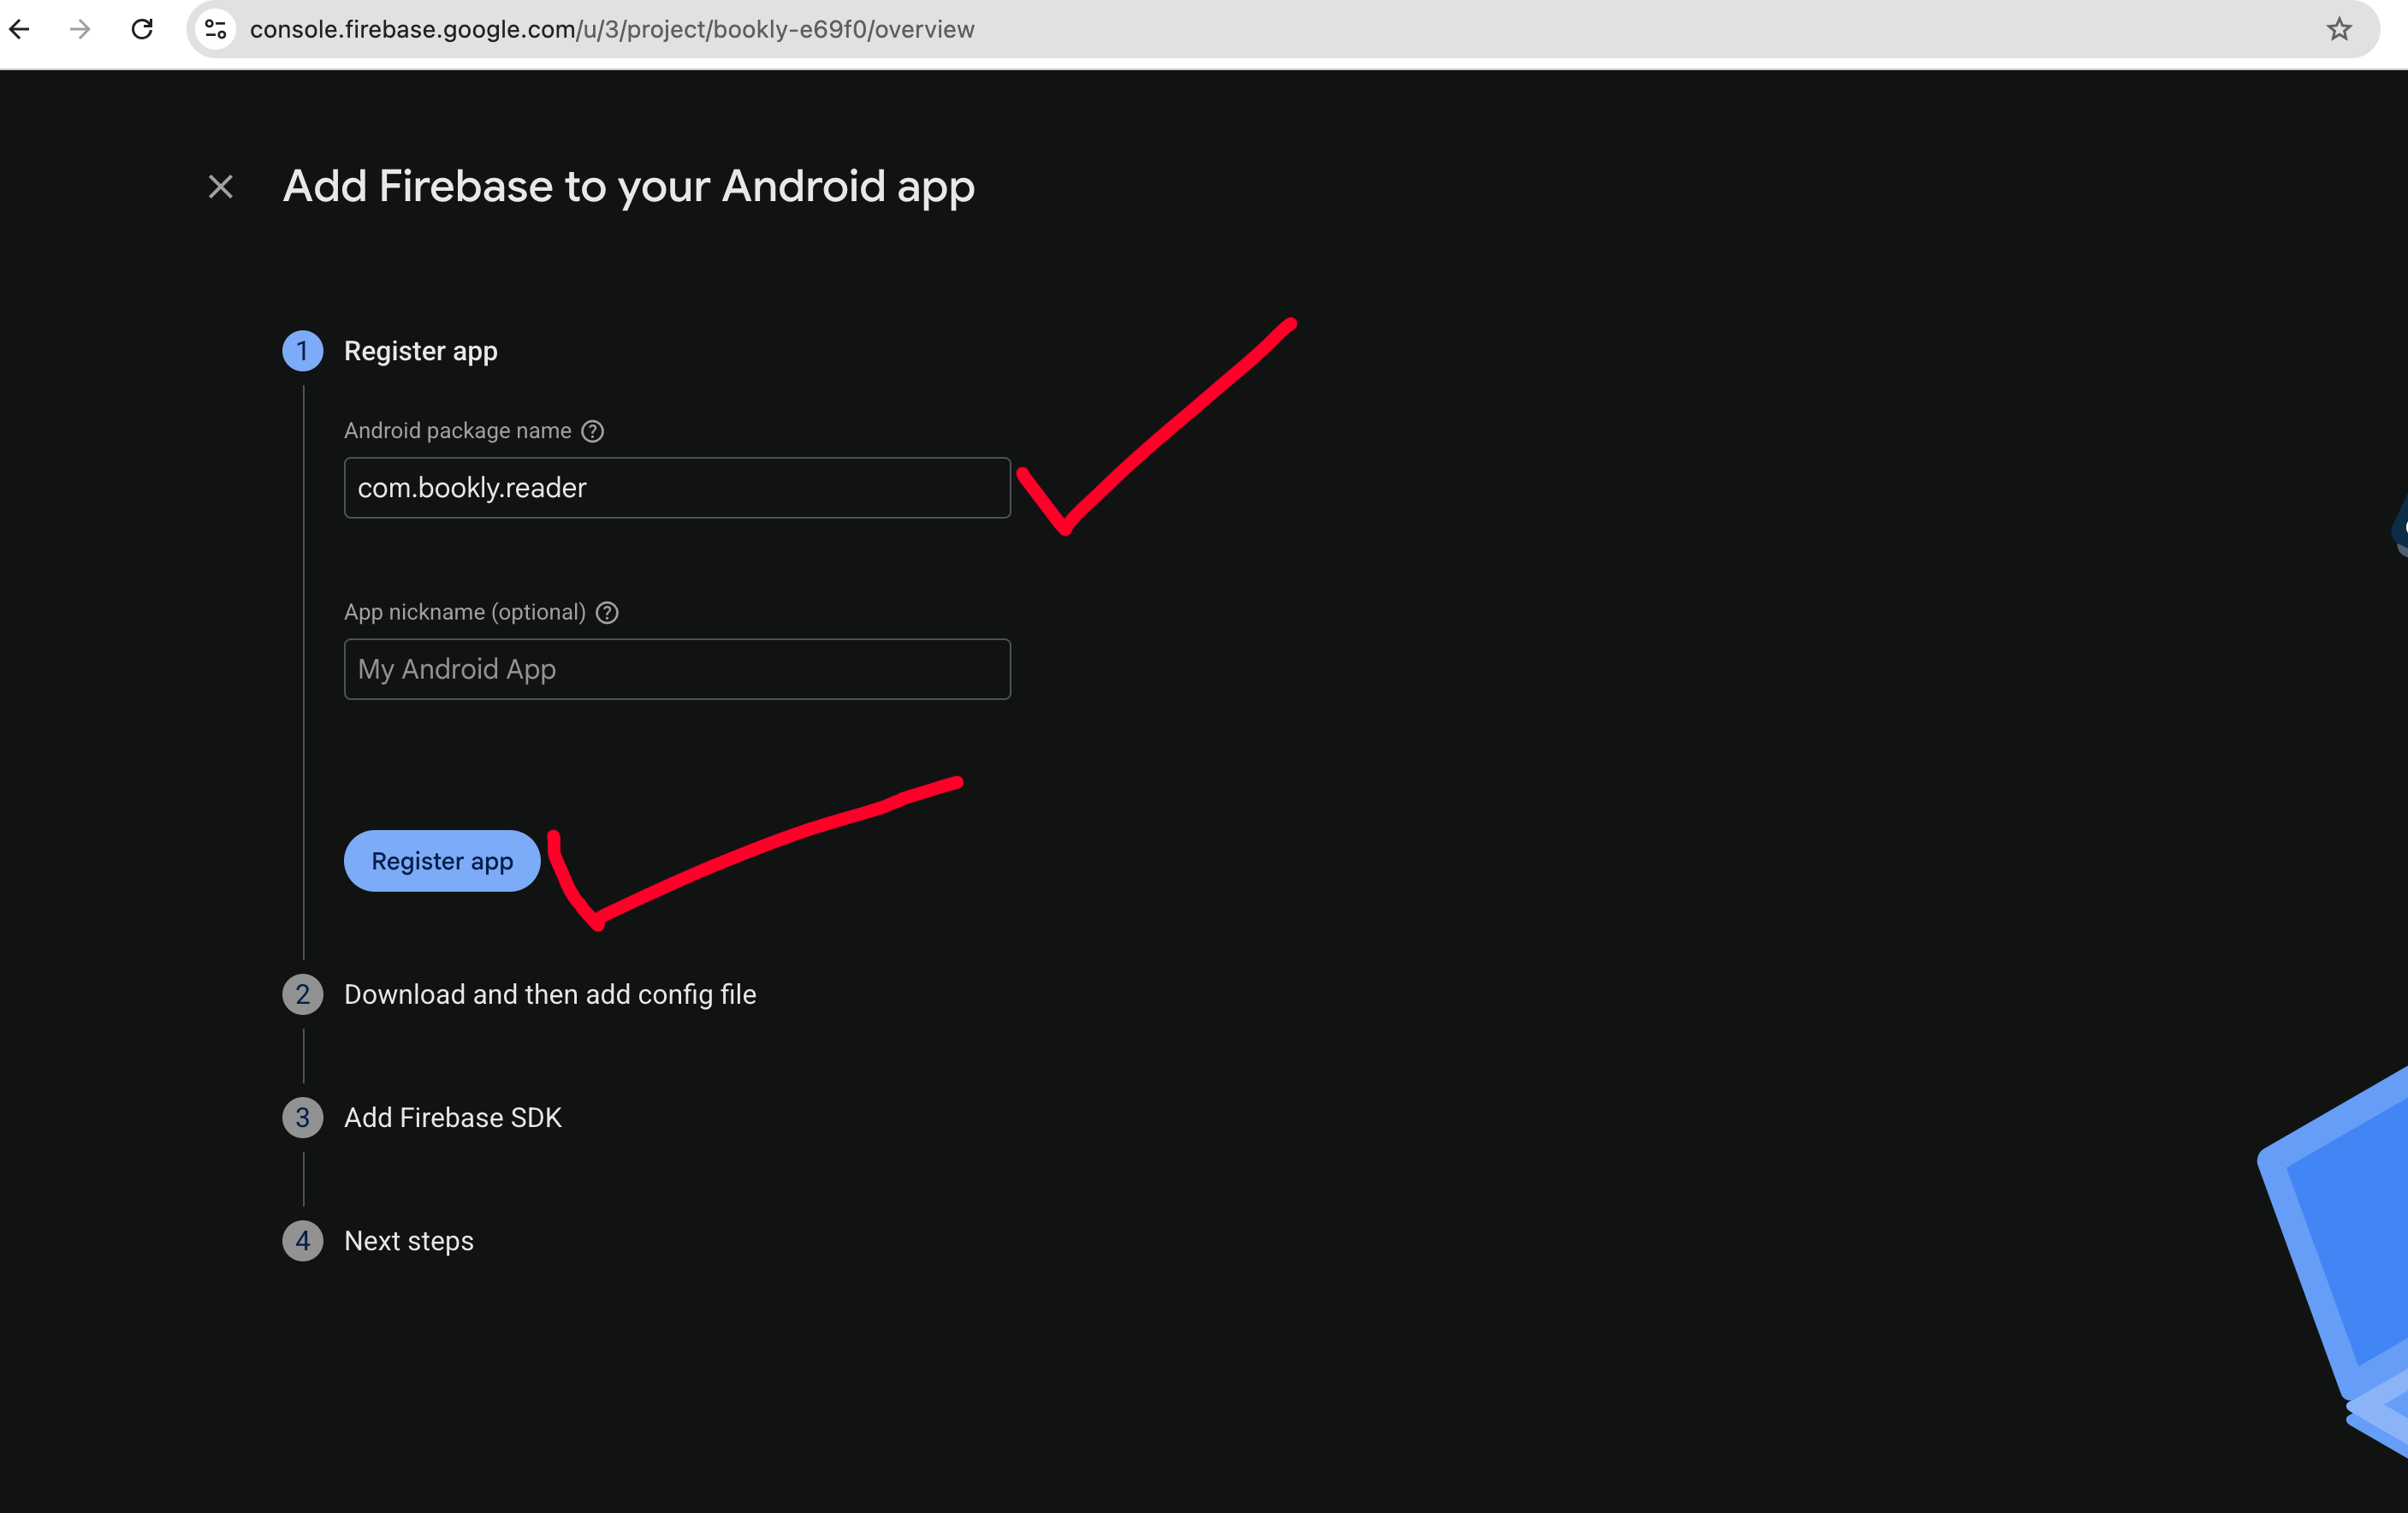
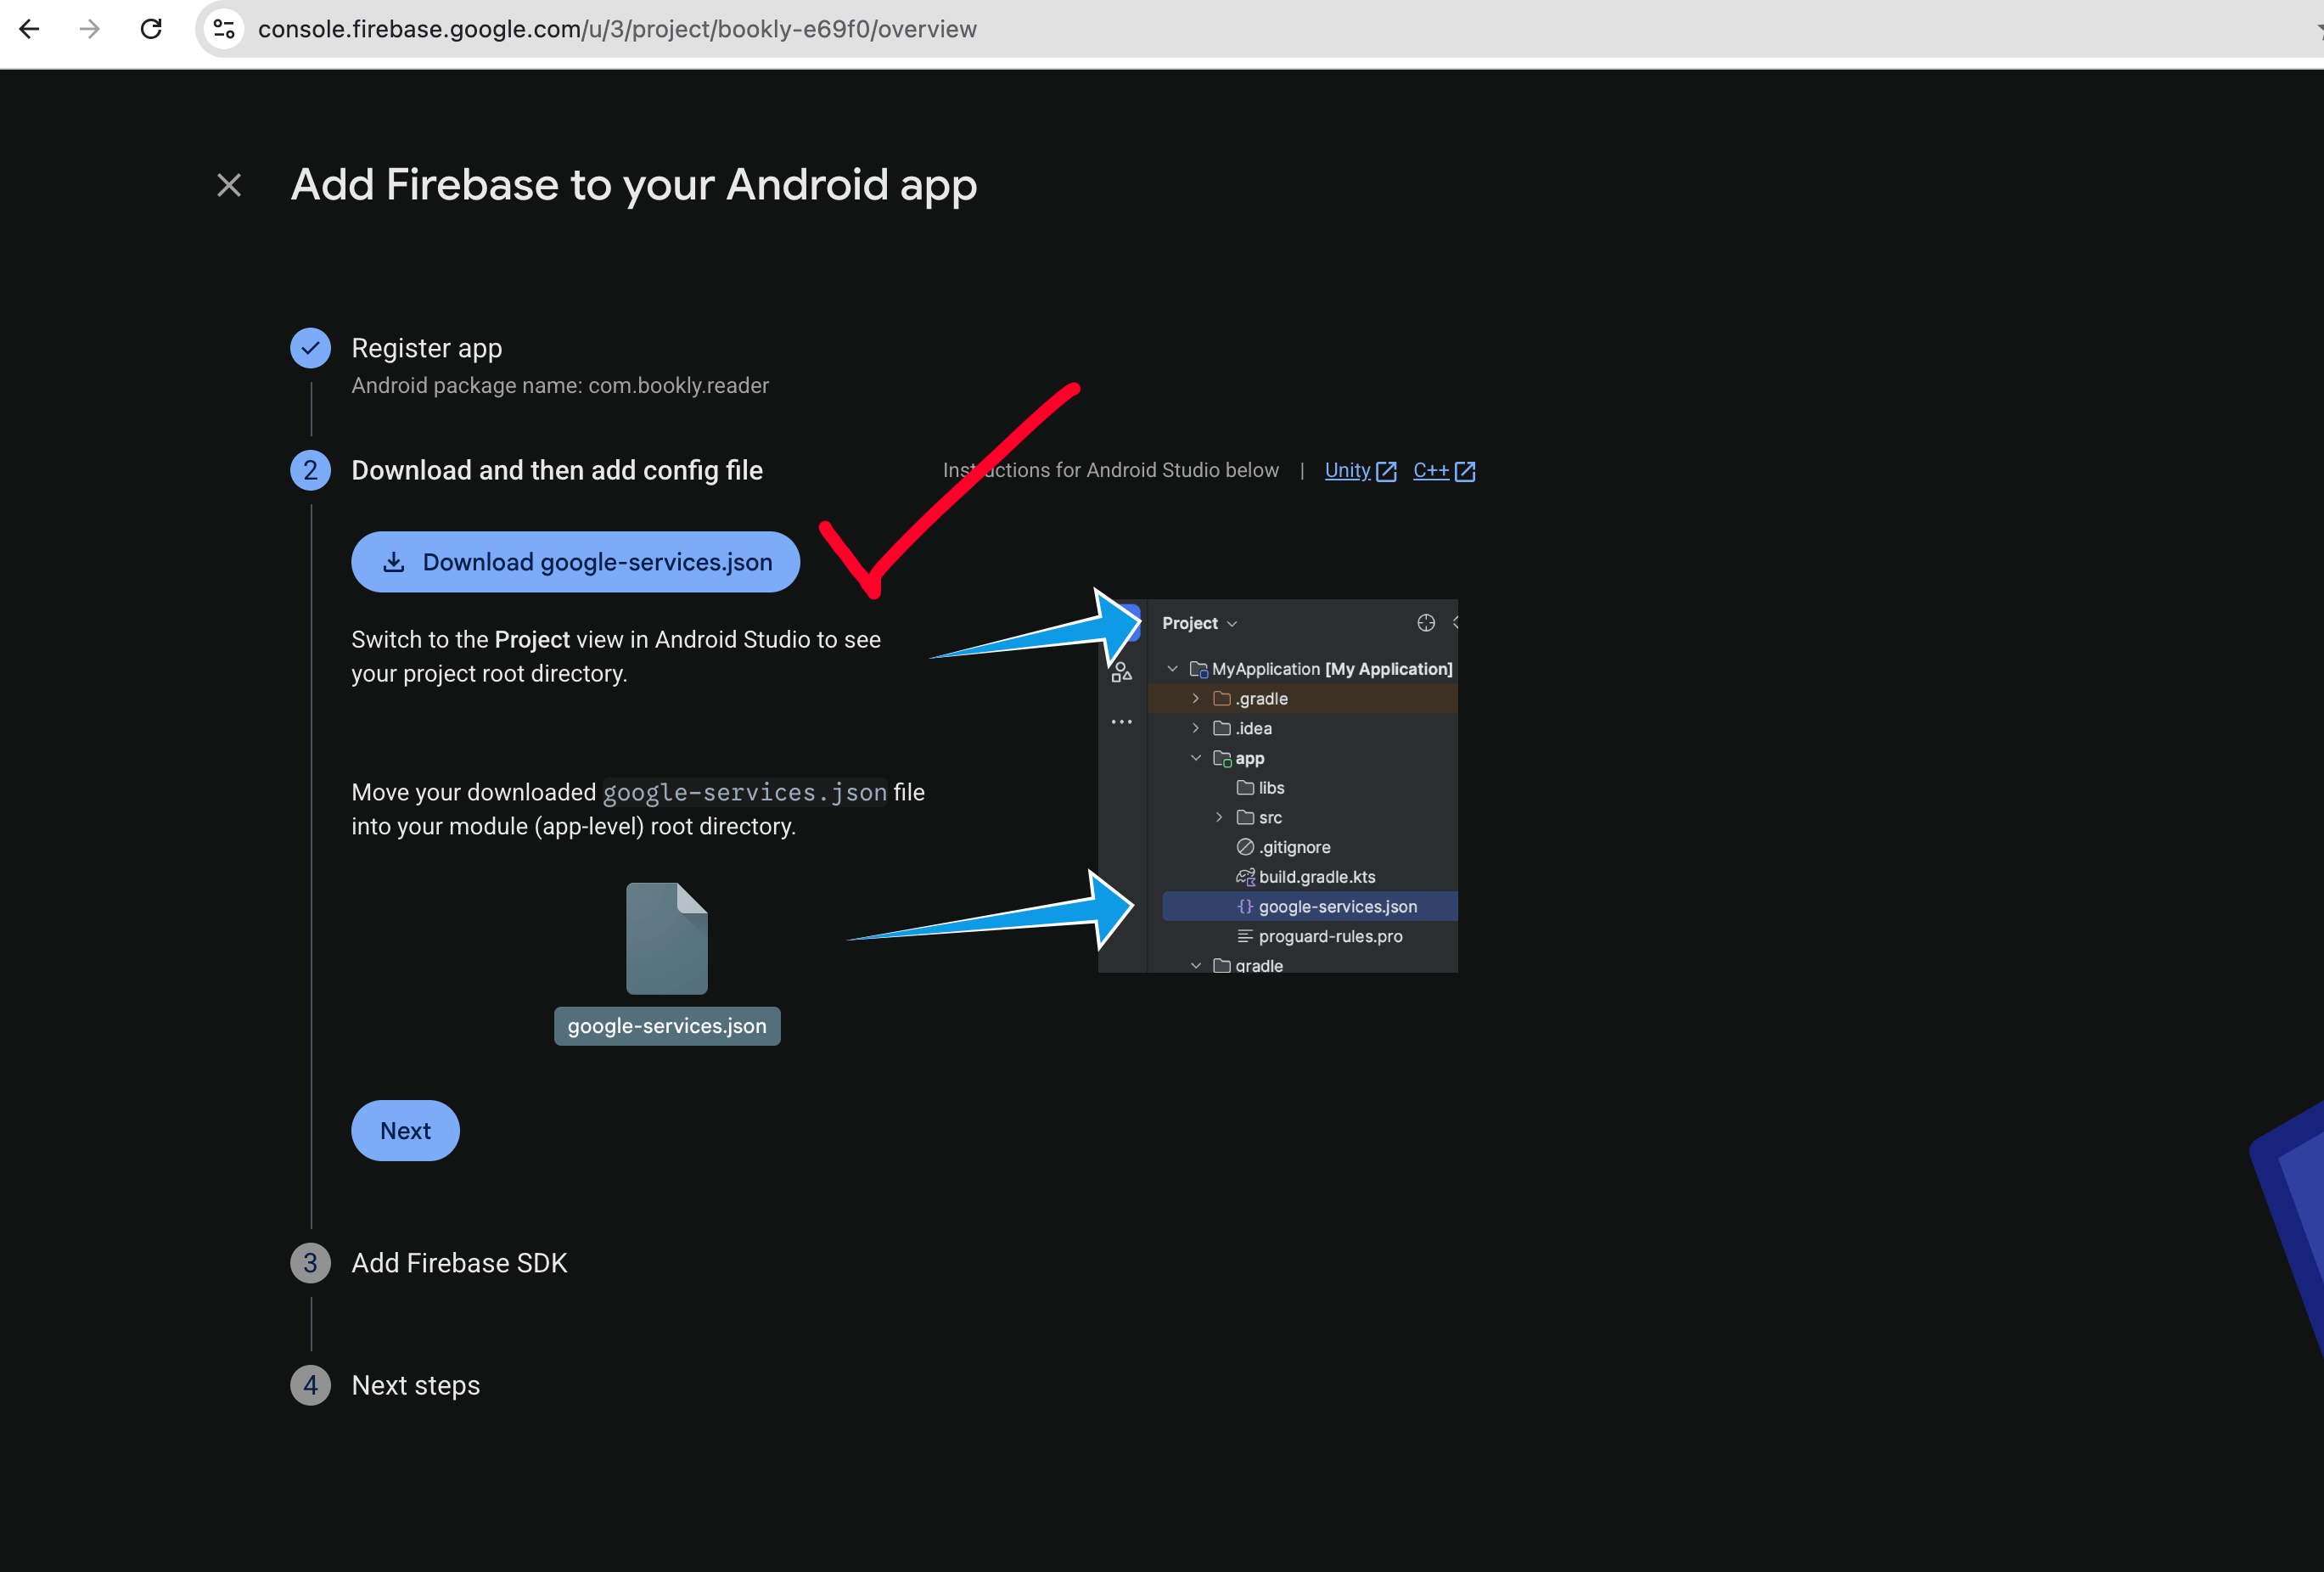
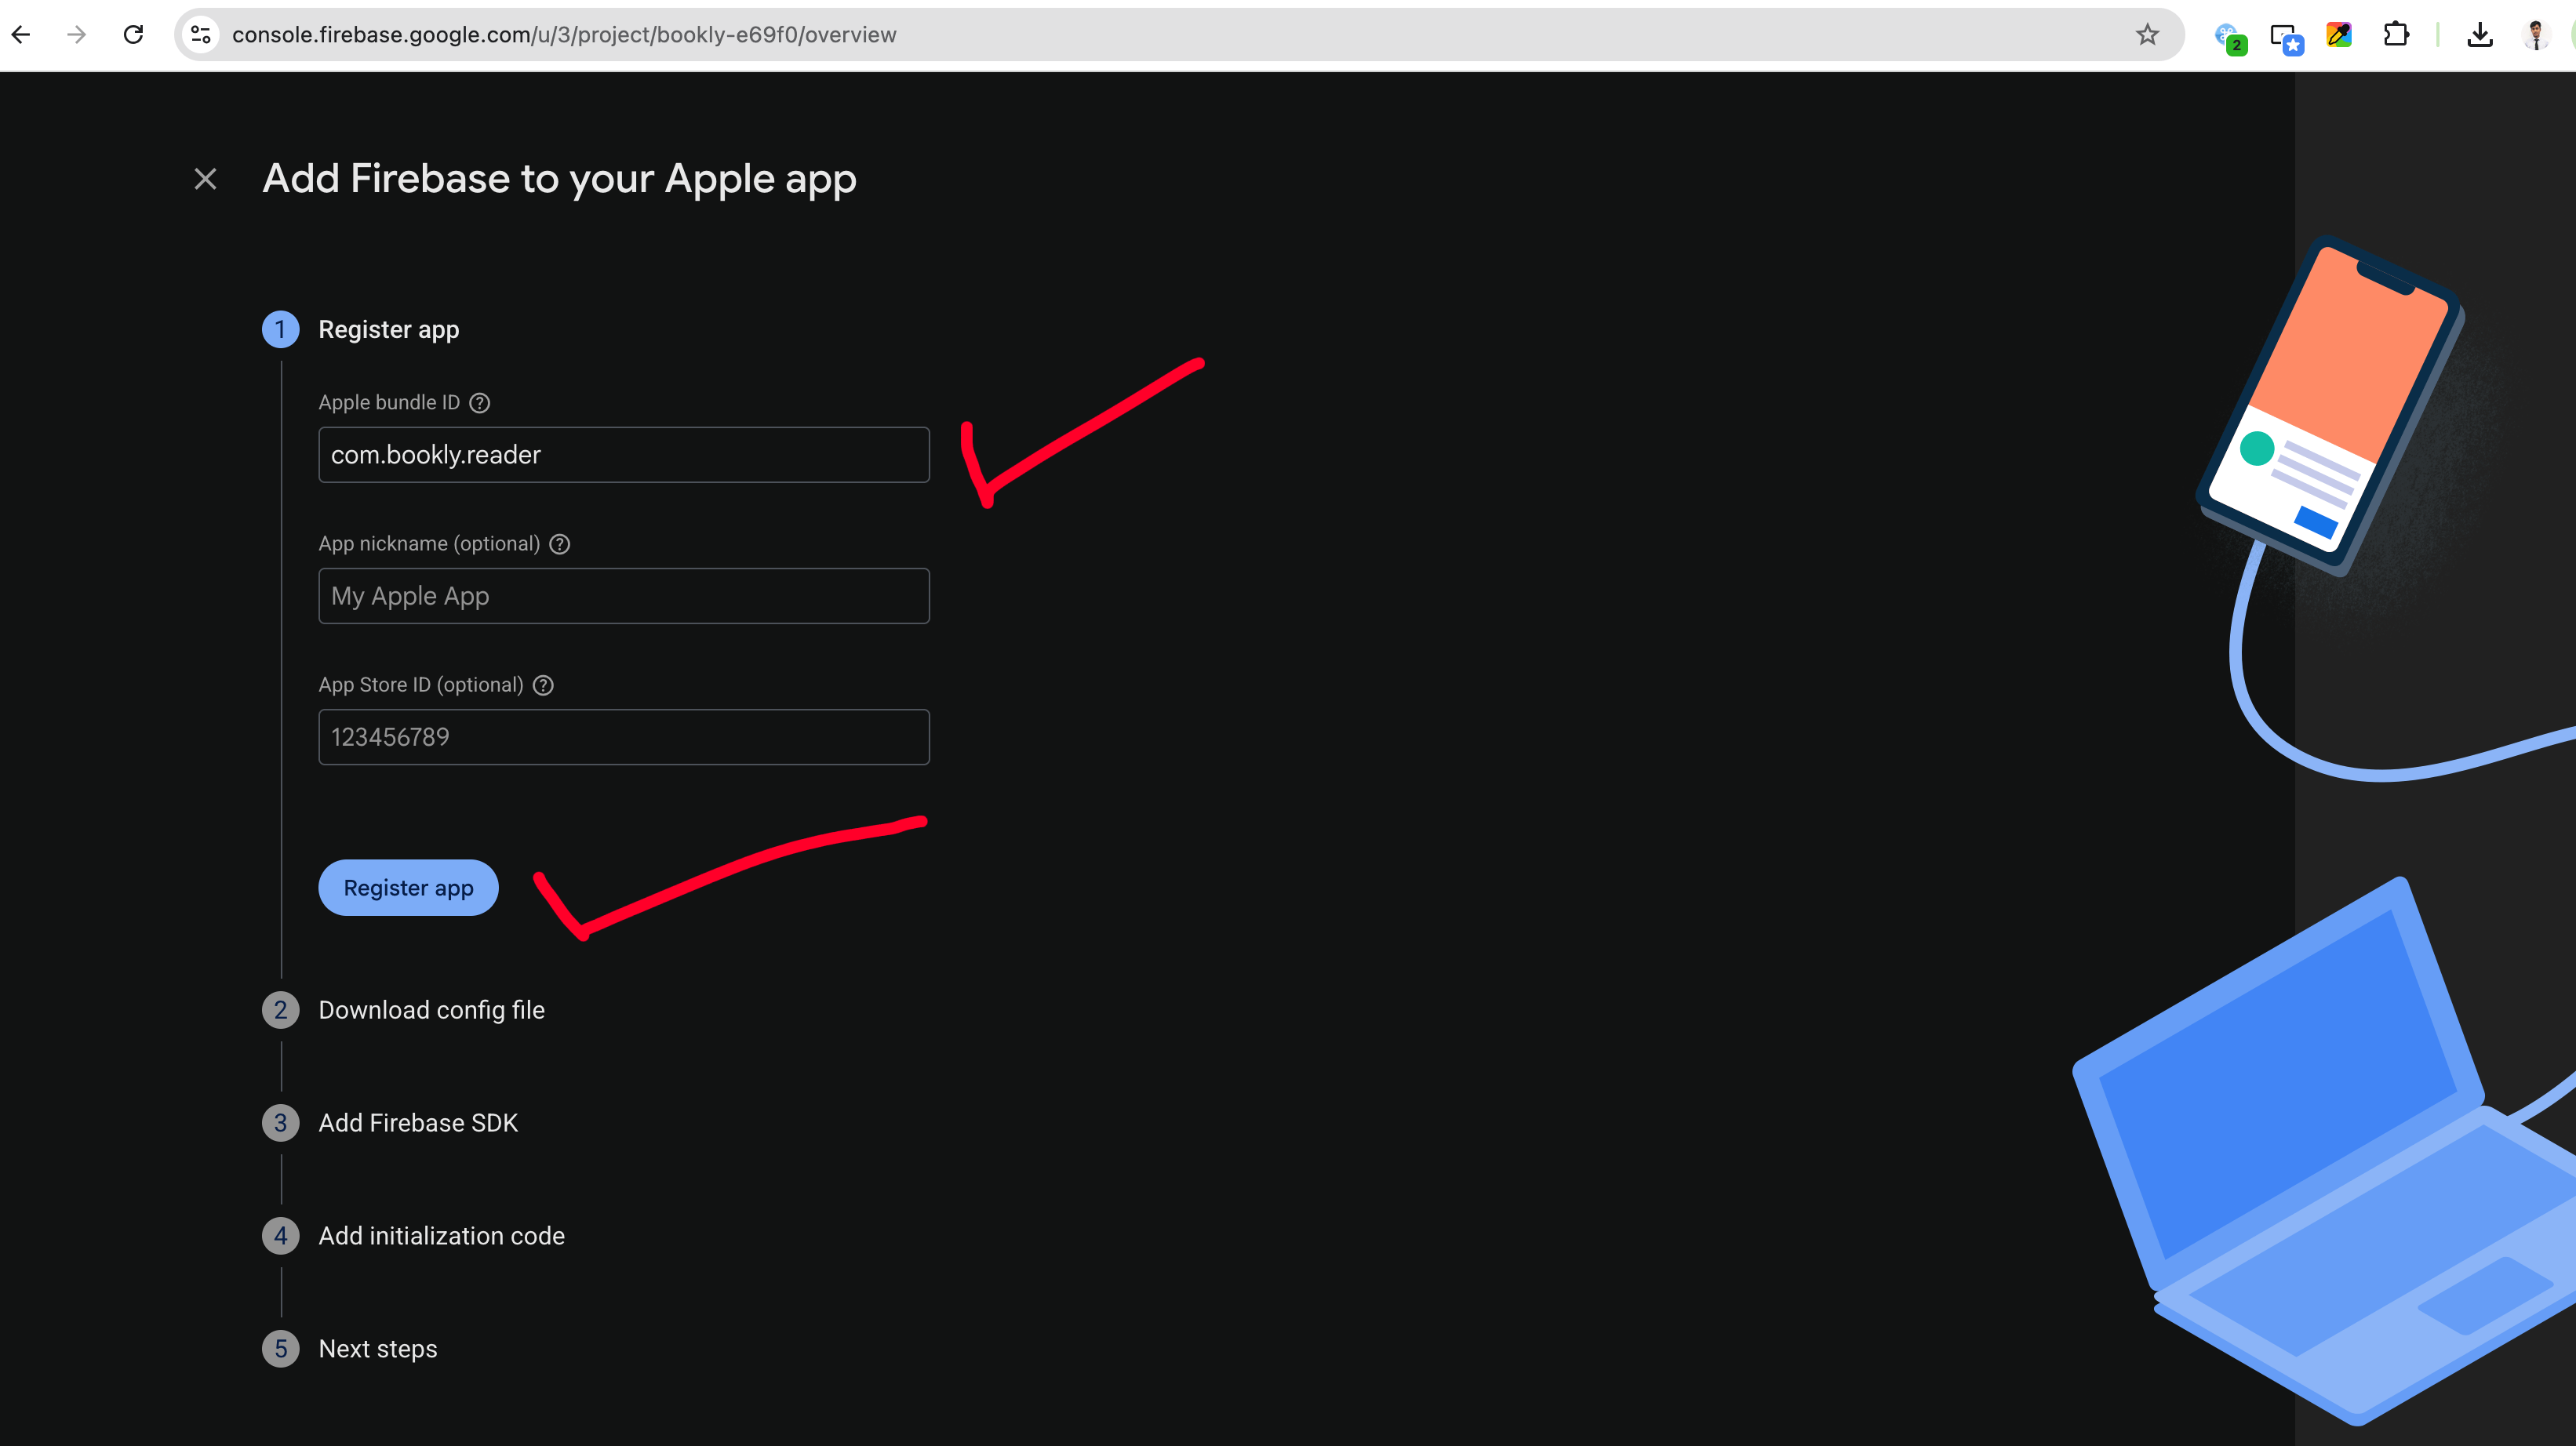
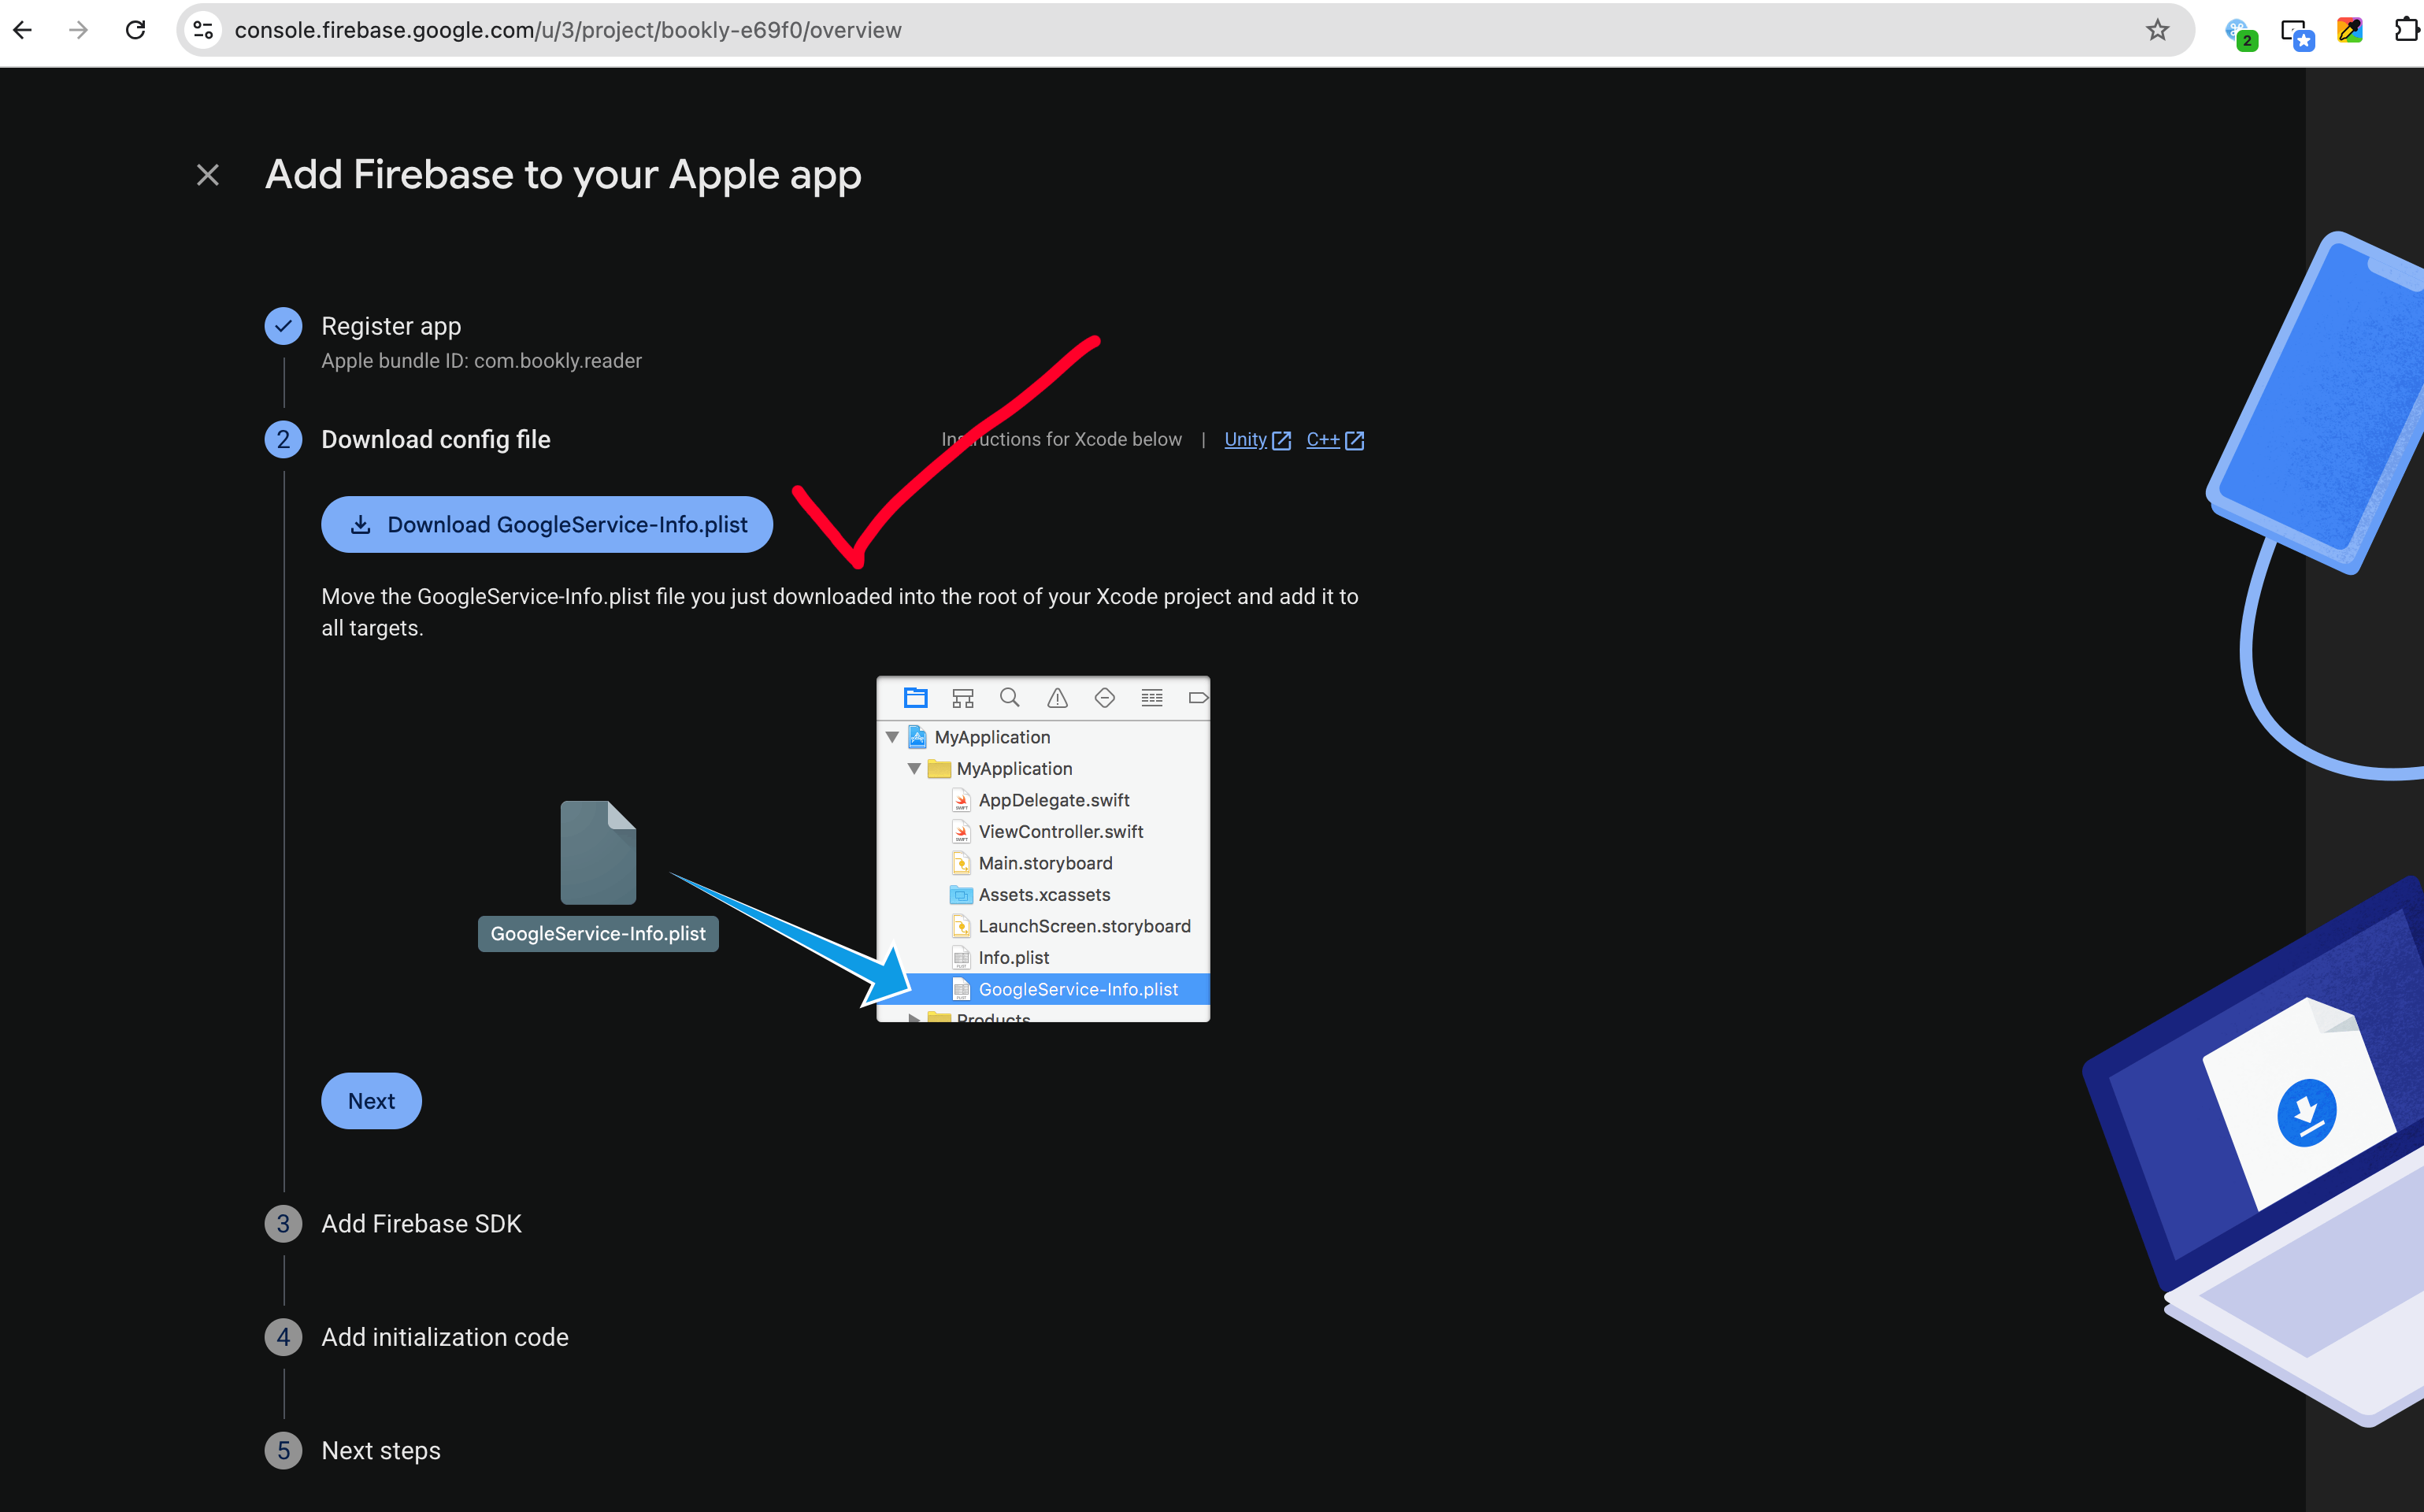
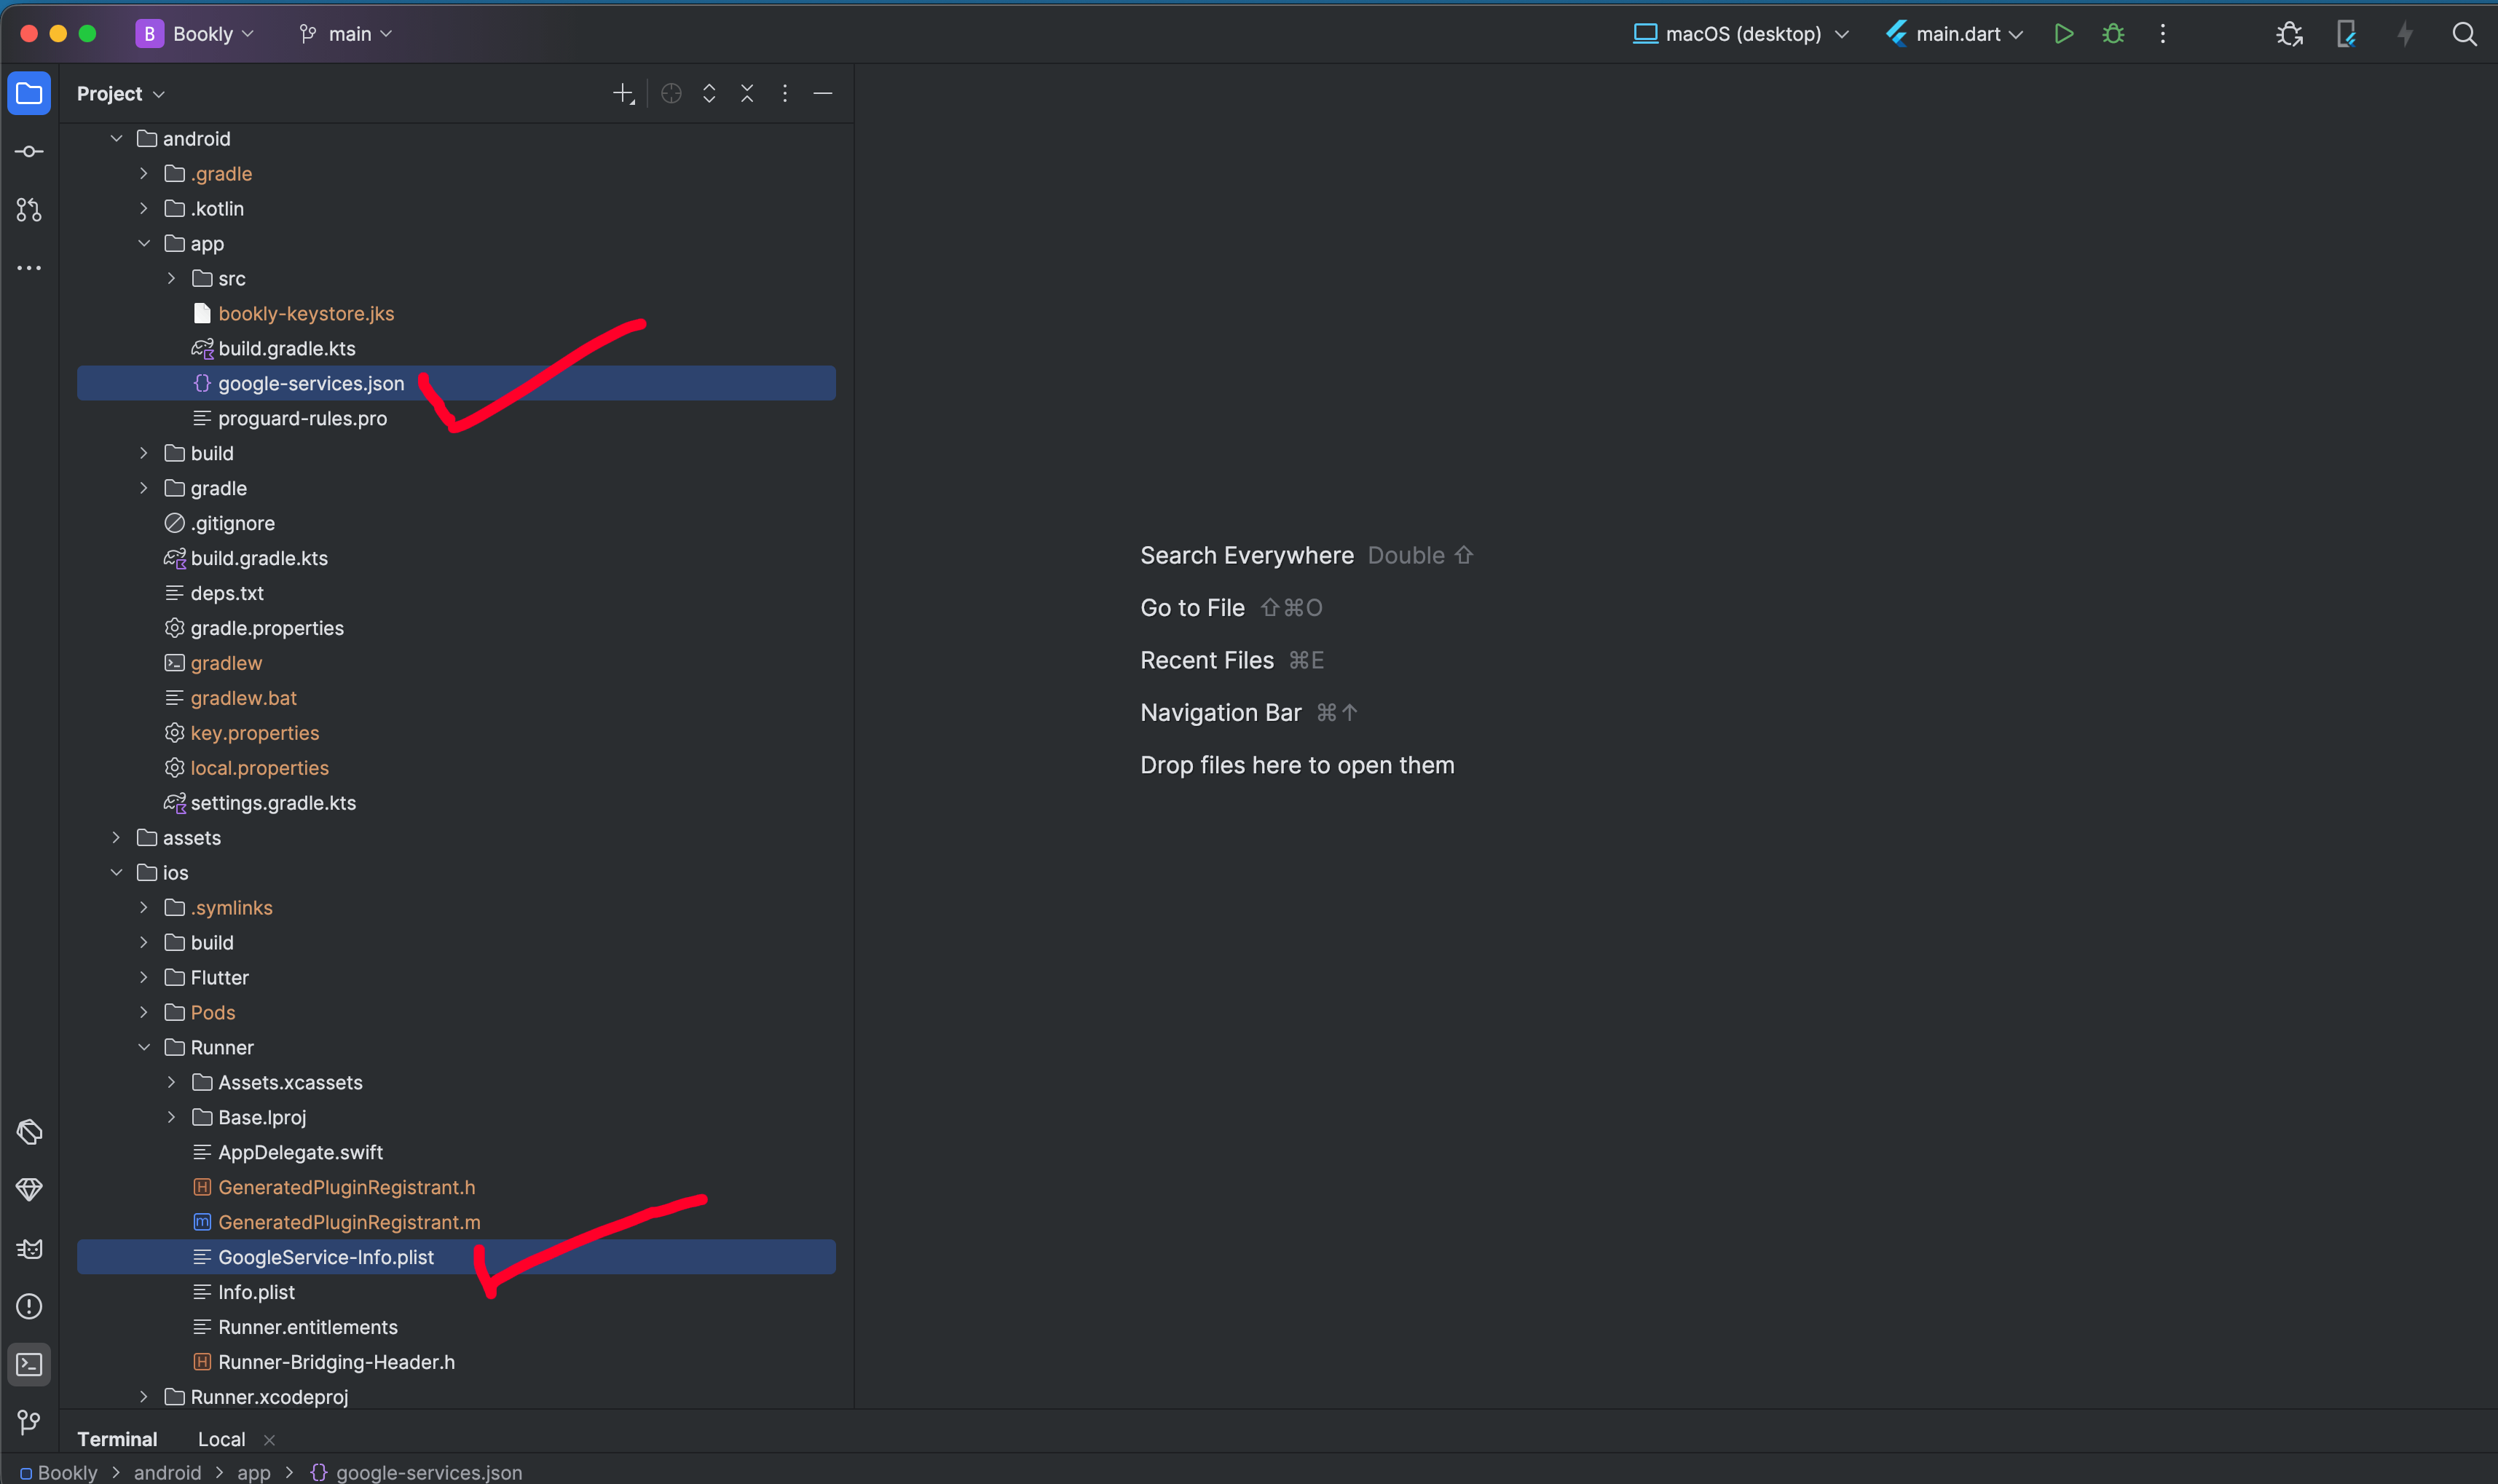
4. Firebase Setup
Important: You should only add the downloaded Firebase JSON/Plist file. There is no change needed in any other files in the project like build.gradle or others.
For Android: Go to /android/app/src/main/res and replace all mipmap folders with your <generated icon>/android folder.
For iOS: Go to /ios/Runner and replace the existing Assets.xcassets folder with your generated Assets.xcassets folder.
8. API Customization
To connect the Bookly app to your own backend server, you must update the API endpoint configurations.
Navigate to <project>/lib/core/network and open the api_endpoints.dart file.
Replace the default baseUrl and searchApi strings with your own backend URLs.
Update the remaining API paths (like homeApi, categoriesApi, etc.) to match your backend routing structure.
Important: Ensure that your custom backend API returns responses in the exact same JSON format and data structure as the default Bookly API, otherwise the app will not parse the data correctly.
9. Localization (Language Customization)
Bookly supports multi-language capabilities. You can easily add new languages, remove existing ones, or set a default app language by following these steps.
Add a New Language
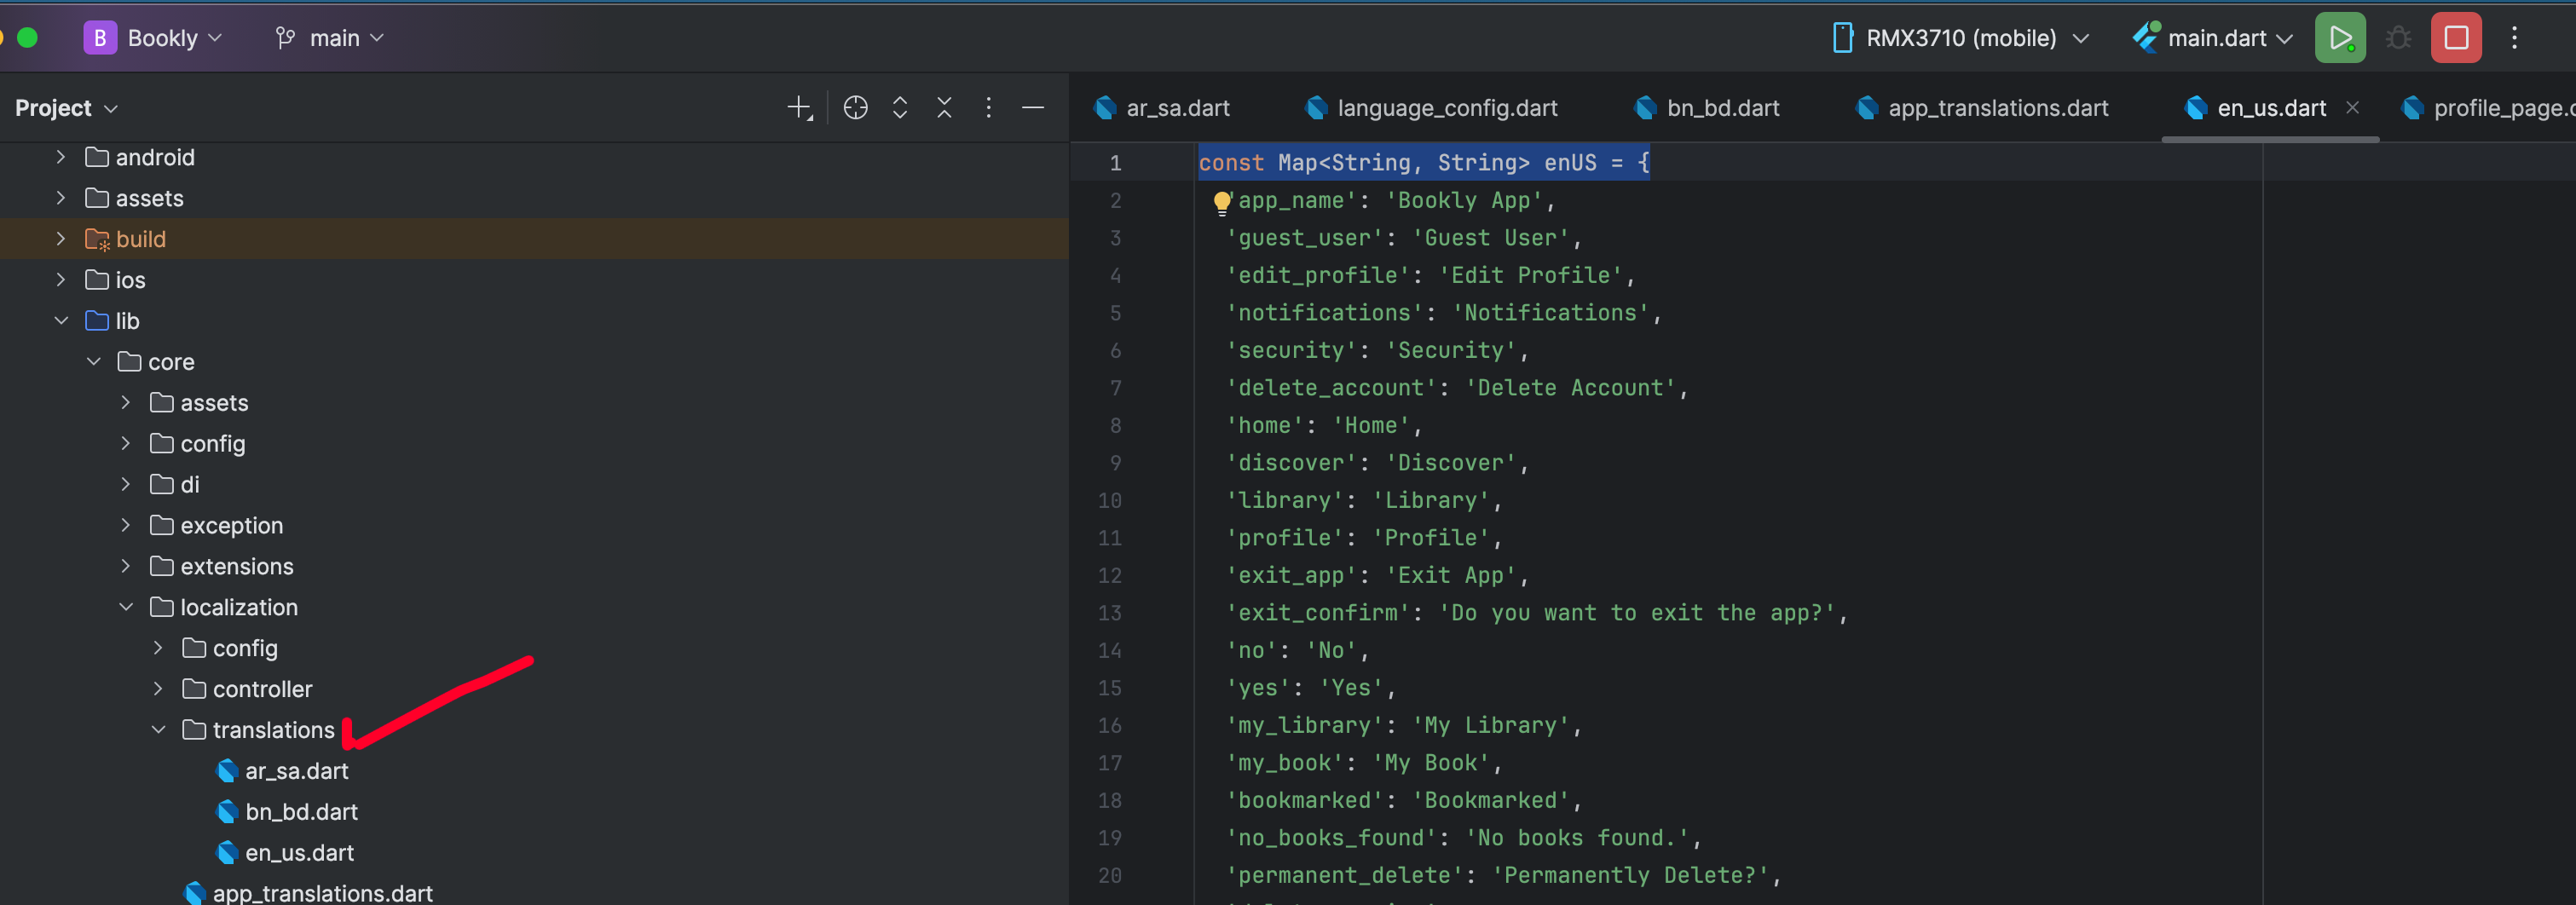
Go to <project>/lib/core/localization/translations.
Create a new Dart file modeled after an existing one (e.g., if you are adding French, you can name it fr_fr.dart).
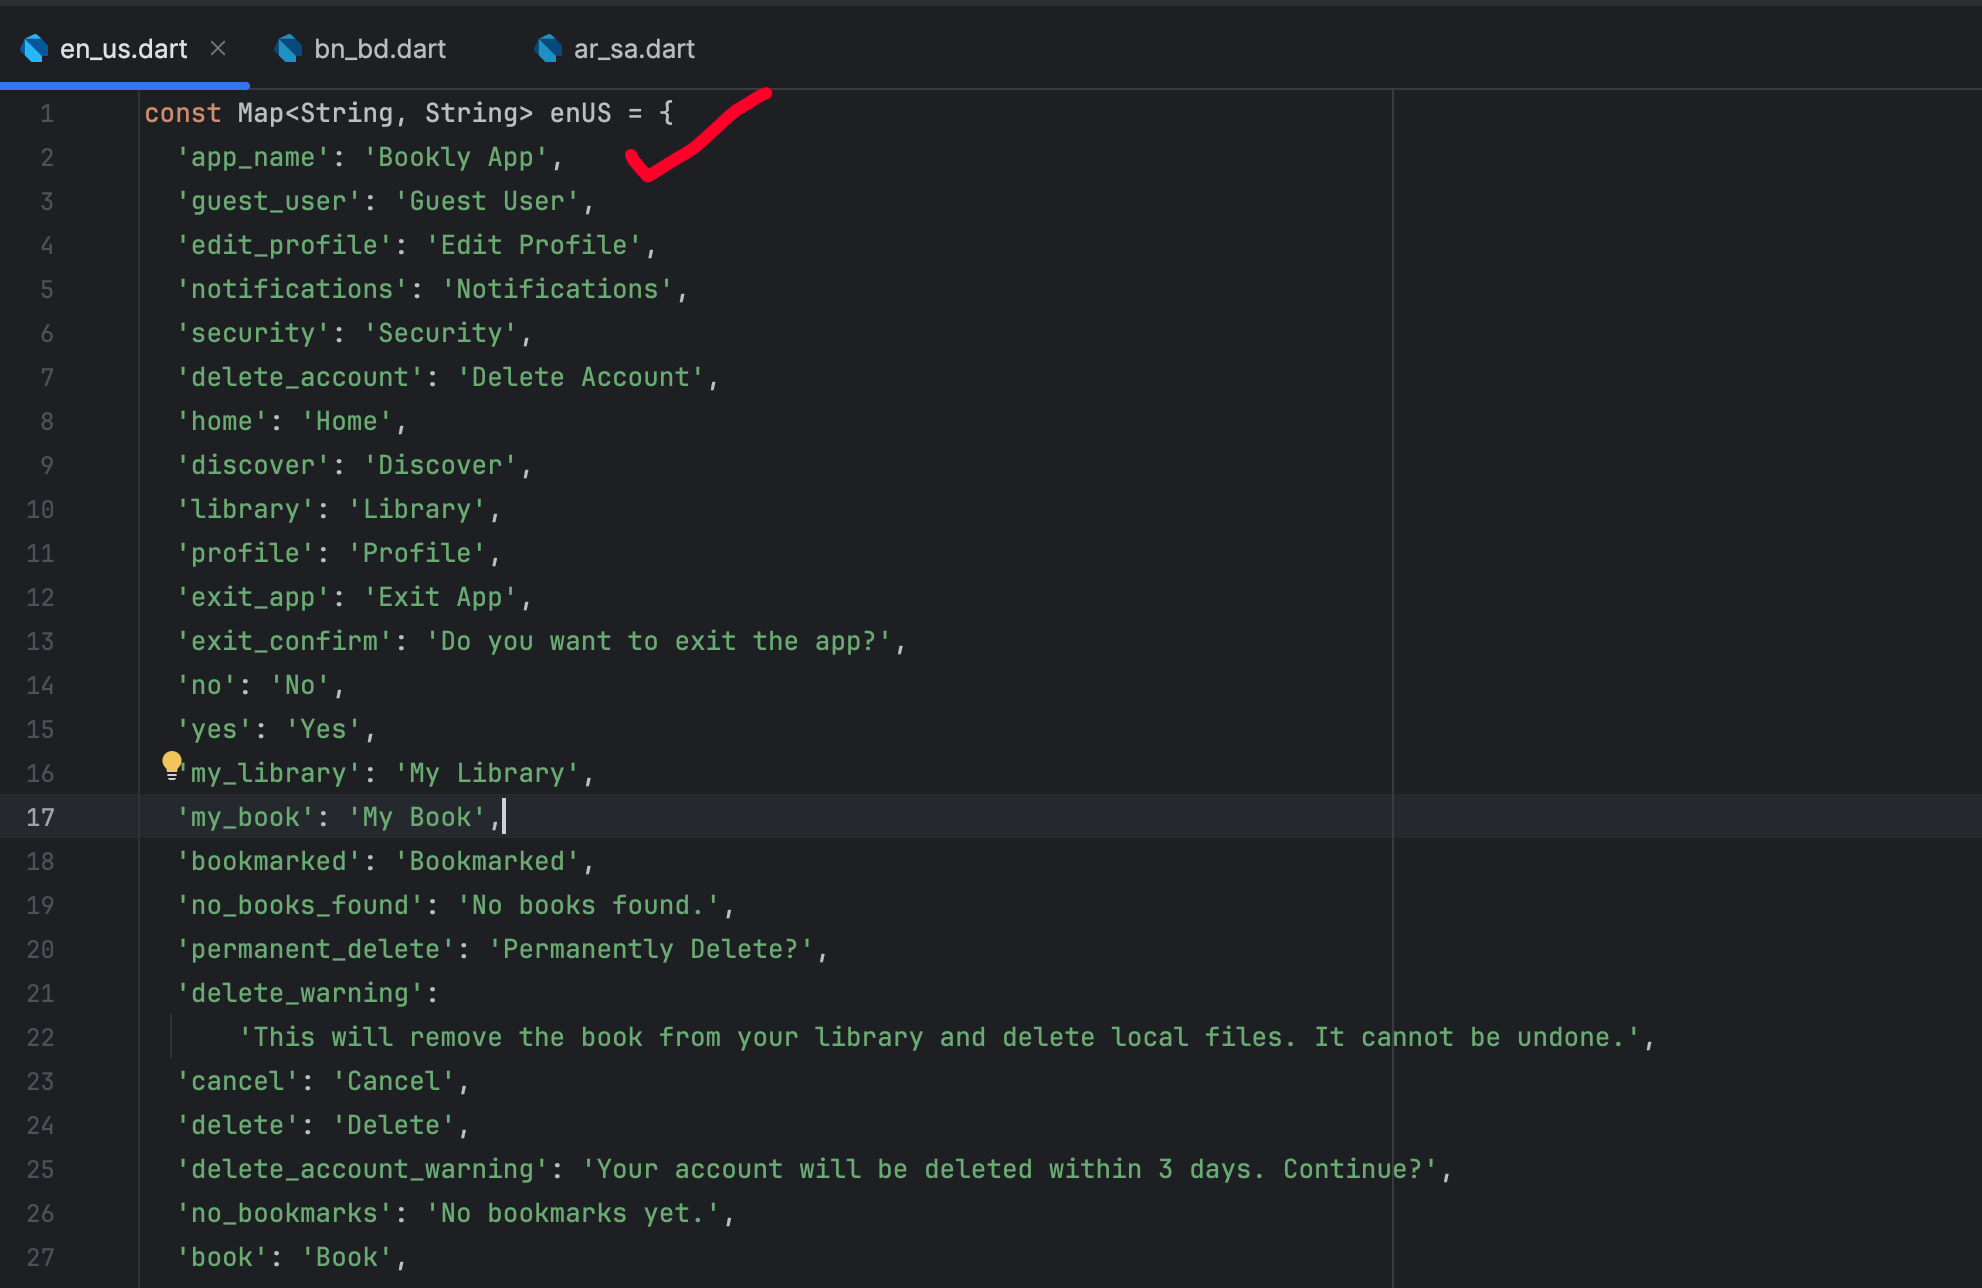
Copy the code structure from an existing translation file (like en_us.dart) into your new file.
Rename the map variable (e.g., from enUS to frFR), and translate all the string values on the right side of the colons to your new language.
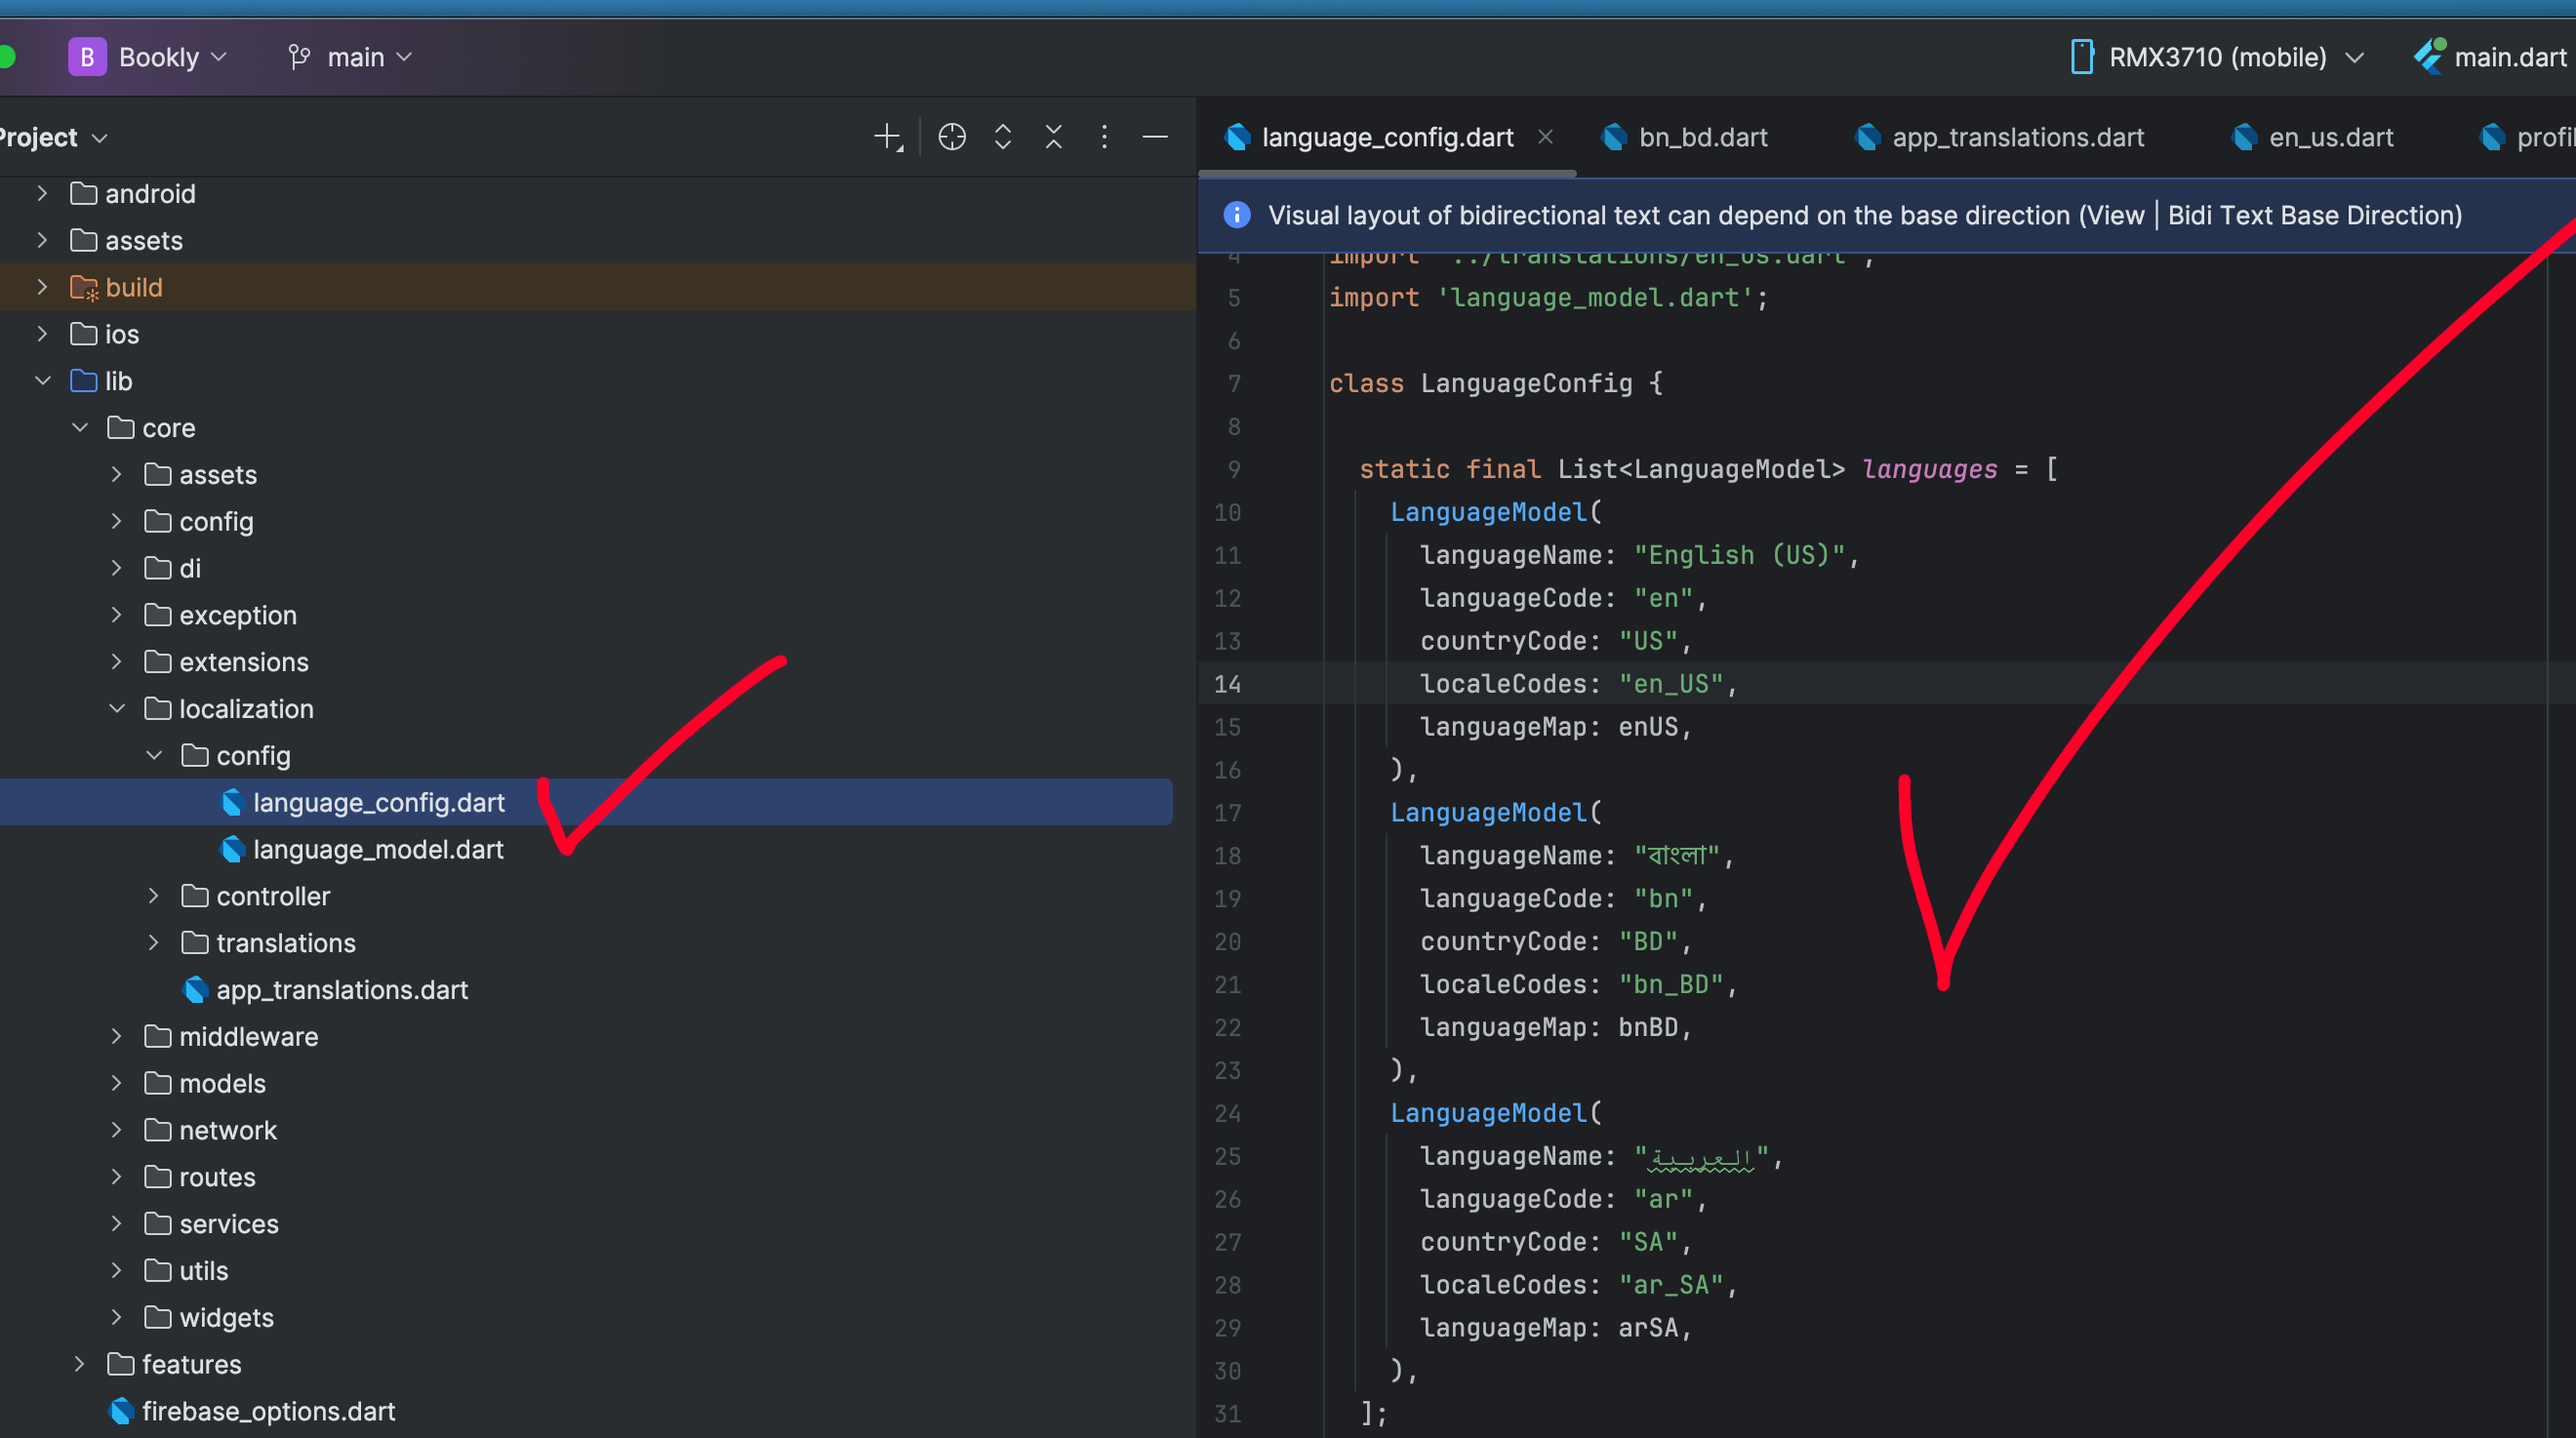
Once your translation file is ready, navigate to <project>/lib/core/localization/config/language_config.dart.
Locate the languages list inside the LanguageConfig class.
Add a new LanguageModel block to this list, filling in your language name, country code, and referencing the translation map variable you just created.
Set the Default Language
The app automatically uses the first language in the languages list as the default.
To set your preferred language as the default, simply move its corresponding LanguageModel to the very top of the list in language_config.dart.
Remove a Language
To remove a language from the app, open language_config.dart and delete its LanguageModel from the list.
For clean code, you can also delete the corresponding translation Dart file from the translations folder.
10. AdMob Customization
To start earning revenue through ads, you need to integrate your own AdMob Unit IDs for both Android and iOS.
CRITICAL WARNING: For development, you do not need to set up your real AdMob account. You must only configure AdMob with your real production IDs right before publishing your app to the App Store or Play Store. If you run the app during development and testing using your live production AdMob configuration, it will generate invalid traffic and your AdMob account will likely be permanently suspended.
The app is pre-configured to automatically use Google's provided test IDs during debug mode, ensuring your account remains safe while developing.
Update AdMob Unit IDs
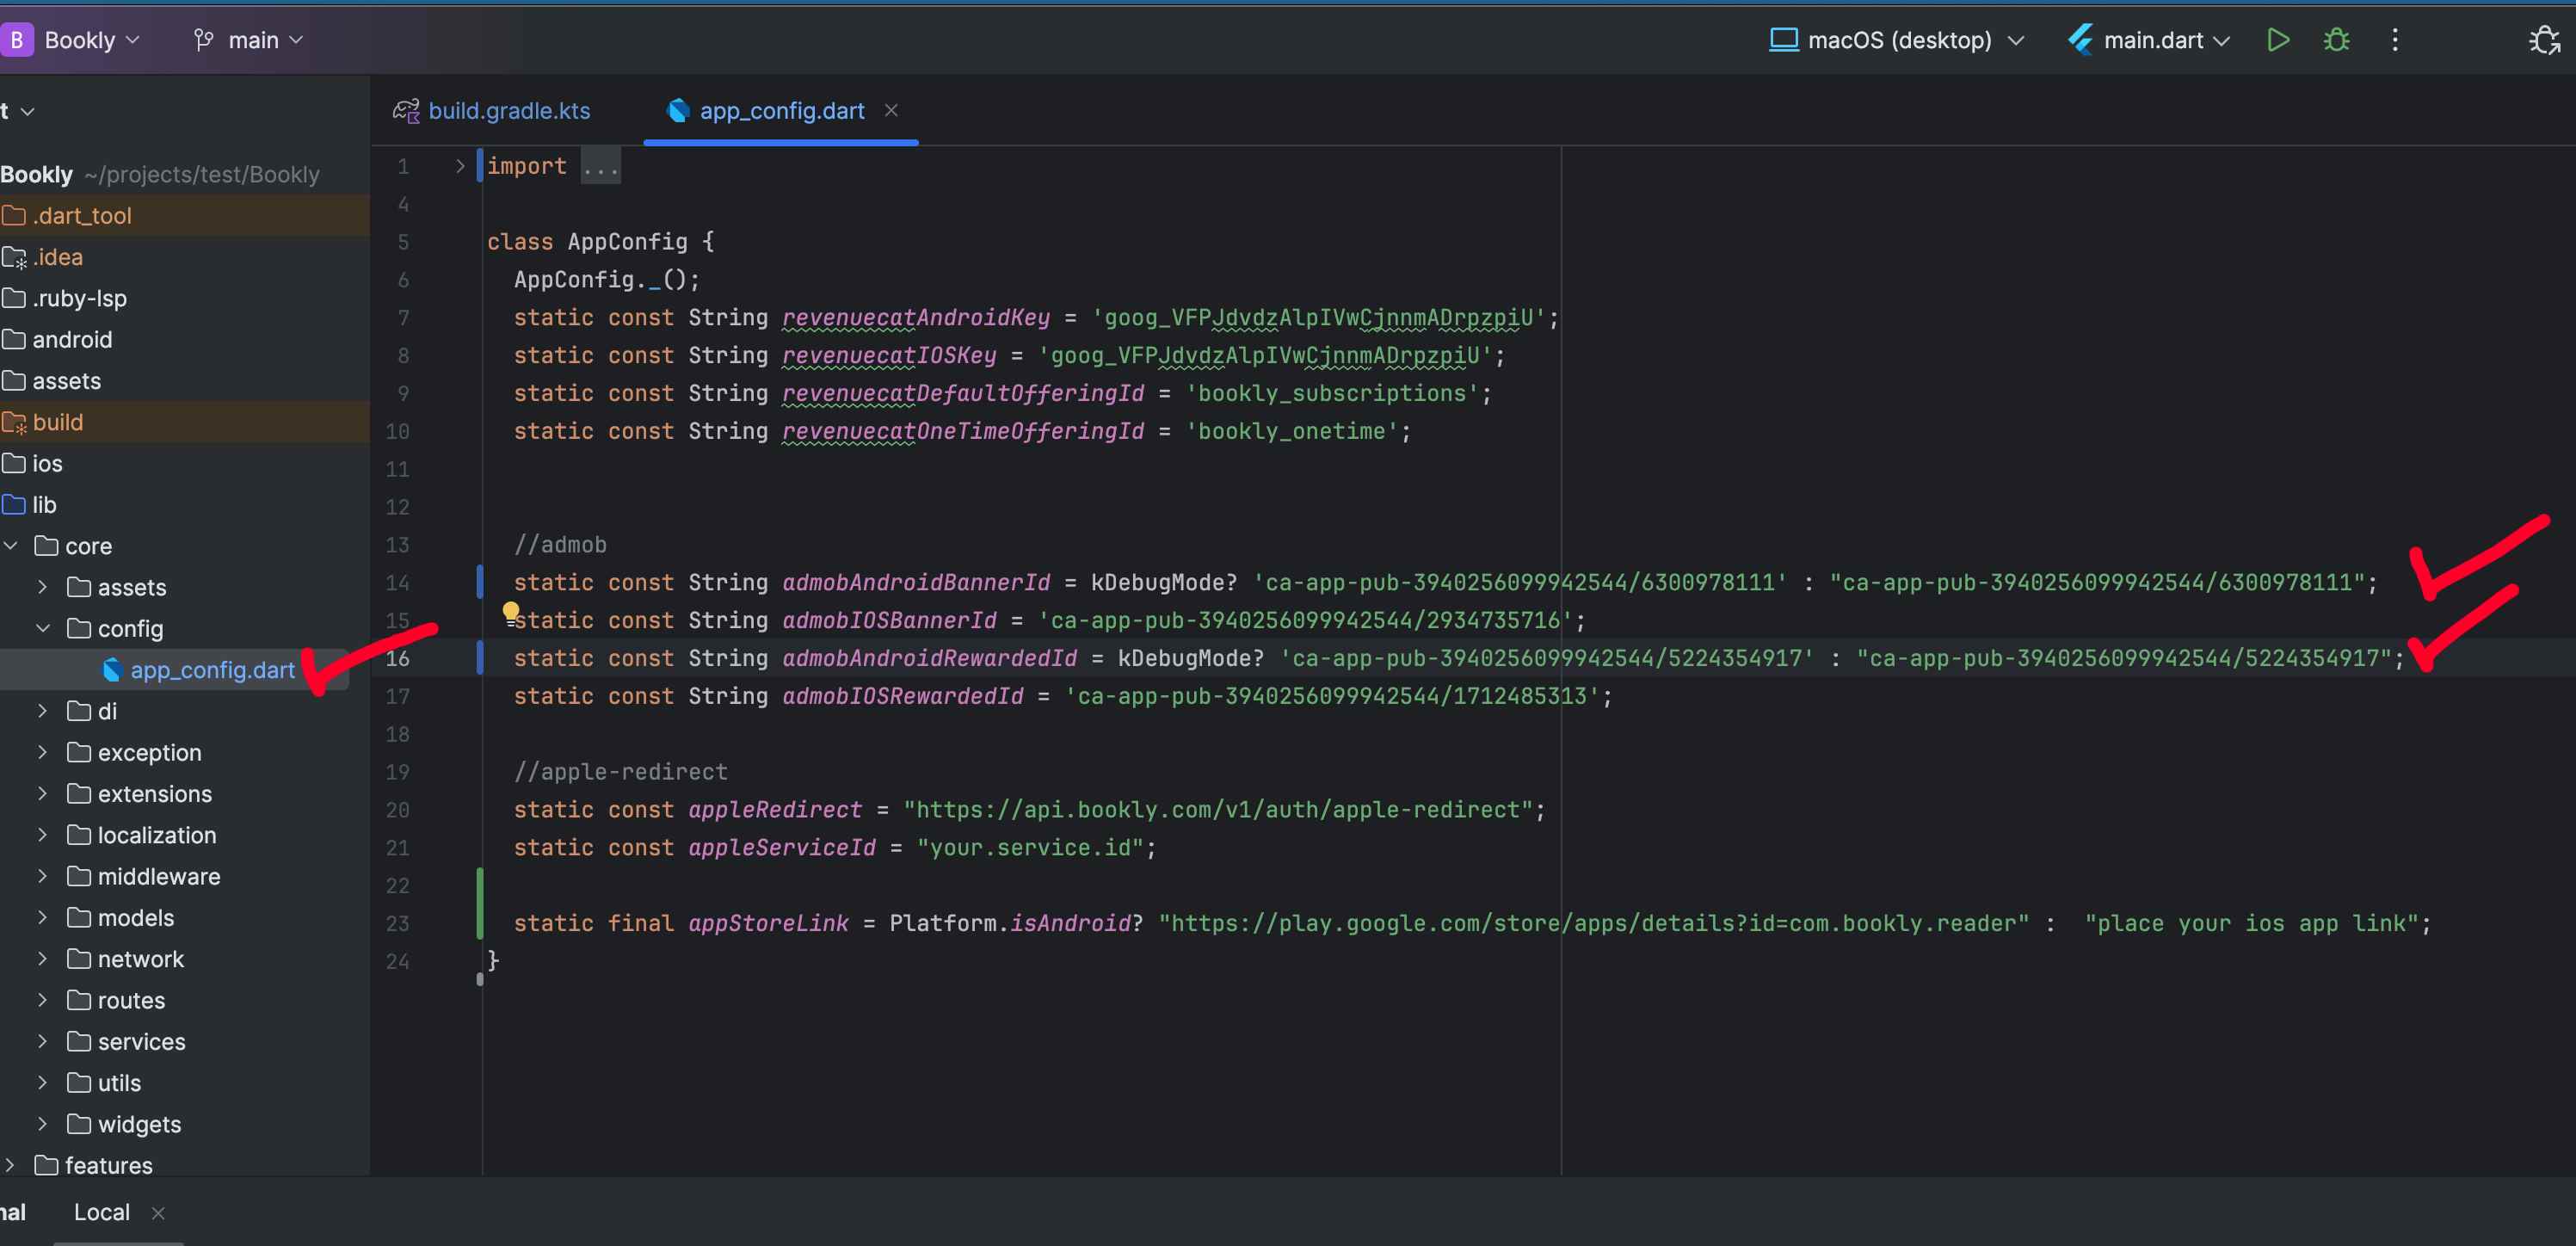
The app configuration uses a conditional check (kDebugMode) to automatically switch between Test IDs (during development) and Production IDs (when live).
Open the configuration file located at <project>/lib/core/config/app_config.dart.
Locate the AdMob variables section within the AppConfig class.
Replace the production value (the string after the colon :) with your actual AdMob Unit IDs for Banner and Rewarded ads. Leave the first string as the test ID.
Need help creating Ad Unit IDs?
If you do not have an AdMob account or need help generating Ad Unit IDs, you can watch the video below for a clear understanding of the account creation process.
Note: The video below shows complete ad integration coding for Flutter. You only need to watch it to understand how to create your AdMob account, add your apps, and generate your Banner and Rewarded Ad Unit IDs. Do not follow the coding steps in the video, as the ad implementation is already fully integrated into the app.
In addition to the Unit IDs, you must configure your AdMob Application IDs in the native Android and iOS configuration files.
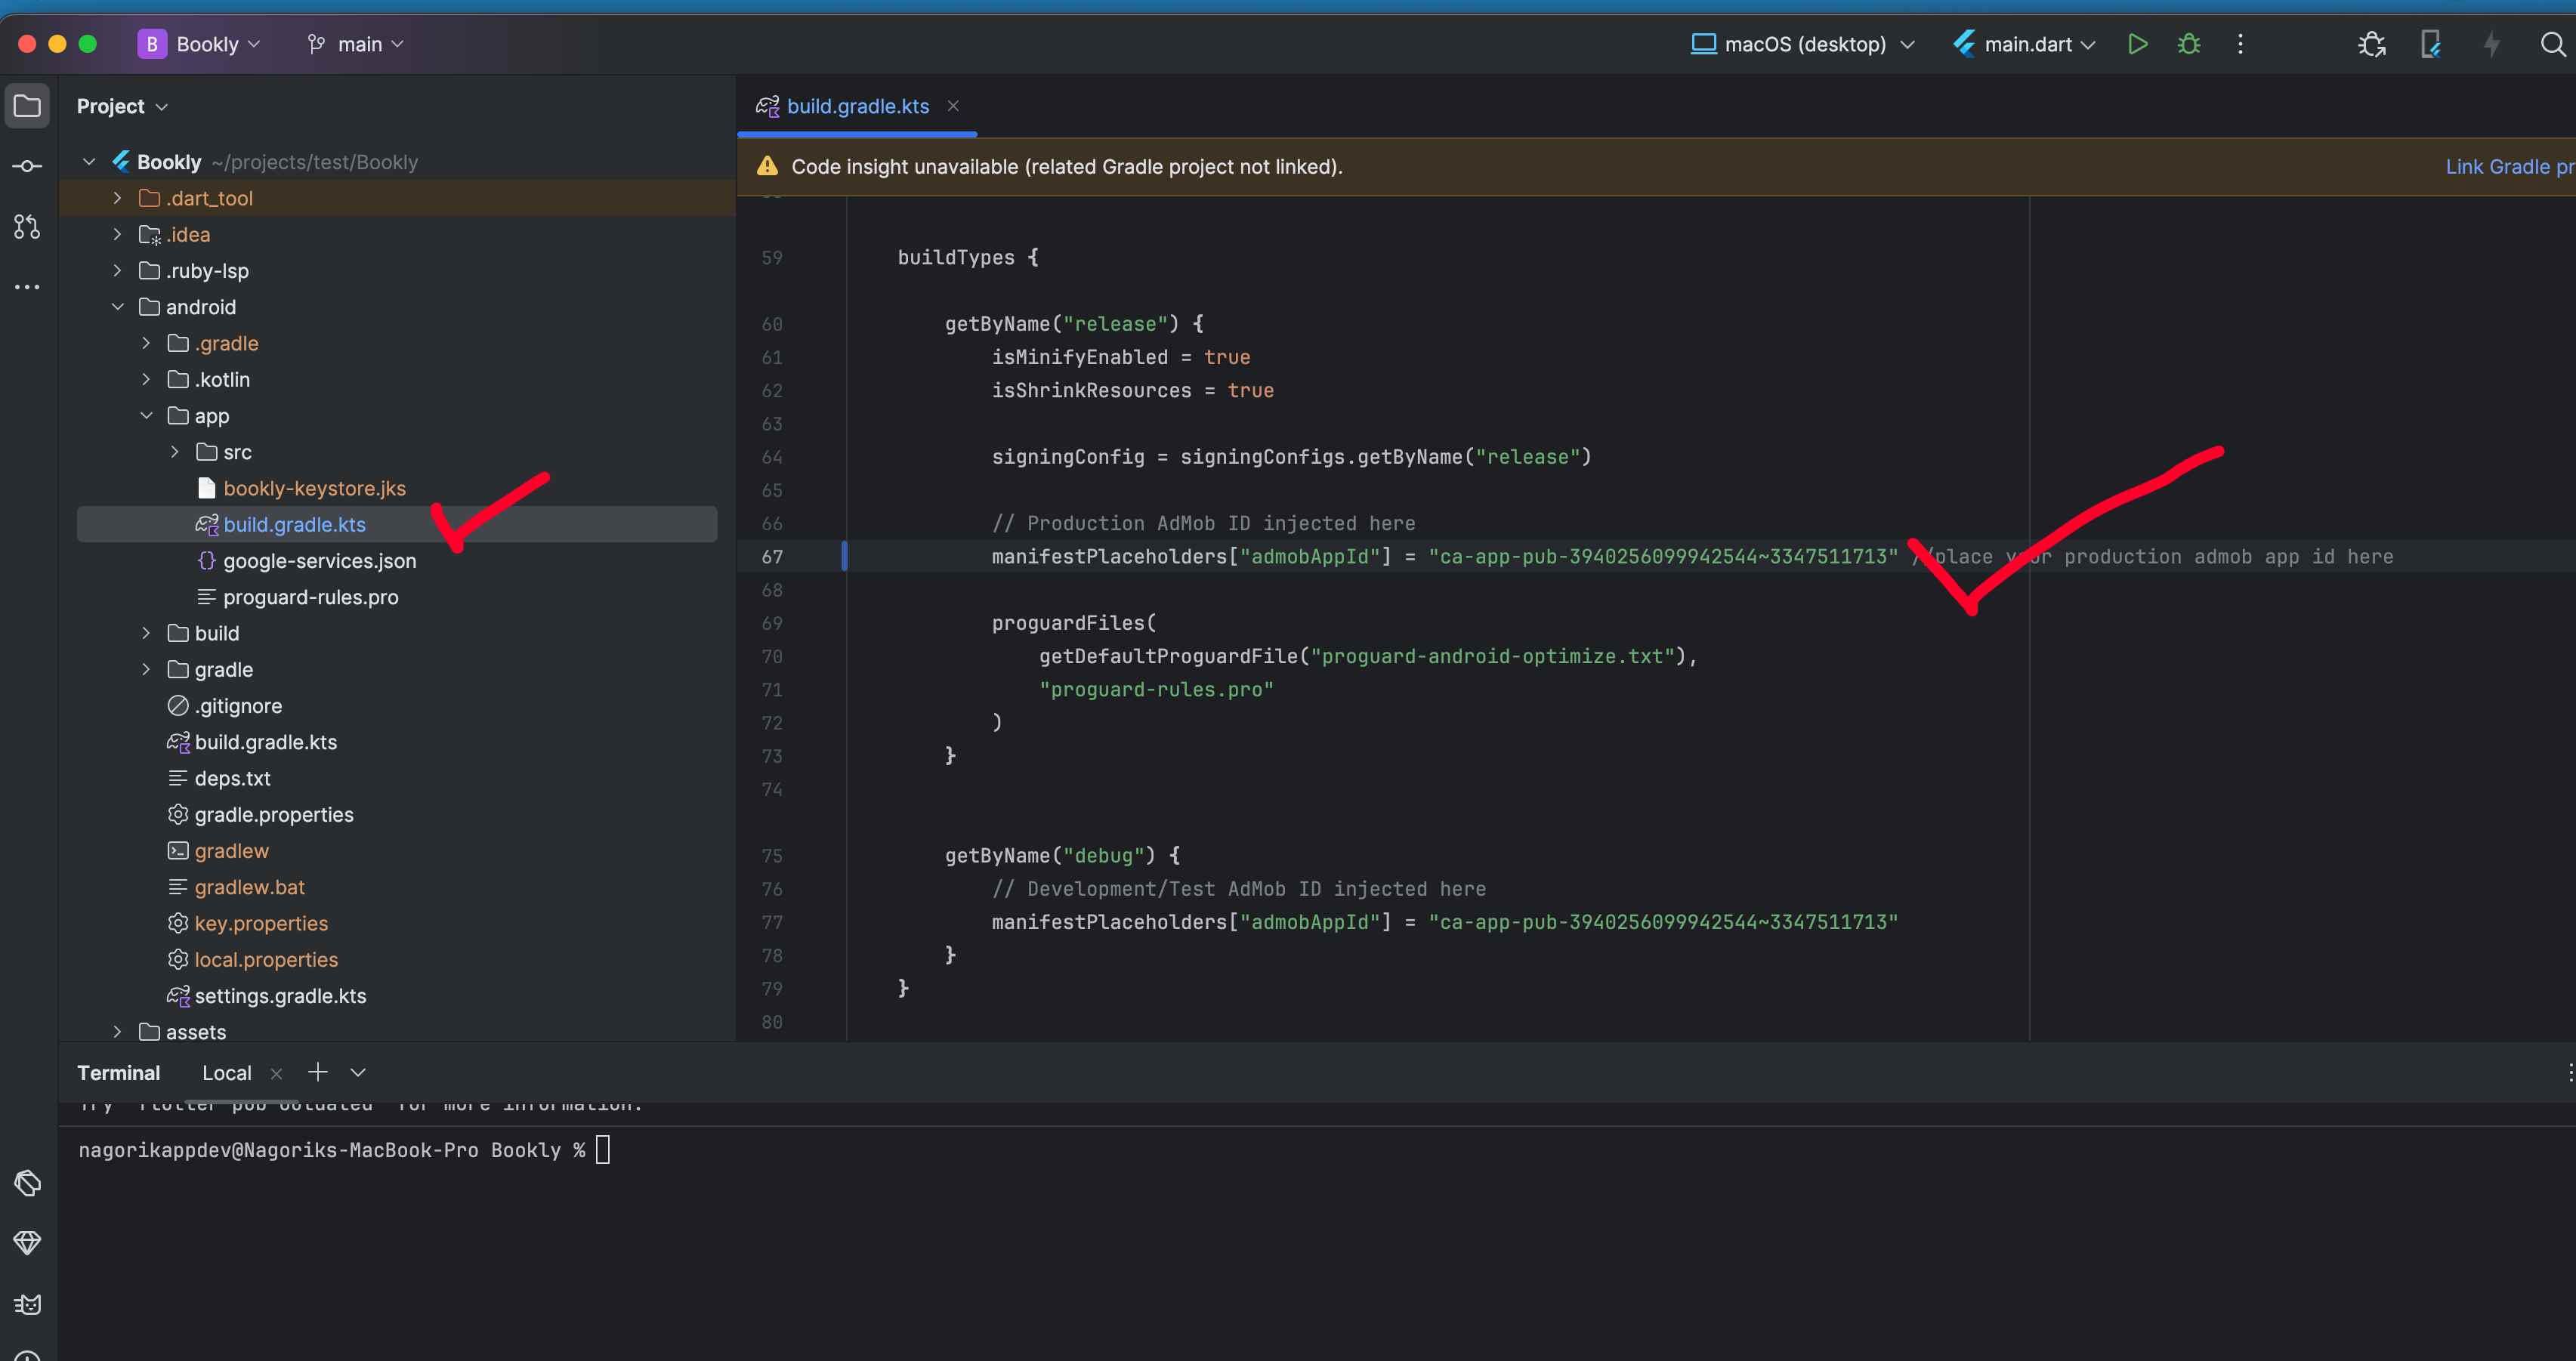
Android: Open <project>/android/app/build.gradle.kts.
Scroll down to the buildTypes section.
Inside the getByName("release") block, locate manifestPlaceholders["admobAppId"] and replace the value with your actual Android AdMob App ID. (You can leave the one under the "debug" block as the default Google test ID).
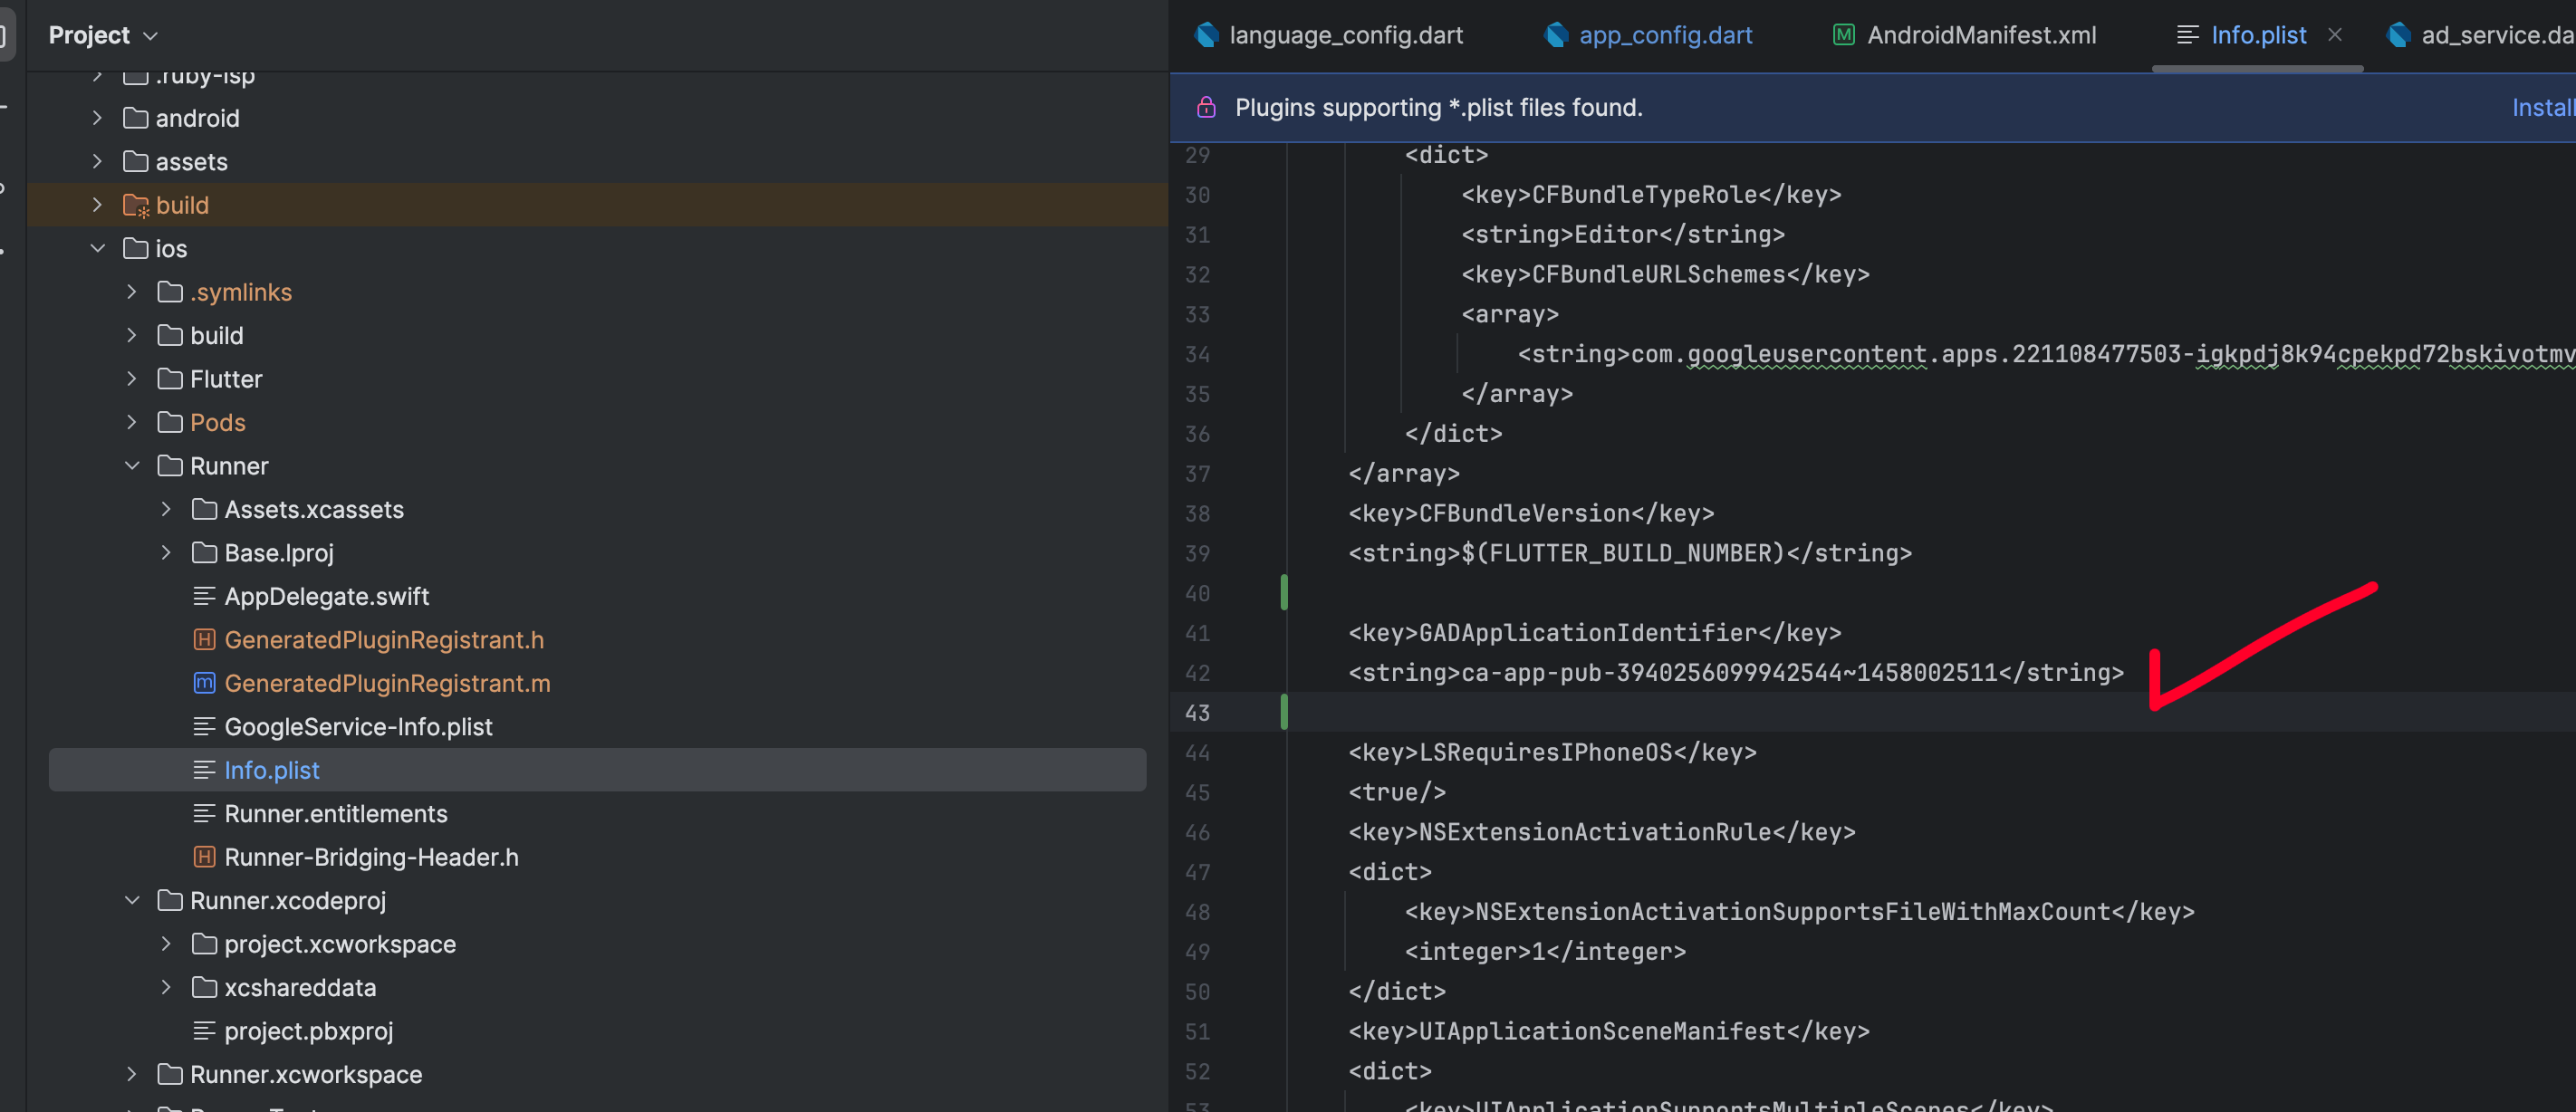
iOS: Open <project>/ios/Runner/Info.plist.
Locate the GADApplicationIdentifier key and replace the string value directly below it with your actual iOS AdMob App ID.
Bookly uses RevenueCat to handle In-App Purchases (subscriptions and one-time purchases) seamlessly across Android and iOS platforms. Follow these steps to configure your products.
Update RevenueCat API Keys
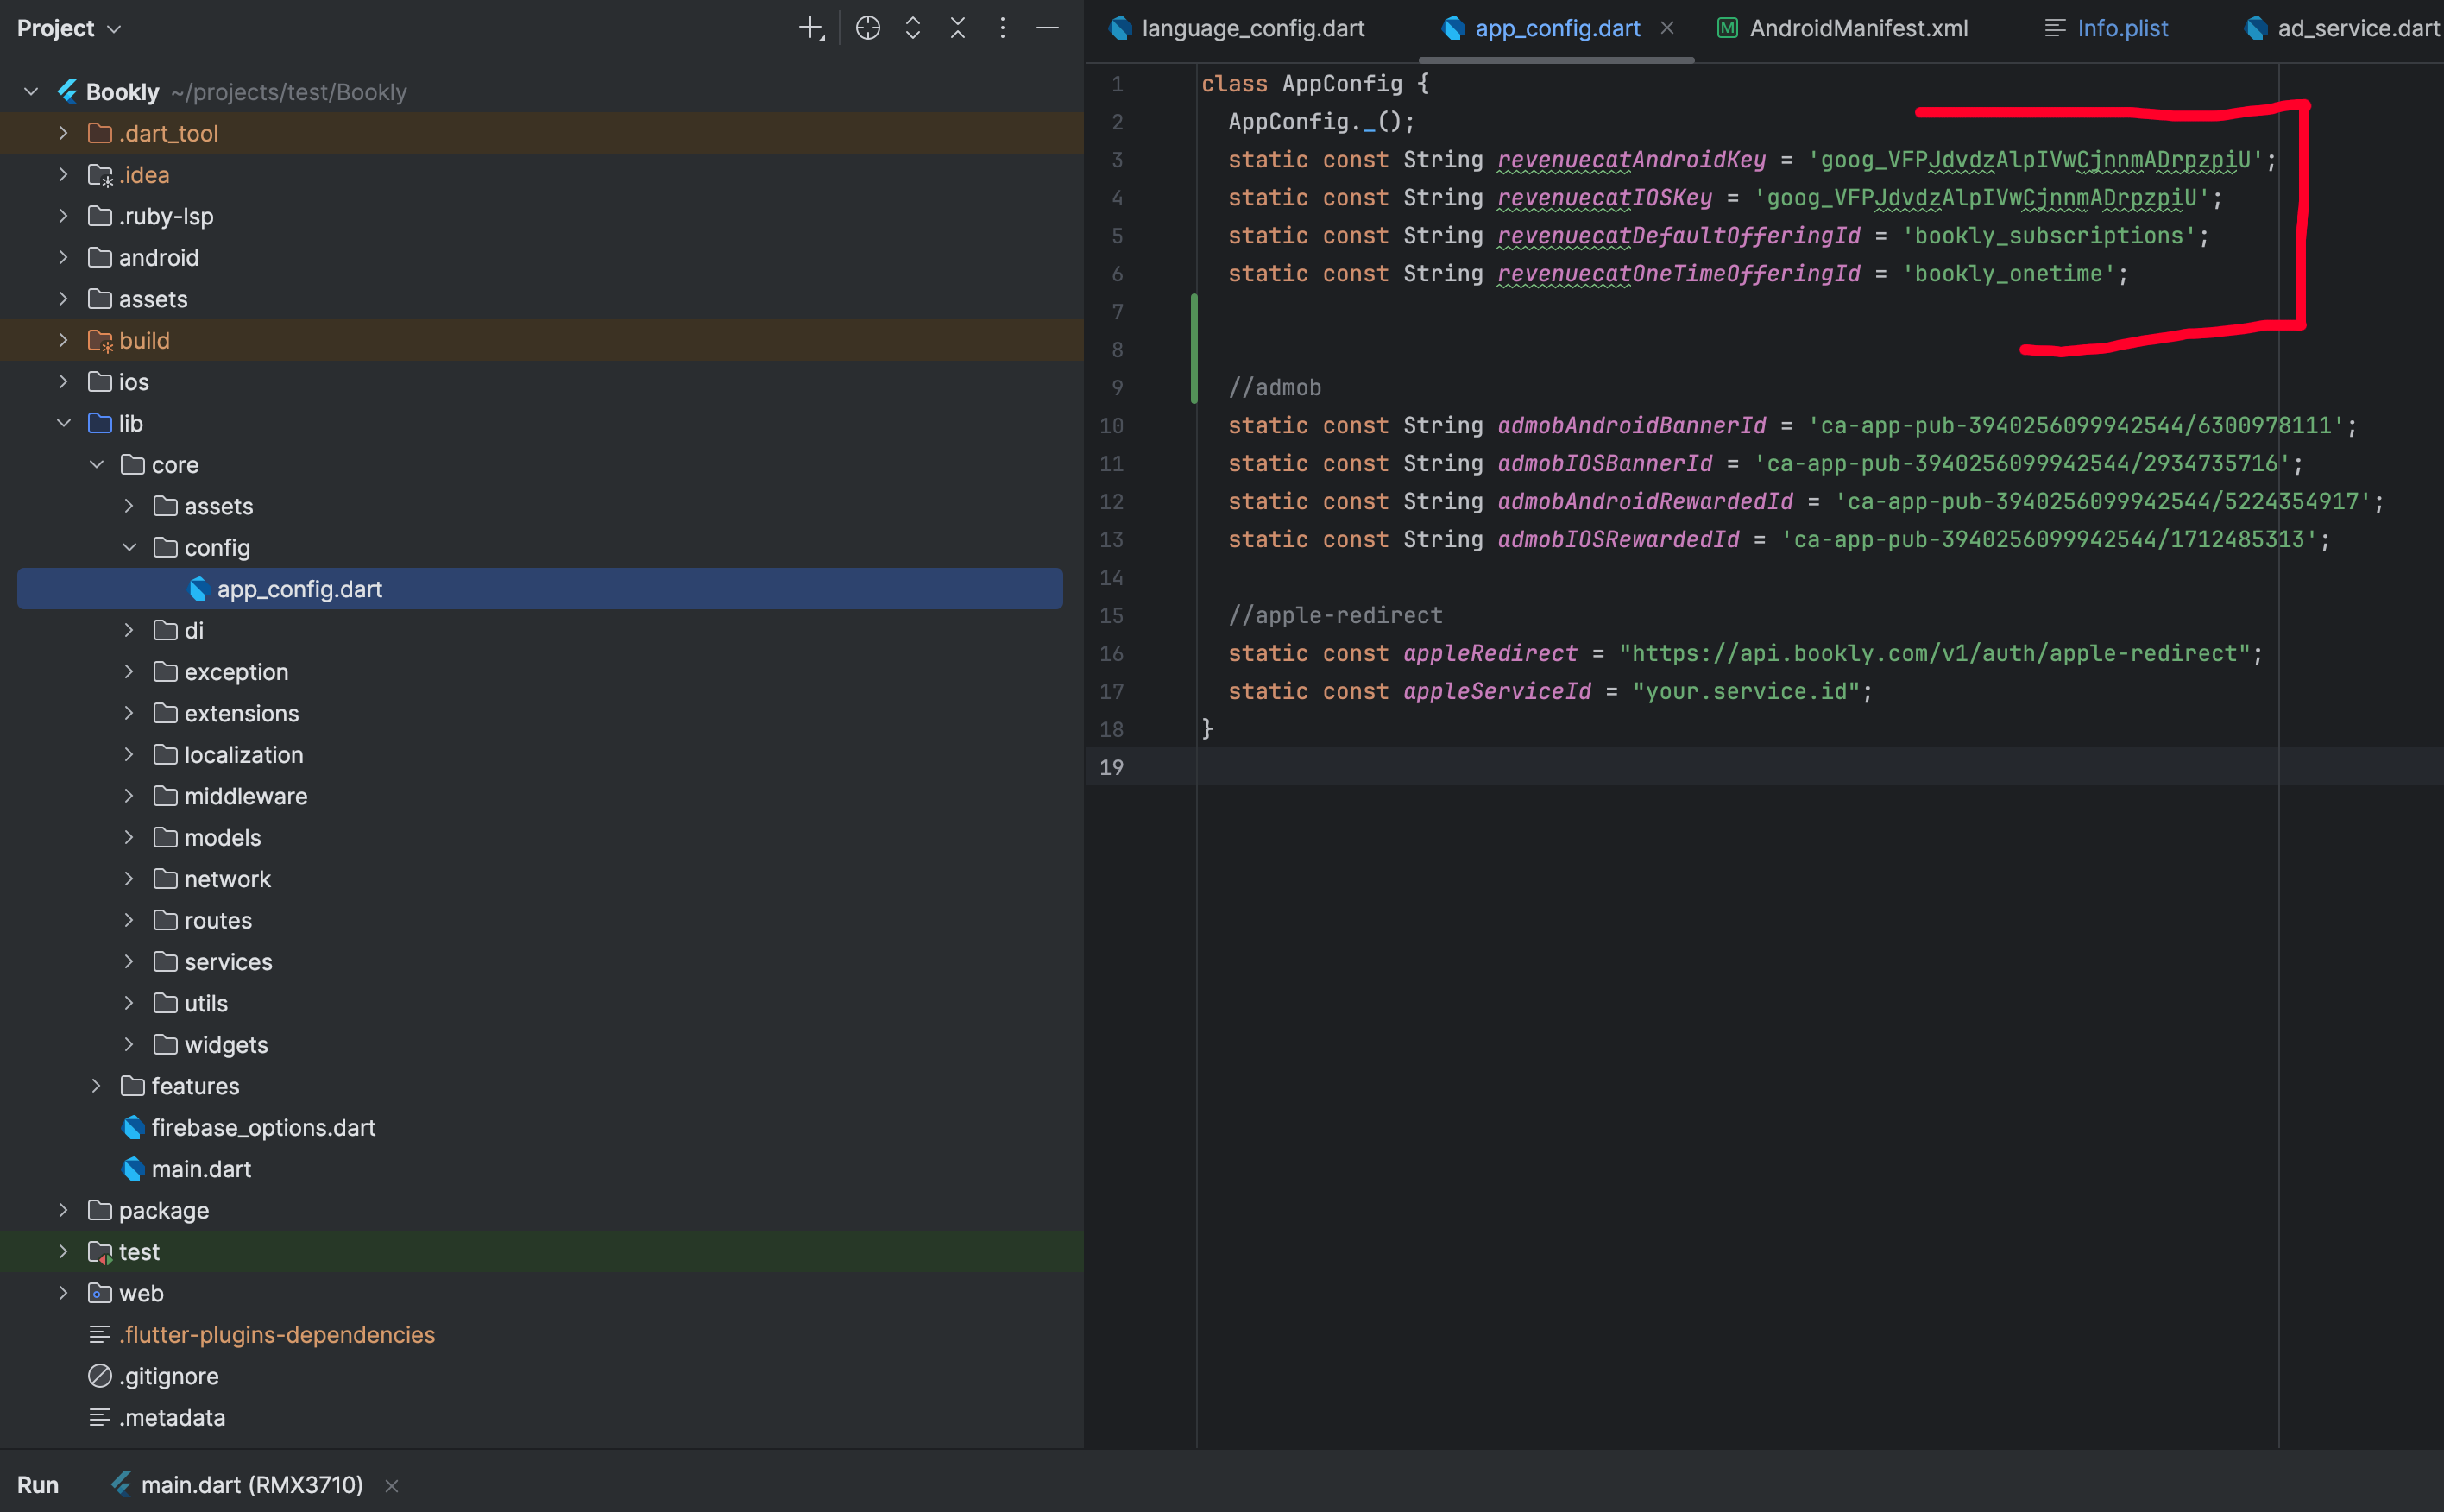
Open your app configuration file at <project>/lib/core/config/app_config.dart.
Replace the revenuecatAndroidKey and revenuecatIOSKey values with your actual API keys from your RevenueCat dashboard.
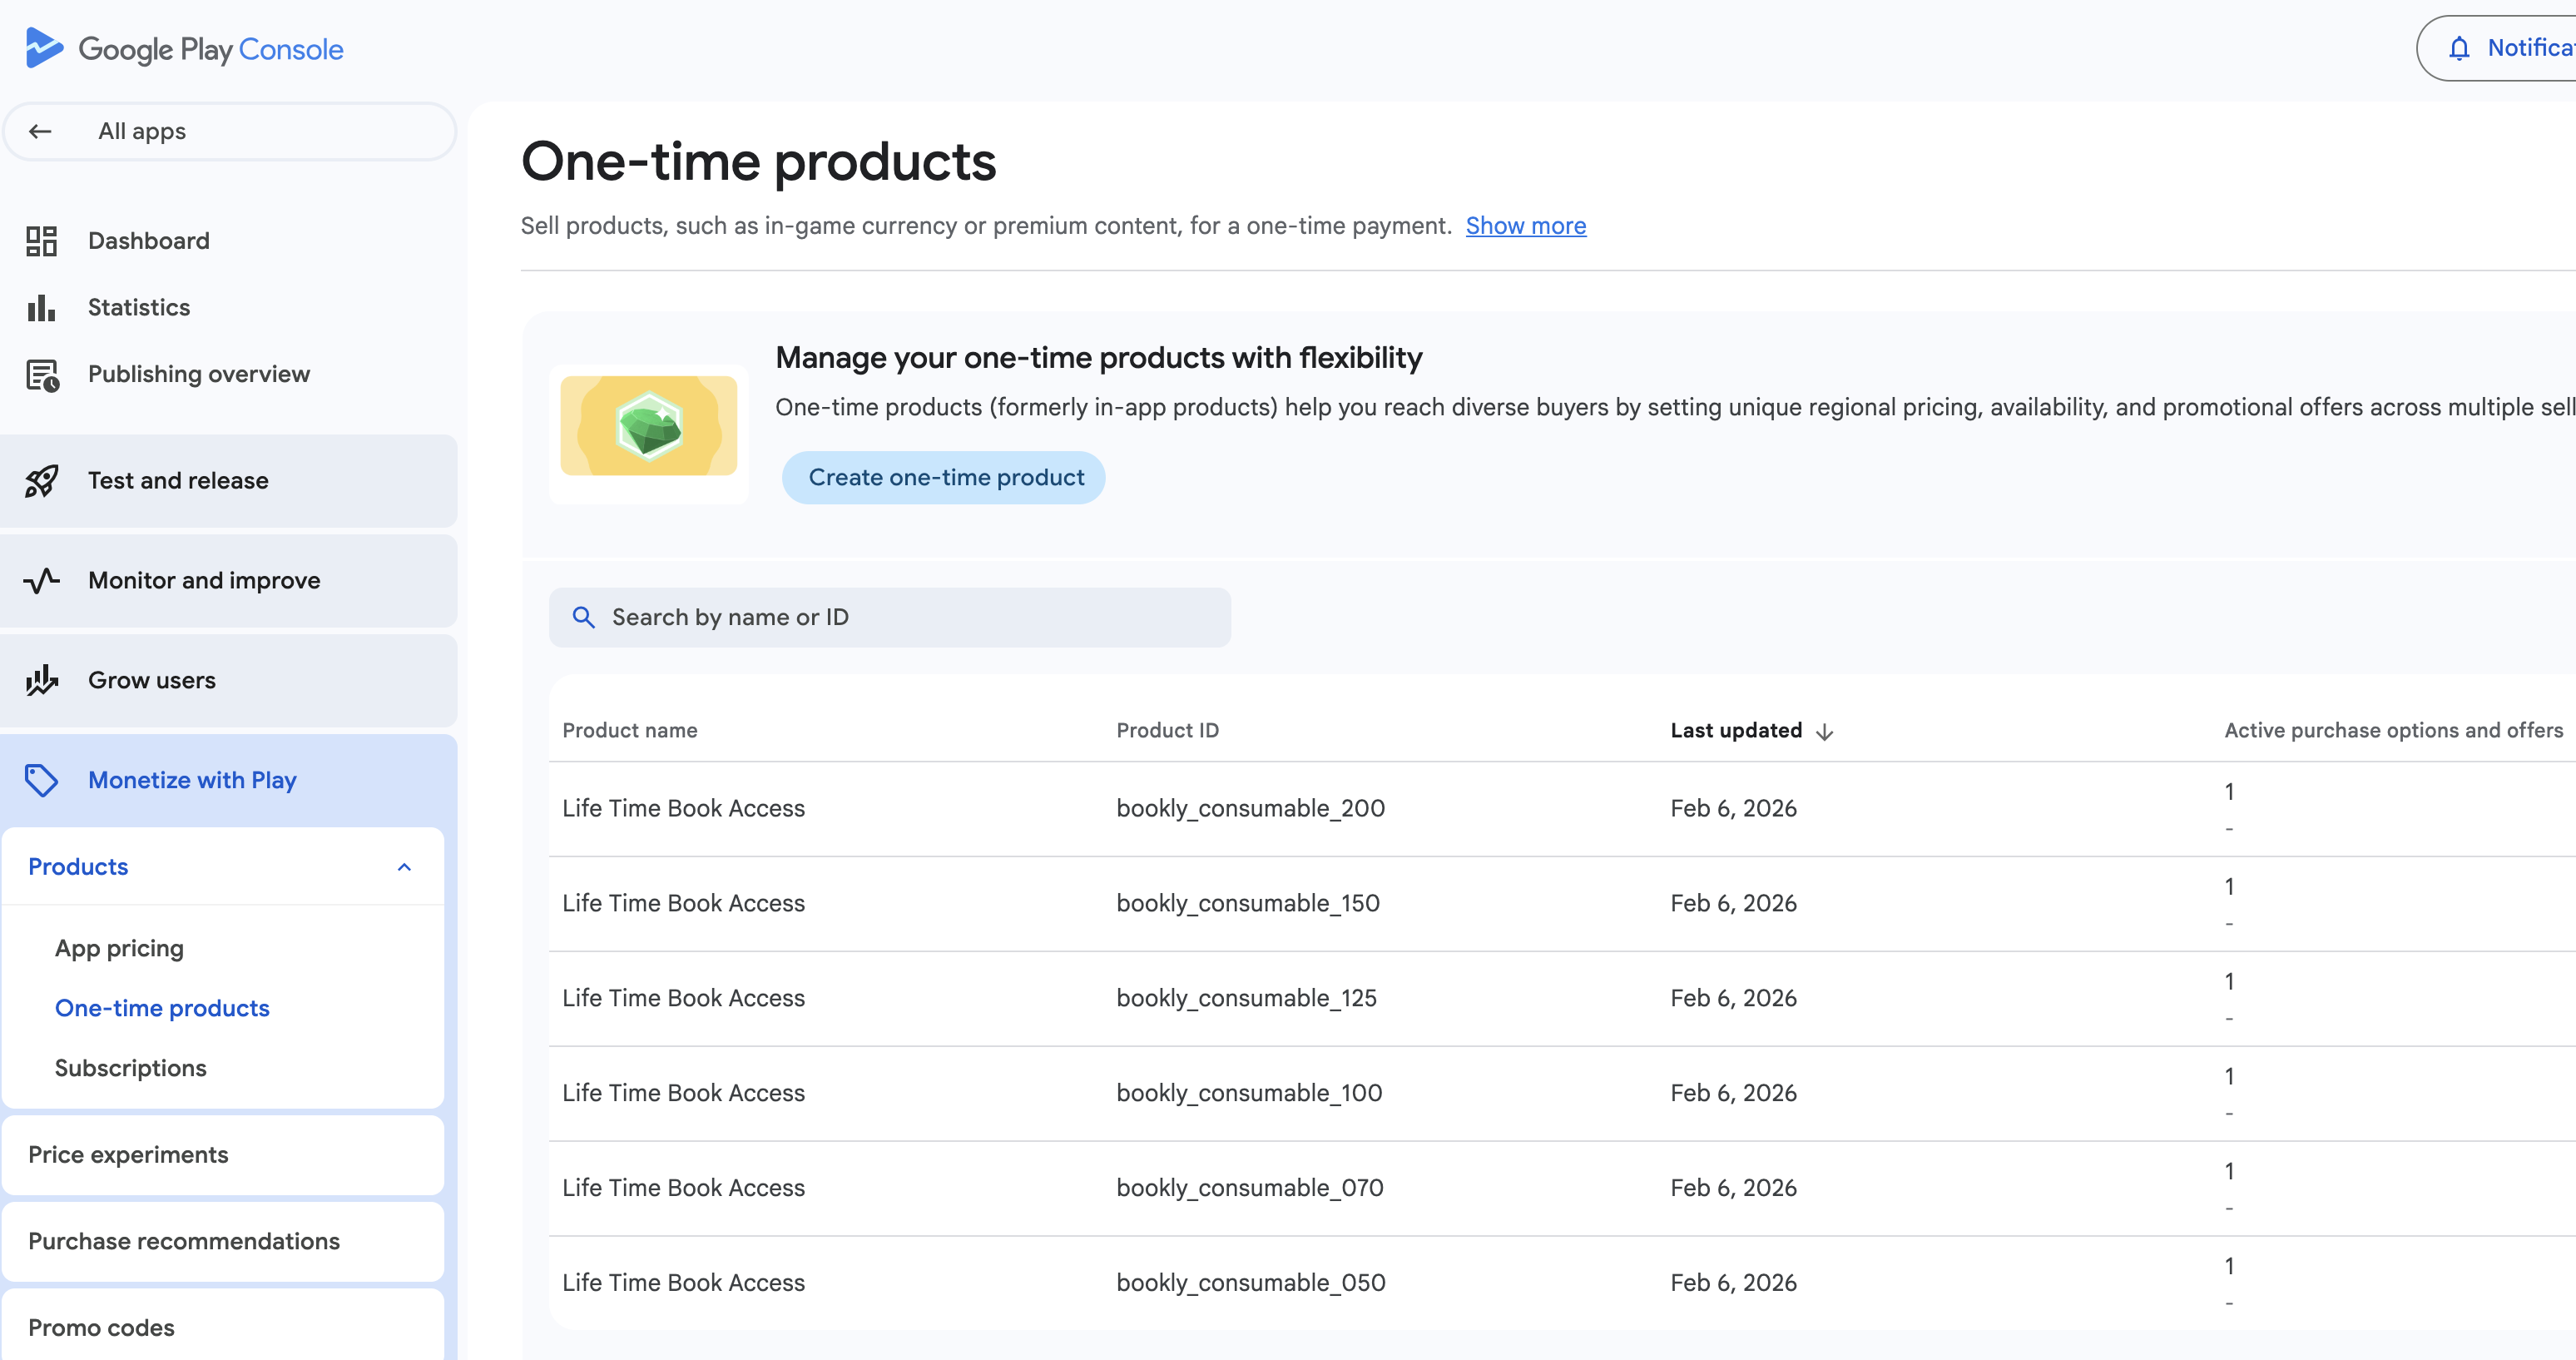
Create Products in Google Play Console (and App Store)
Log into your Google Play Console (and repeat similarly for App Store Connect).
Create an In-App Product for your one-time purchase.
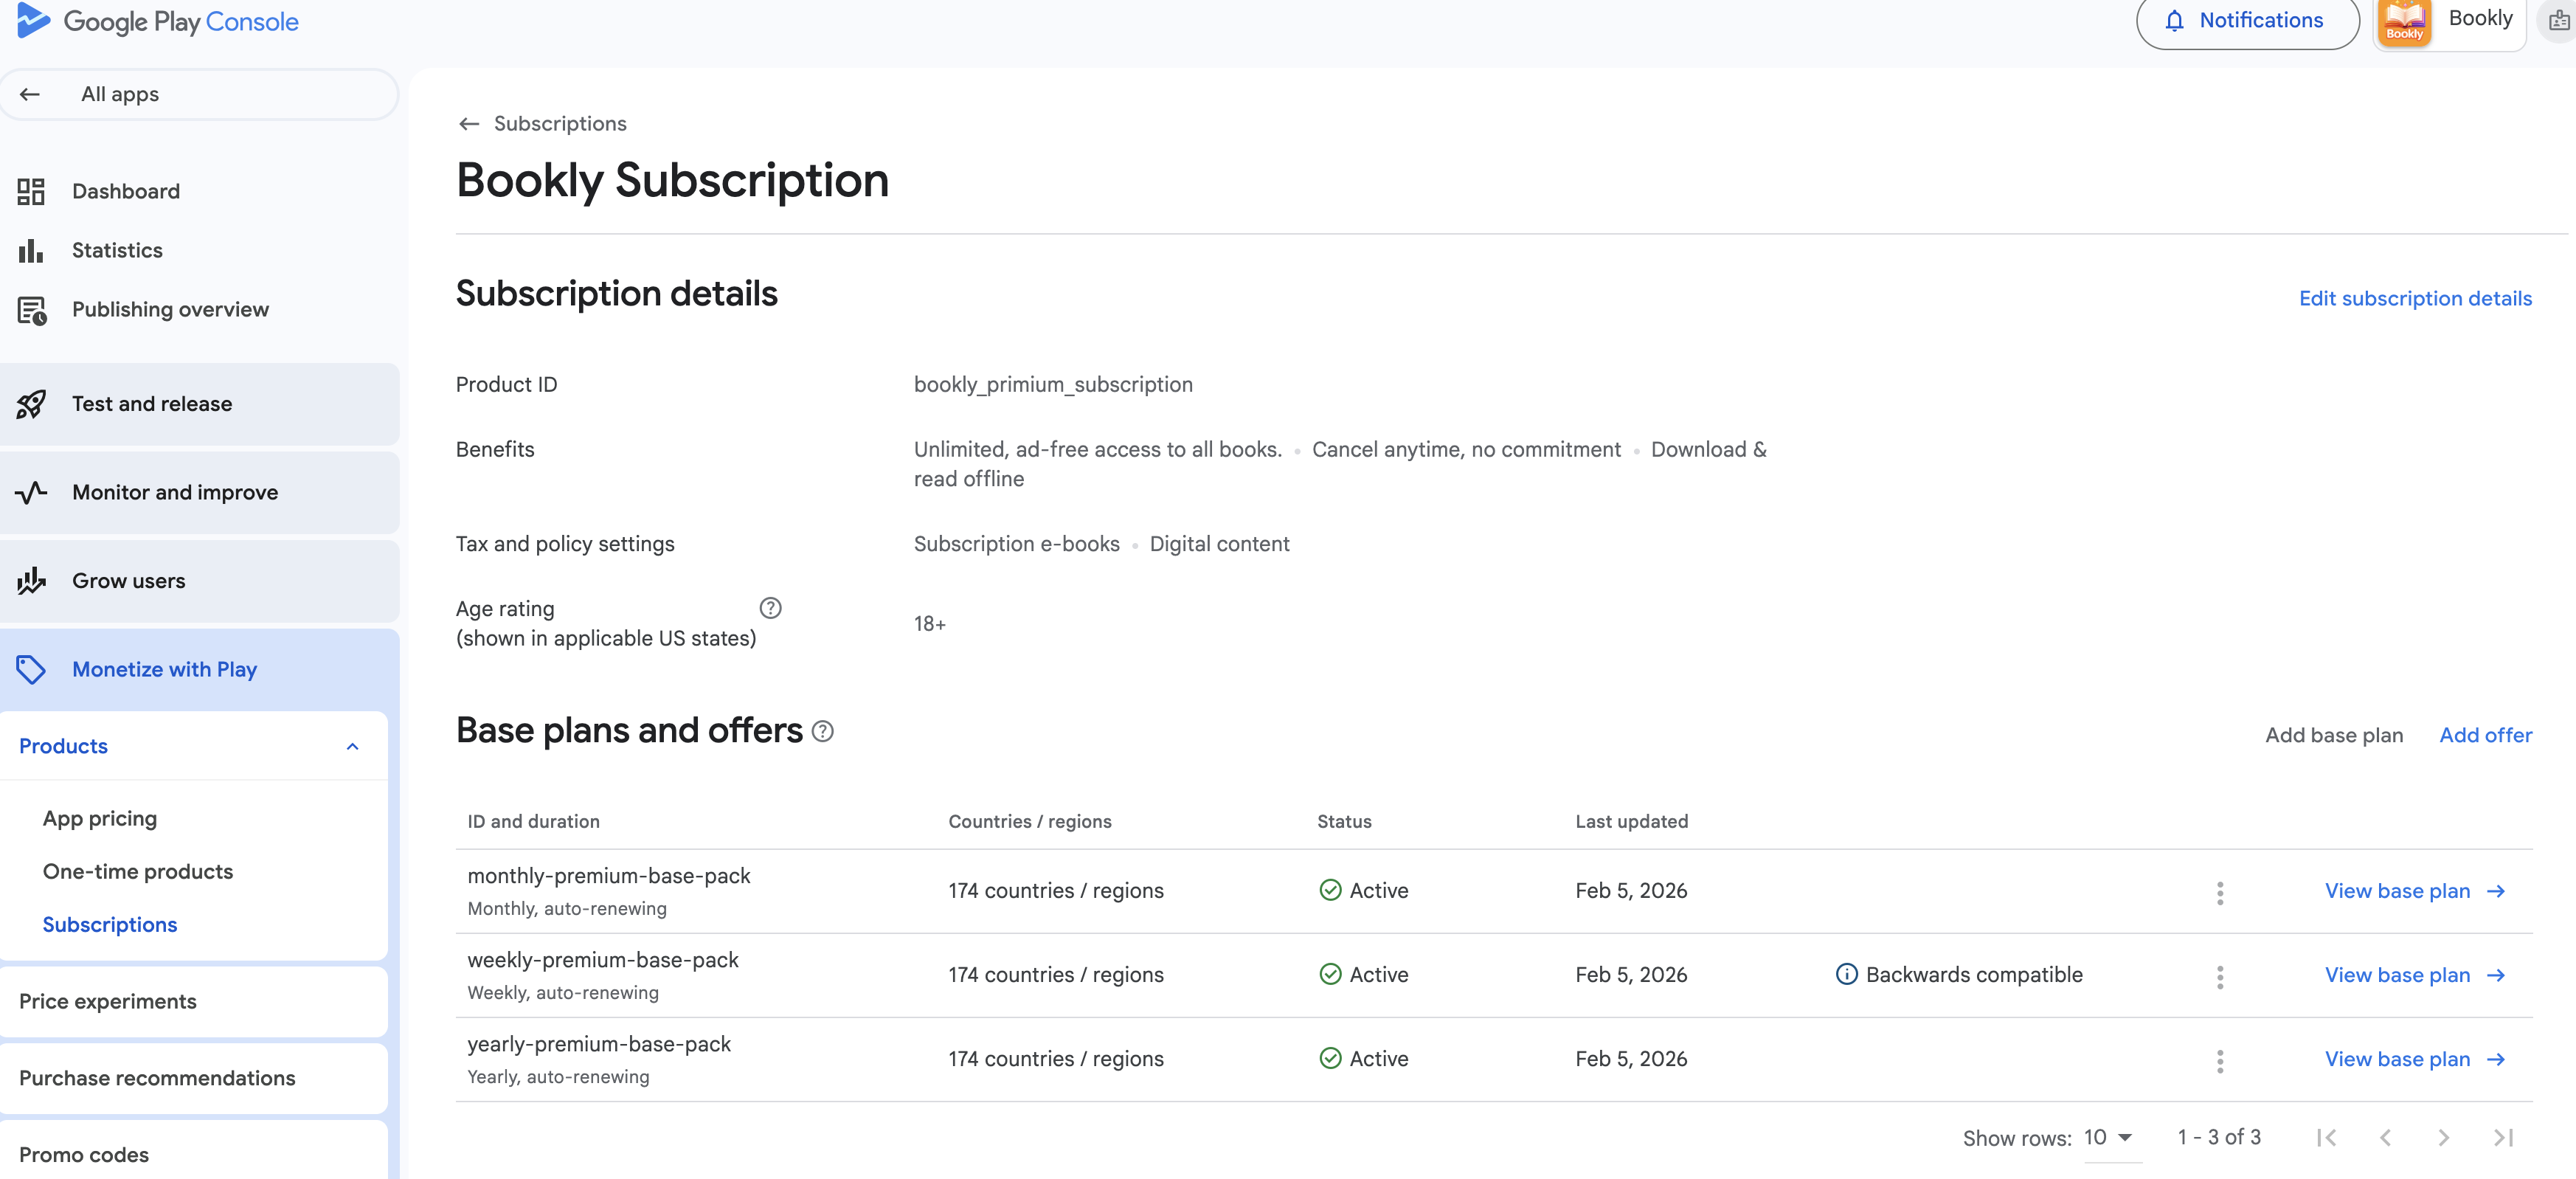
Create a Subscription for your recurring plans.
Connect Stores to RevenueCat
Before importing products, ensure your app stores (Google Play & App Store Connect) are properly linked to RevenueCat.
Import Products & Configure Offerings in RevenueCat
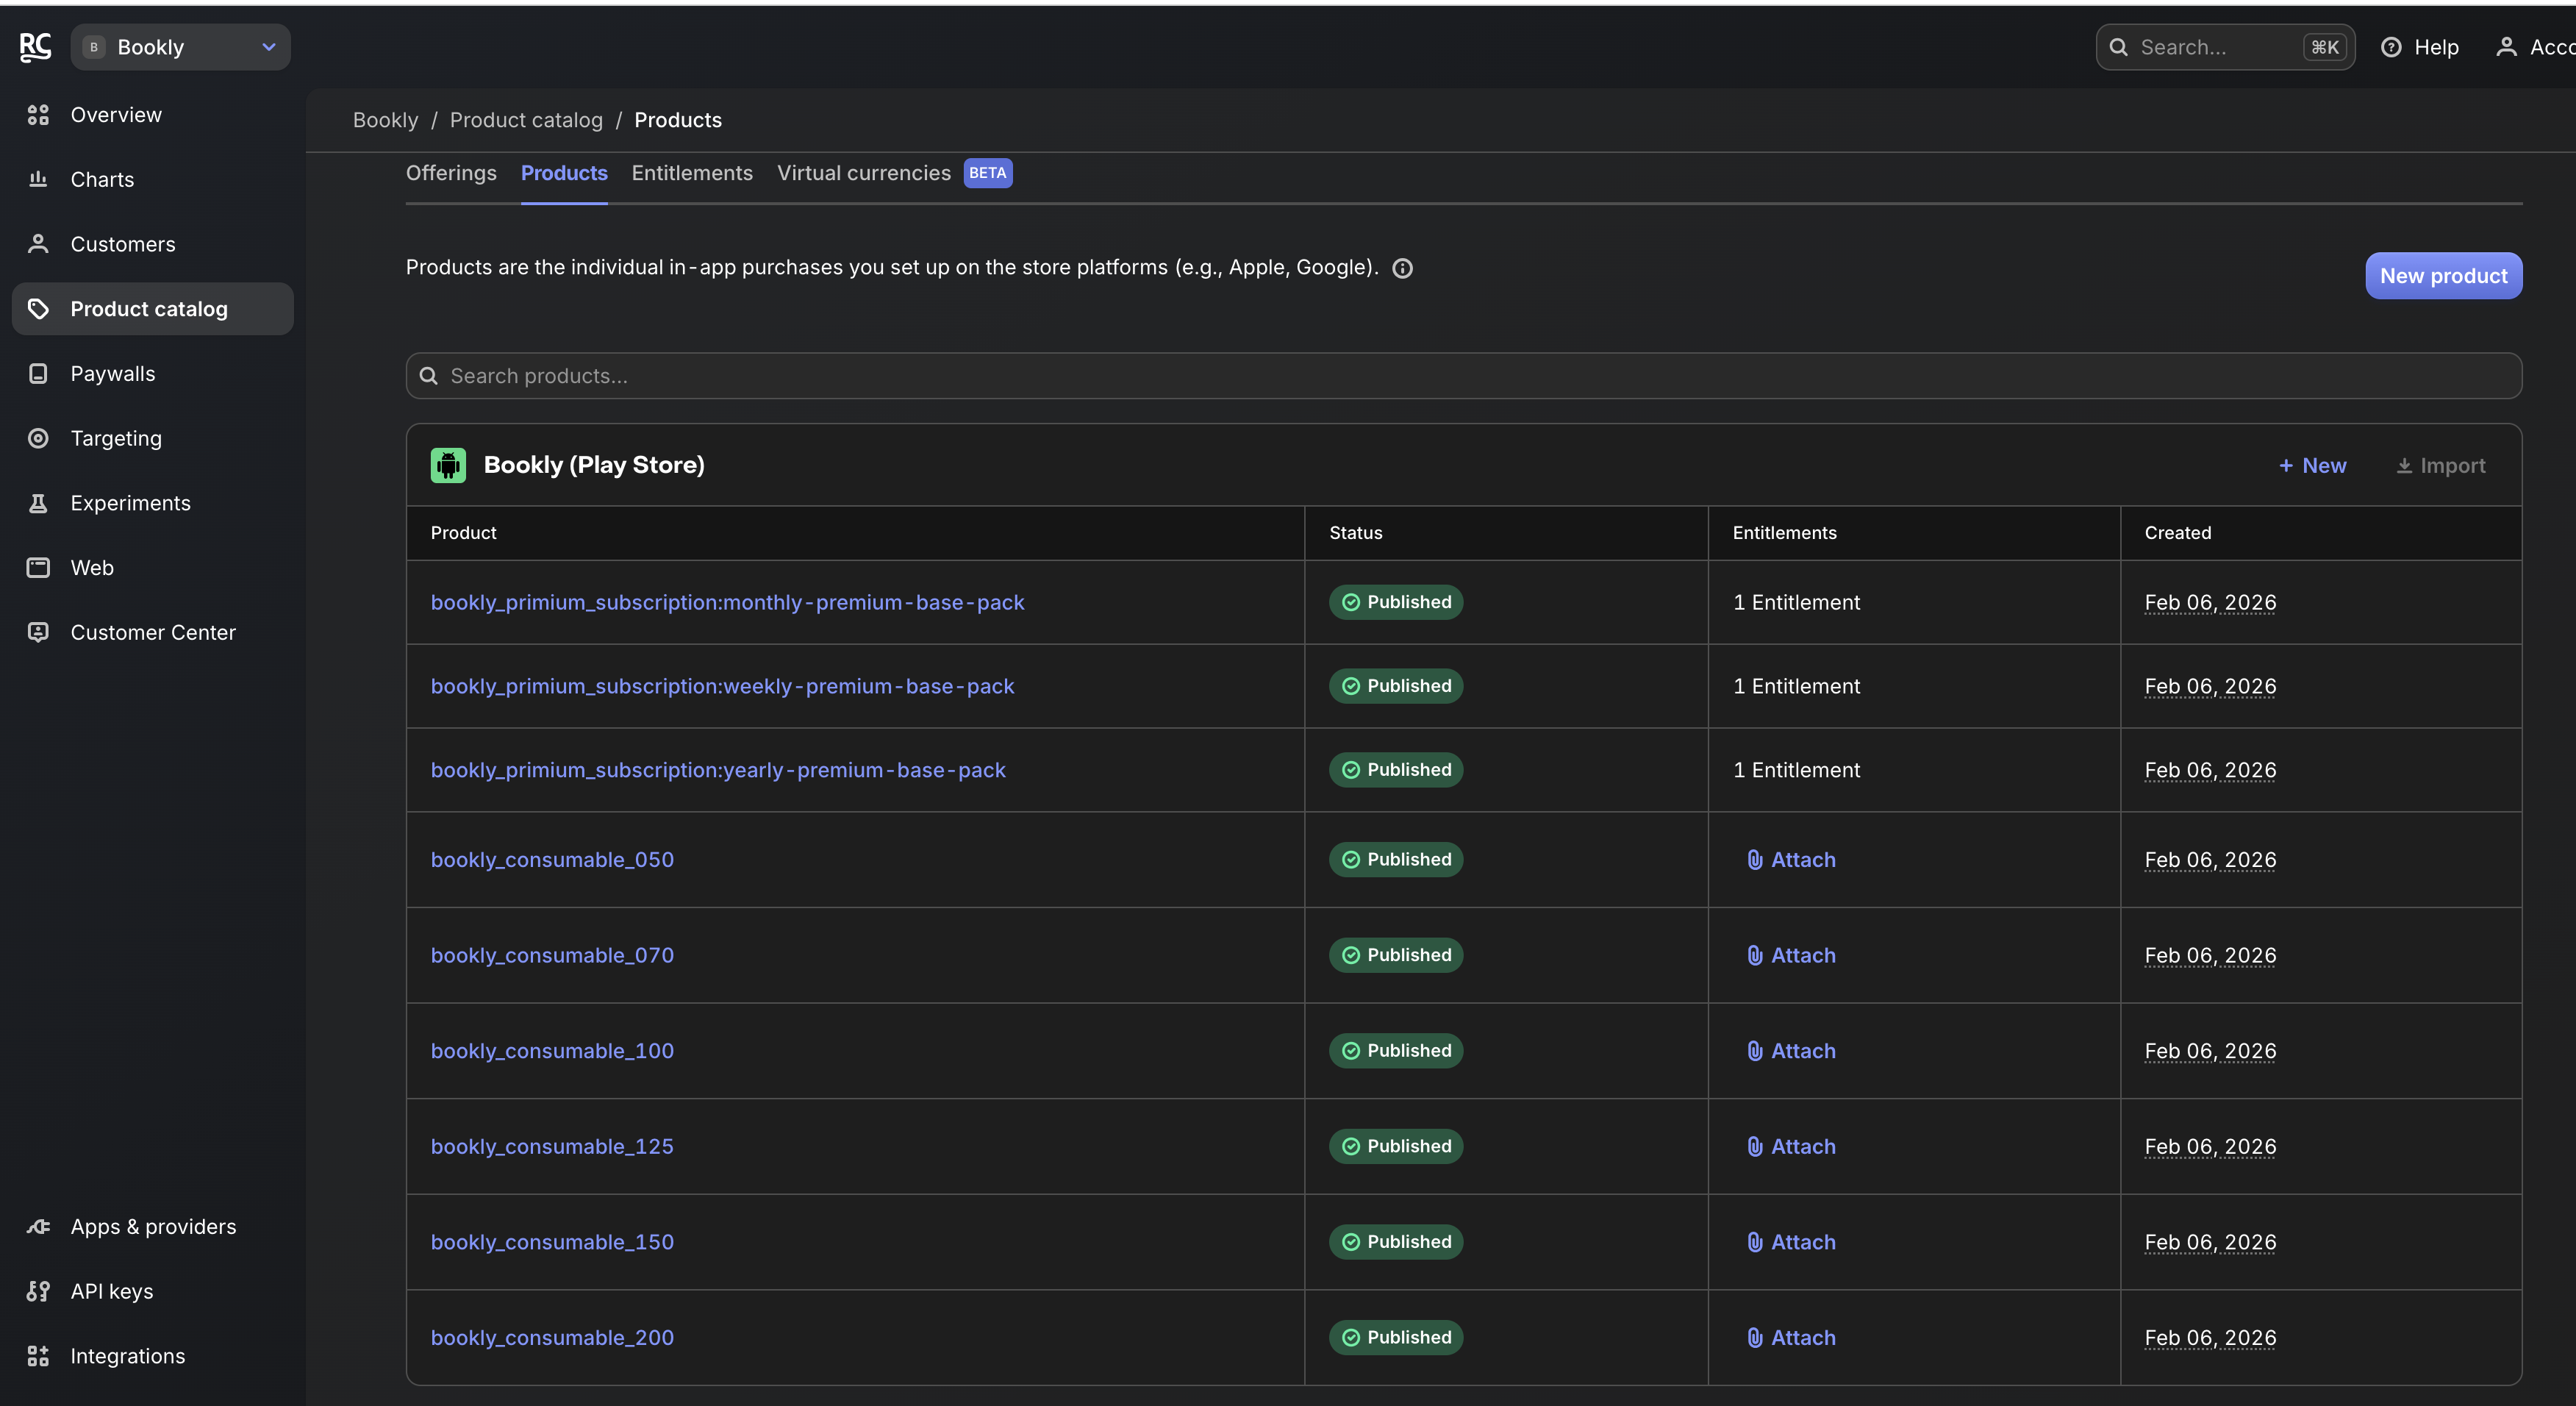
Import the products you created in the Play Console/App Store into your RevenueCat account.
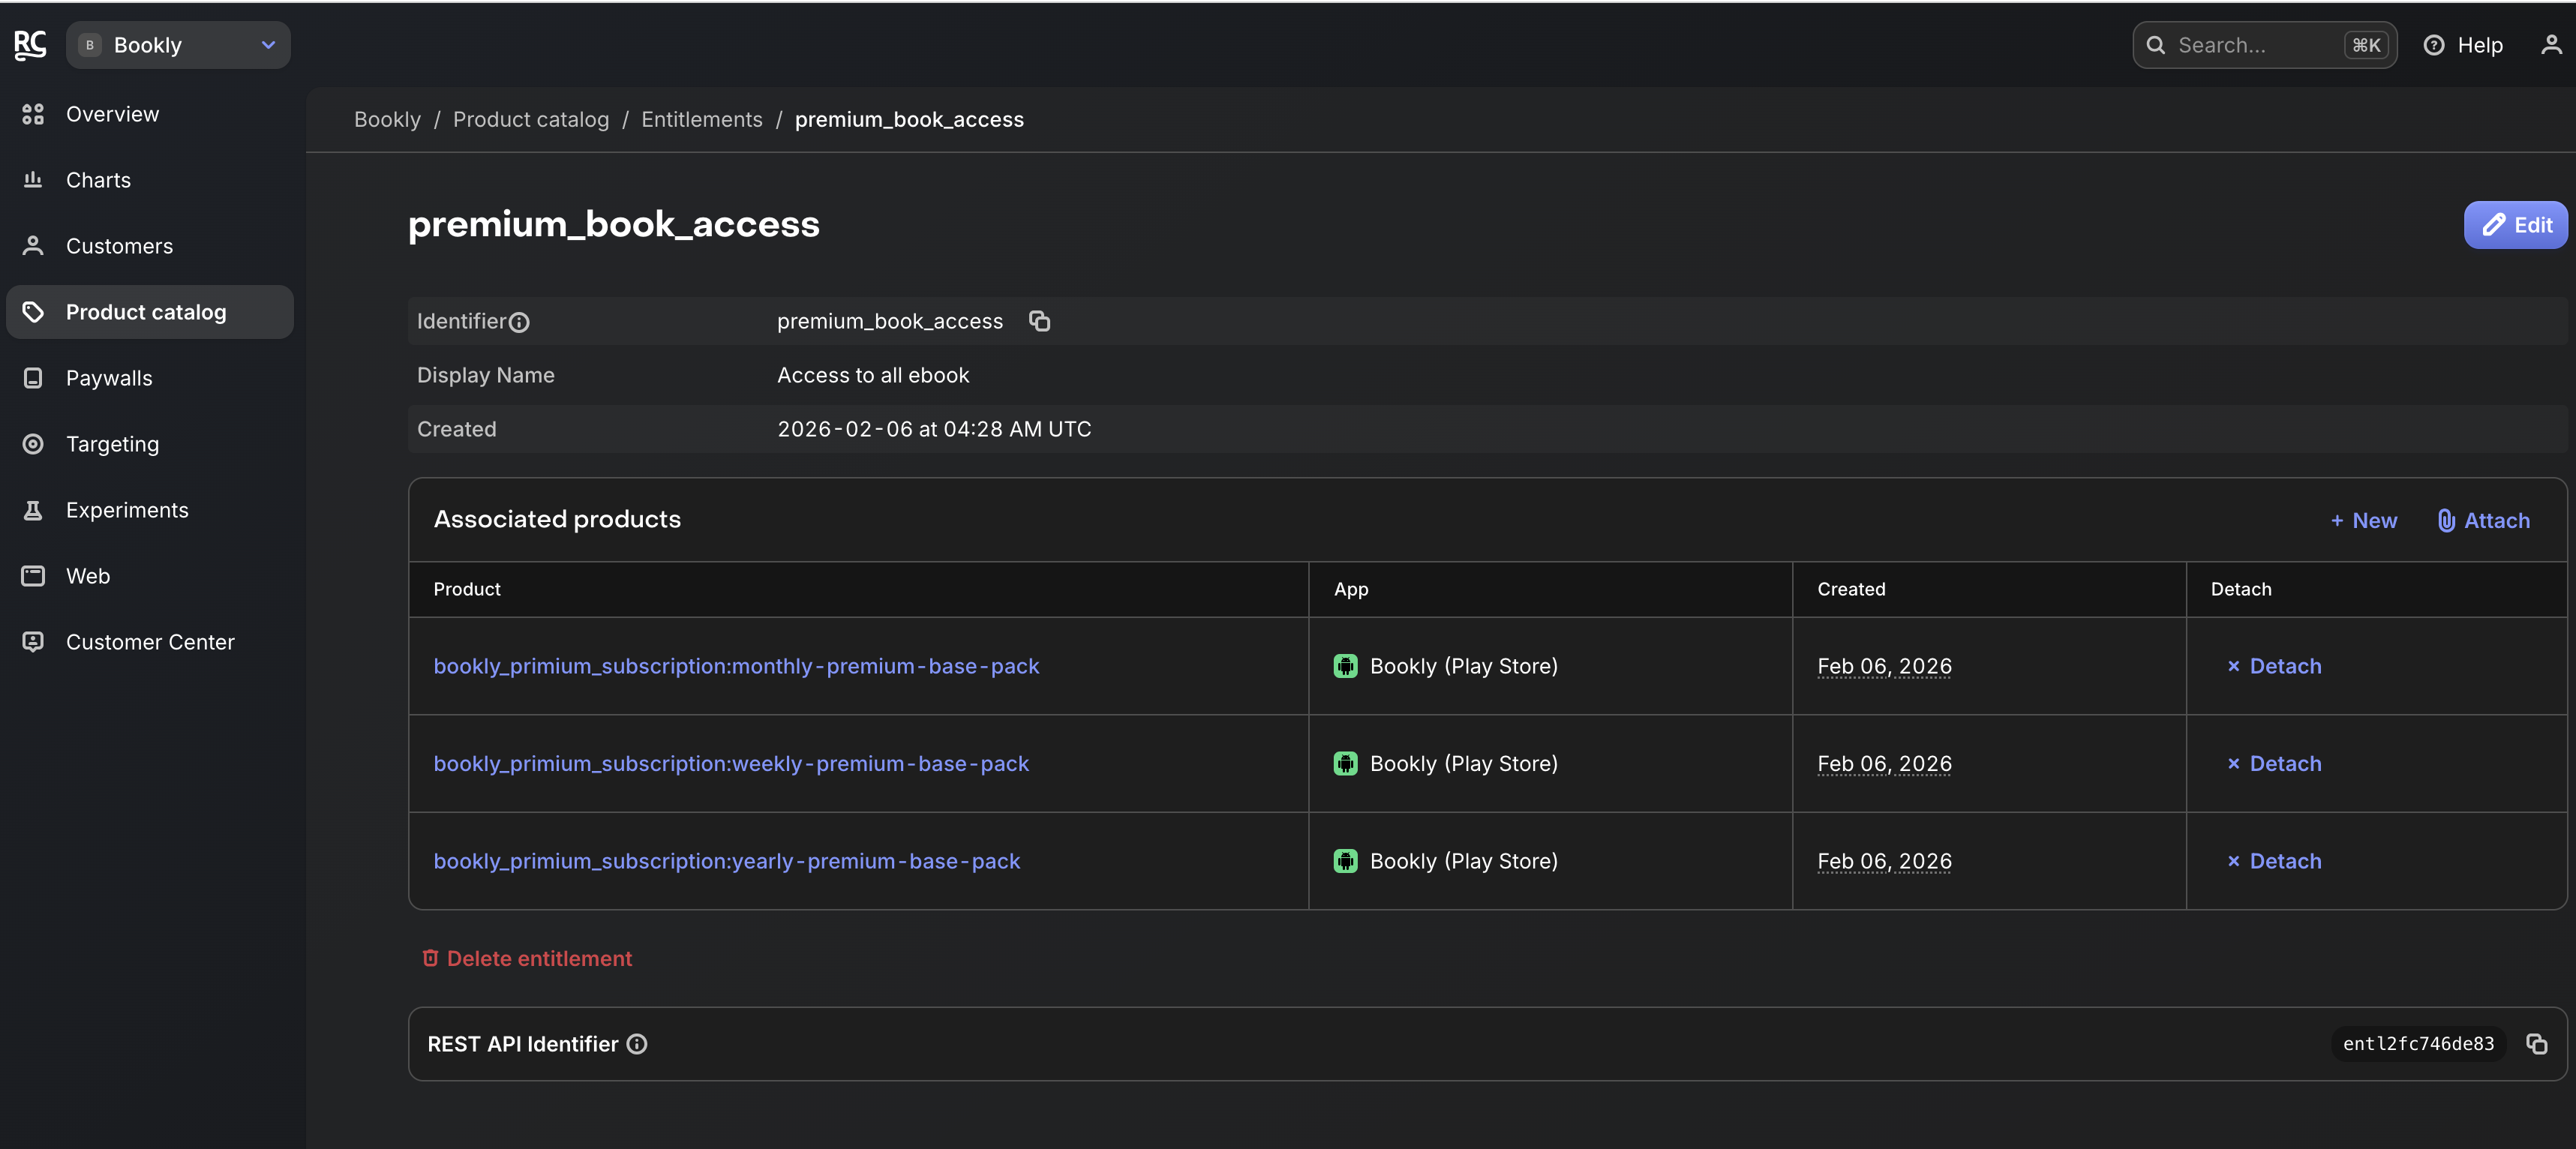
Set up your Entitlements.
CRITICAL: Ensure that your Entitlement Identifier in RevenueCat matches exactly what is shown in the screenshot below.
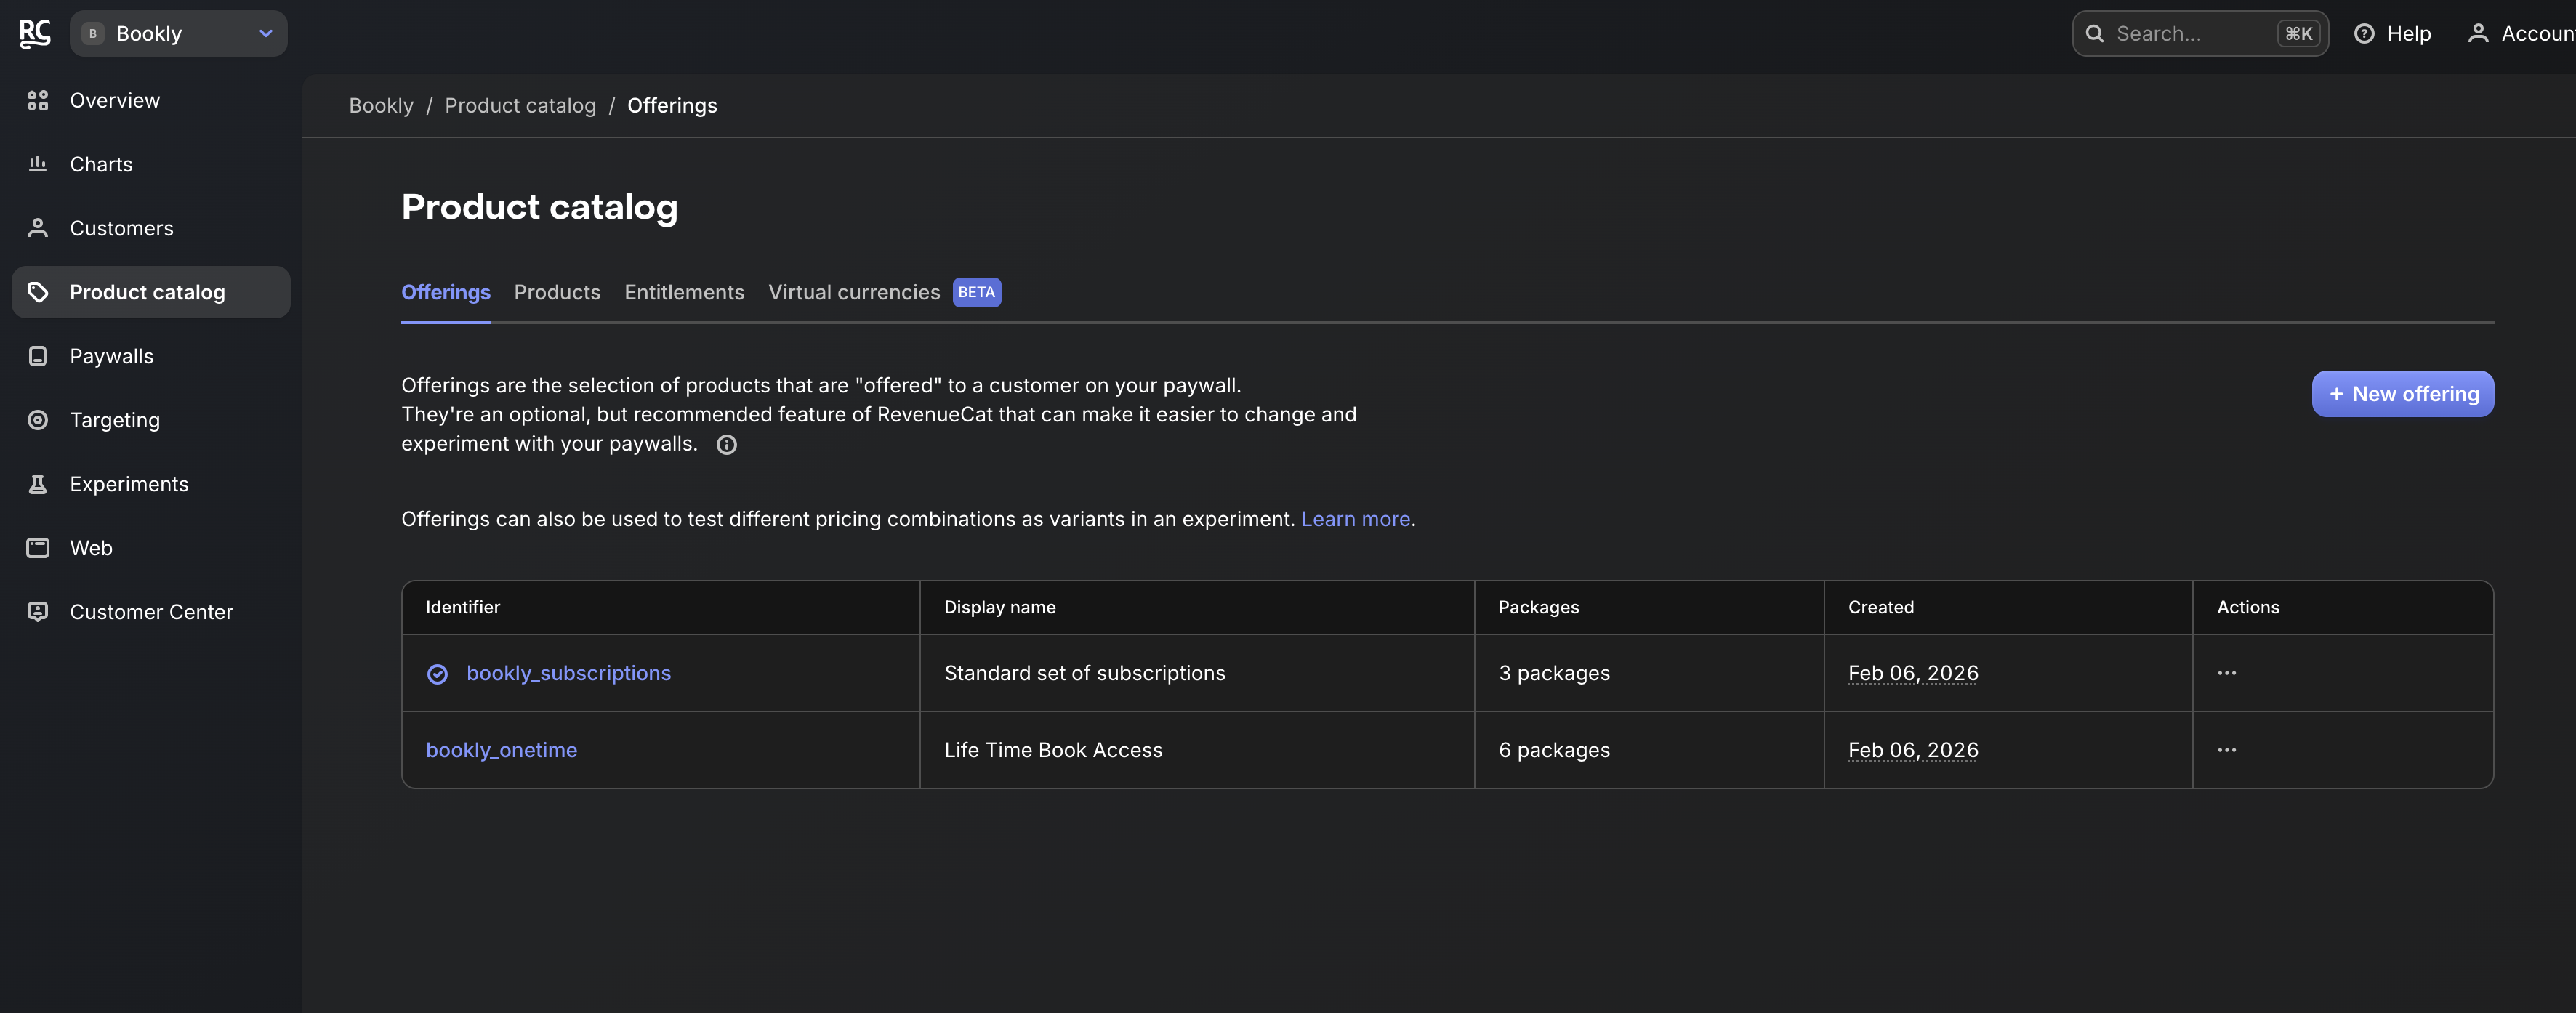
Configure your Offerings.
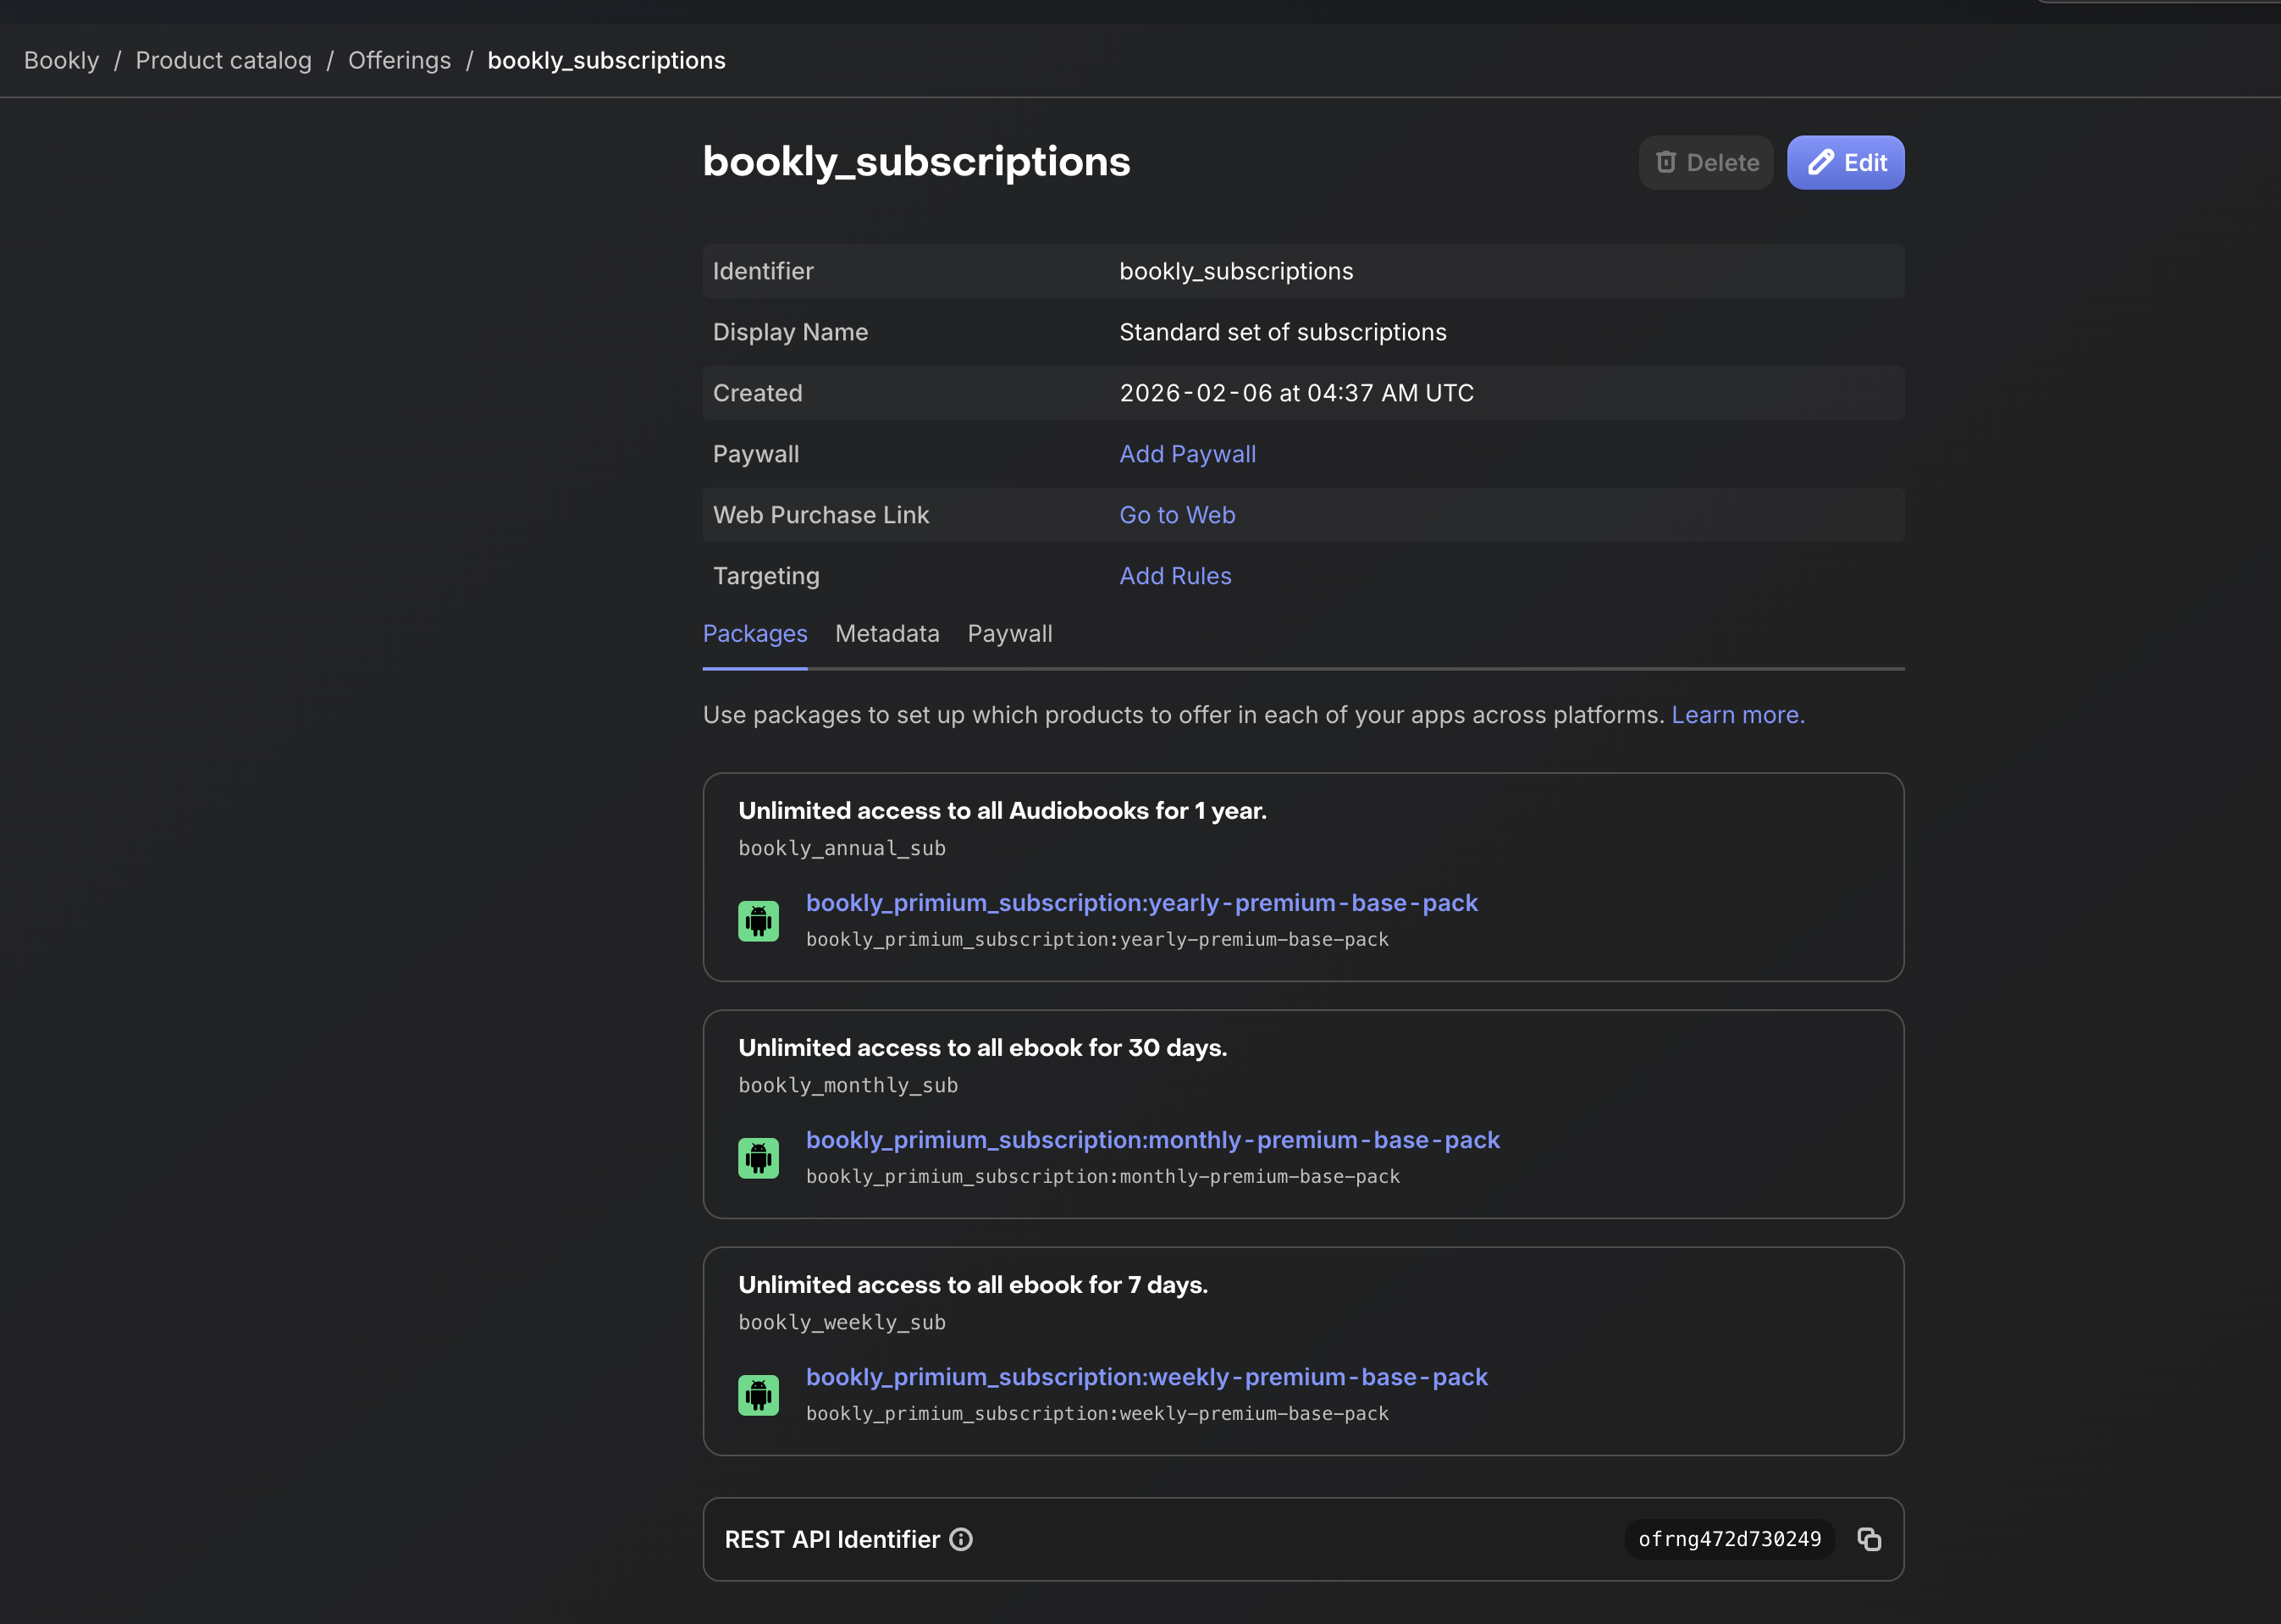
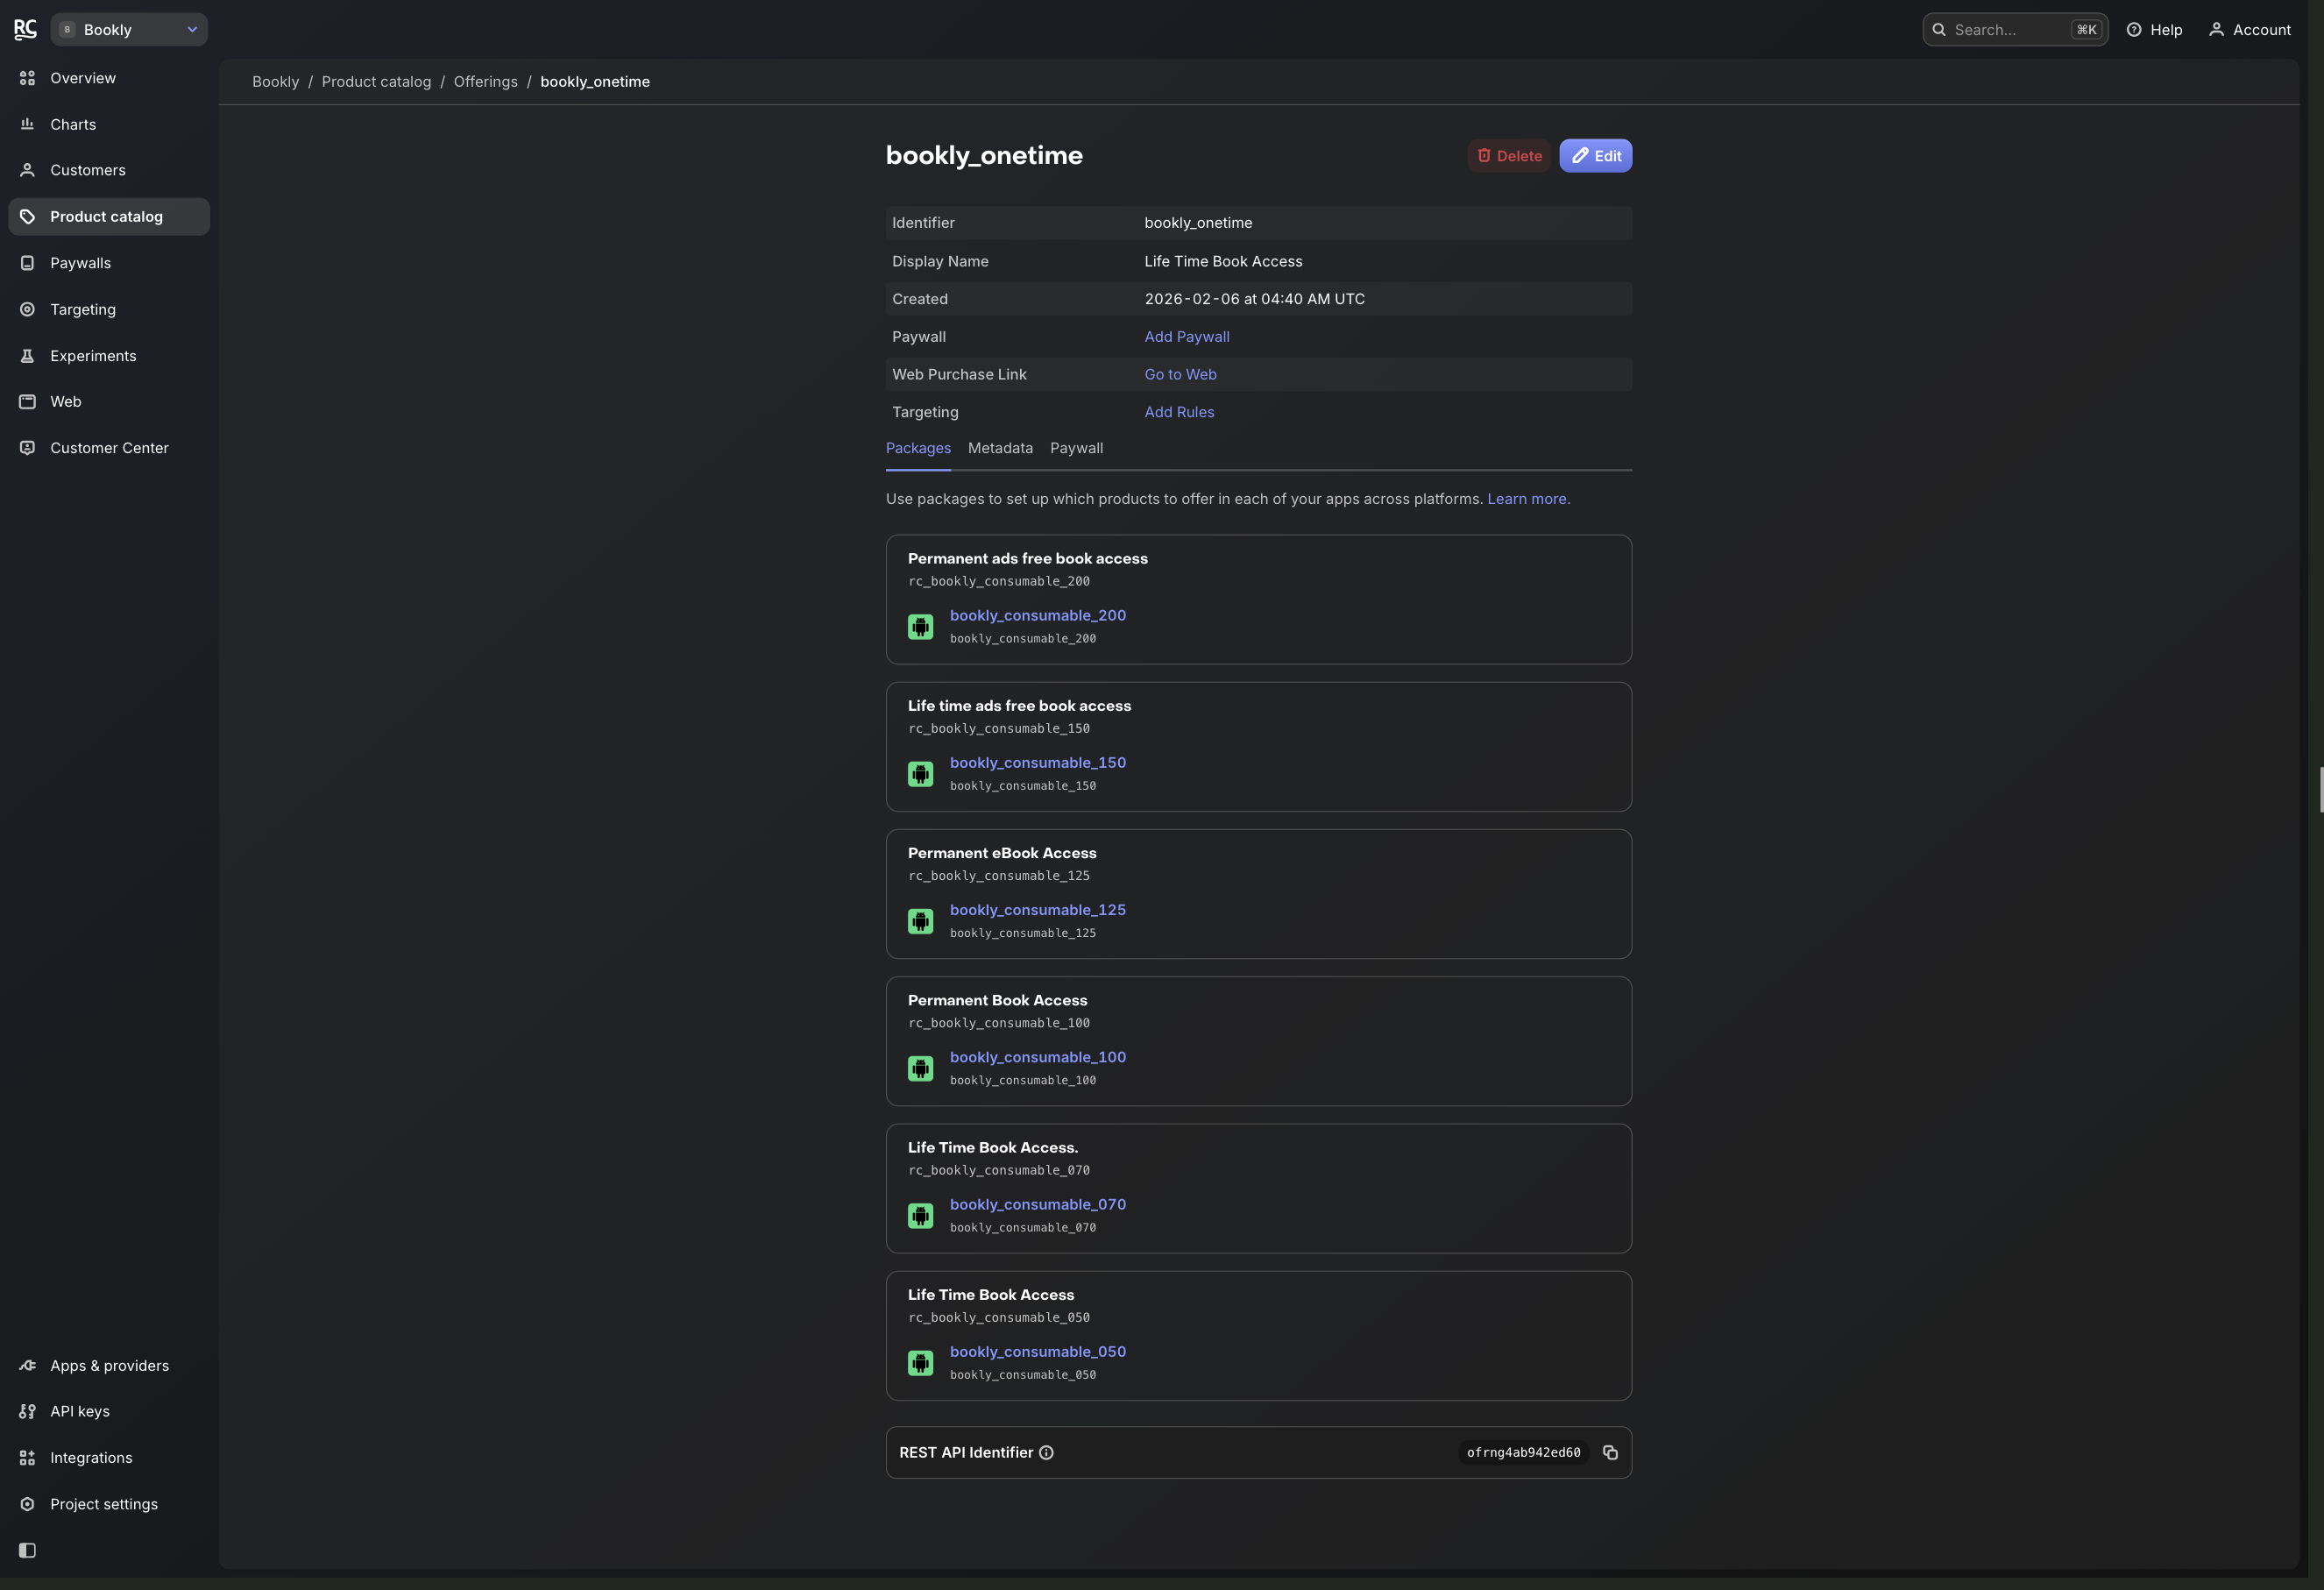
CRITICAL: Ensure that your Offering IDs in RevenueCat match exactly what is defined in your app_config.dart file (e.g., bookly_subscriptions and bookly_onetime).
12. Build and Release
Build for Android (APK)
Run the following command to build the APK:
flutter build apk
This command will compile your Flutter code and generate the APK file. You can find the APK in the build/app/outputs/flutter-apk directory inside your project folder. The APK file will be named something like app-release.apk or app-debug.apk.
Prepare for Google Play Store (App Bundle)
Before deploying to the Play Store, additional configuration is needed. You must create an upload keystore.
1. Create an upload keystore
Run the following command at the command line. On macOS or Linux, use the following command:
Important: After running this keystore generation command, you need to enter some information. Make sure the keystore password is set carefully.
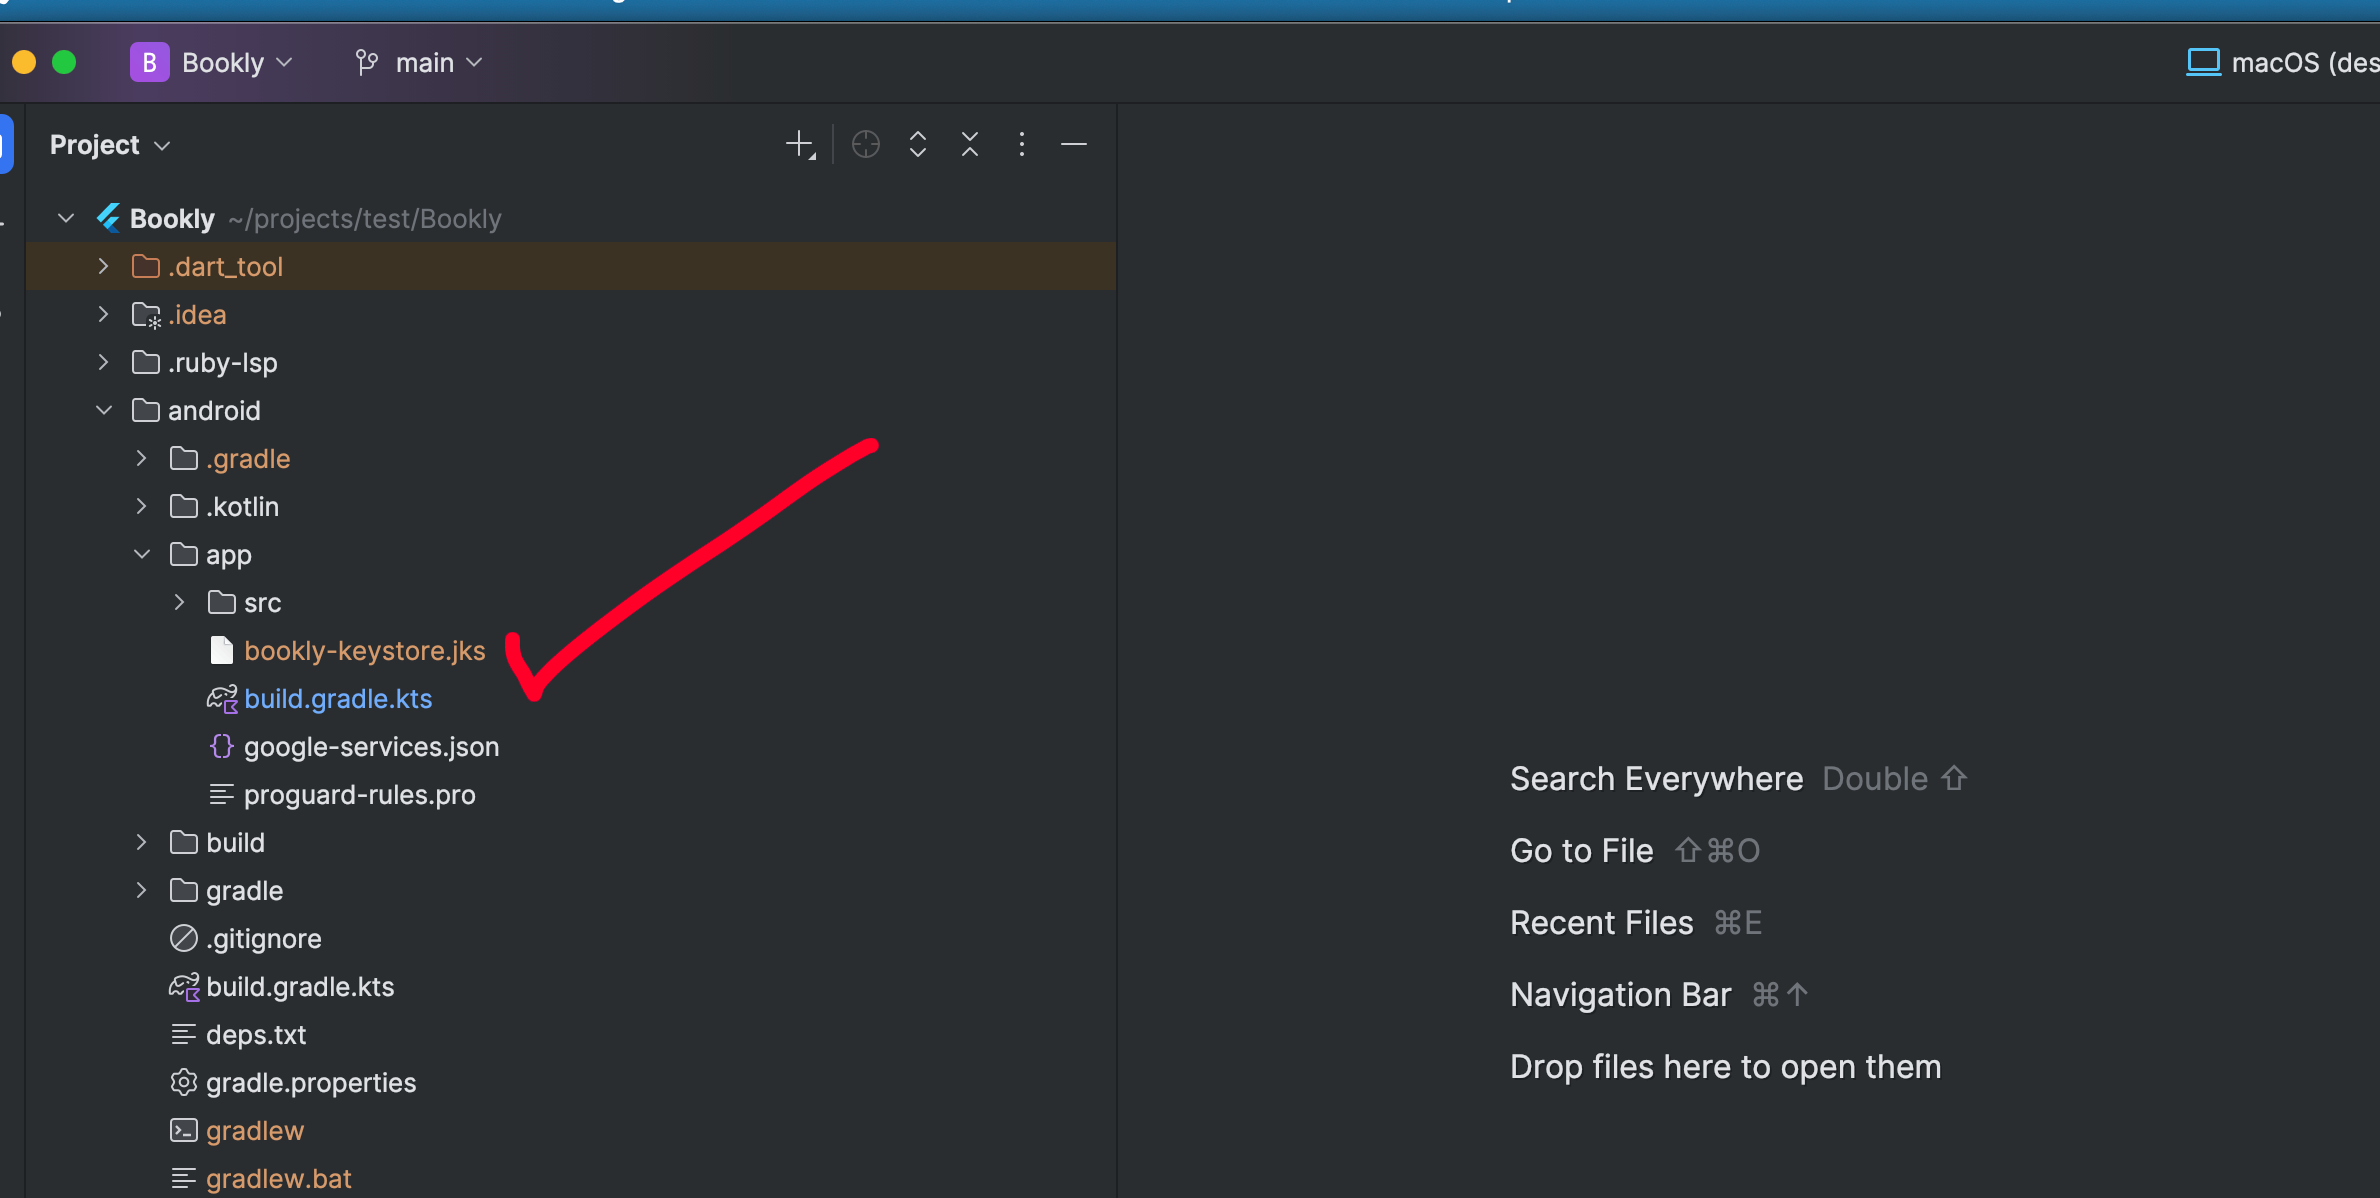
2. Replace the Keystore File
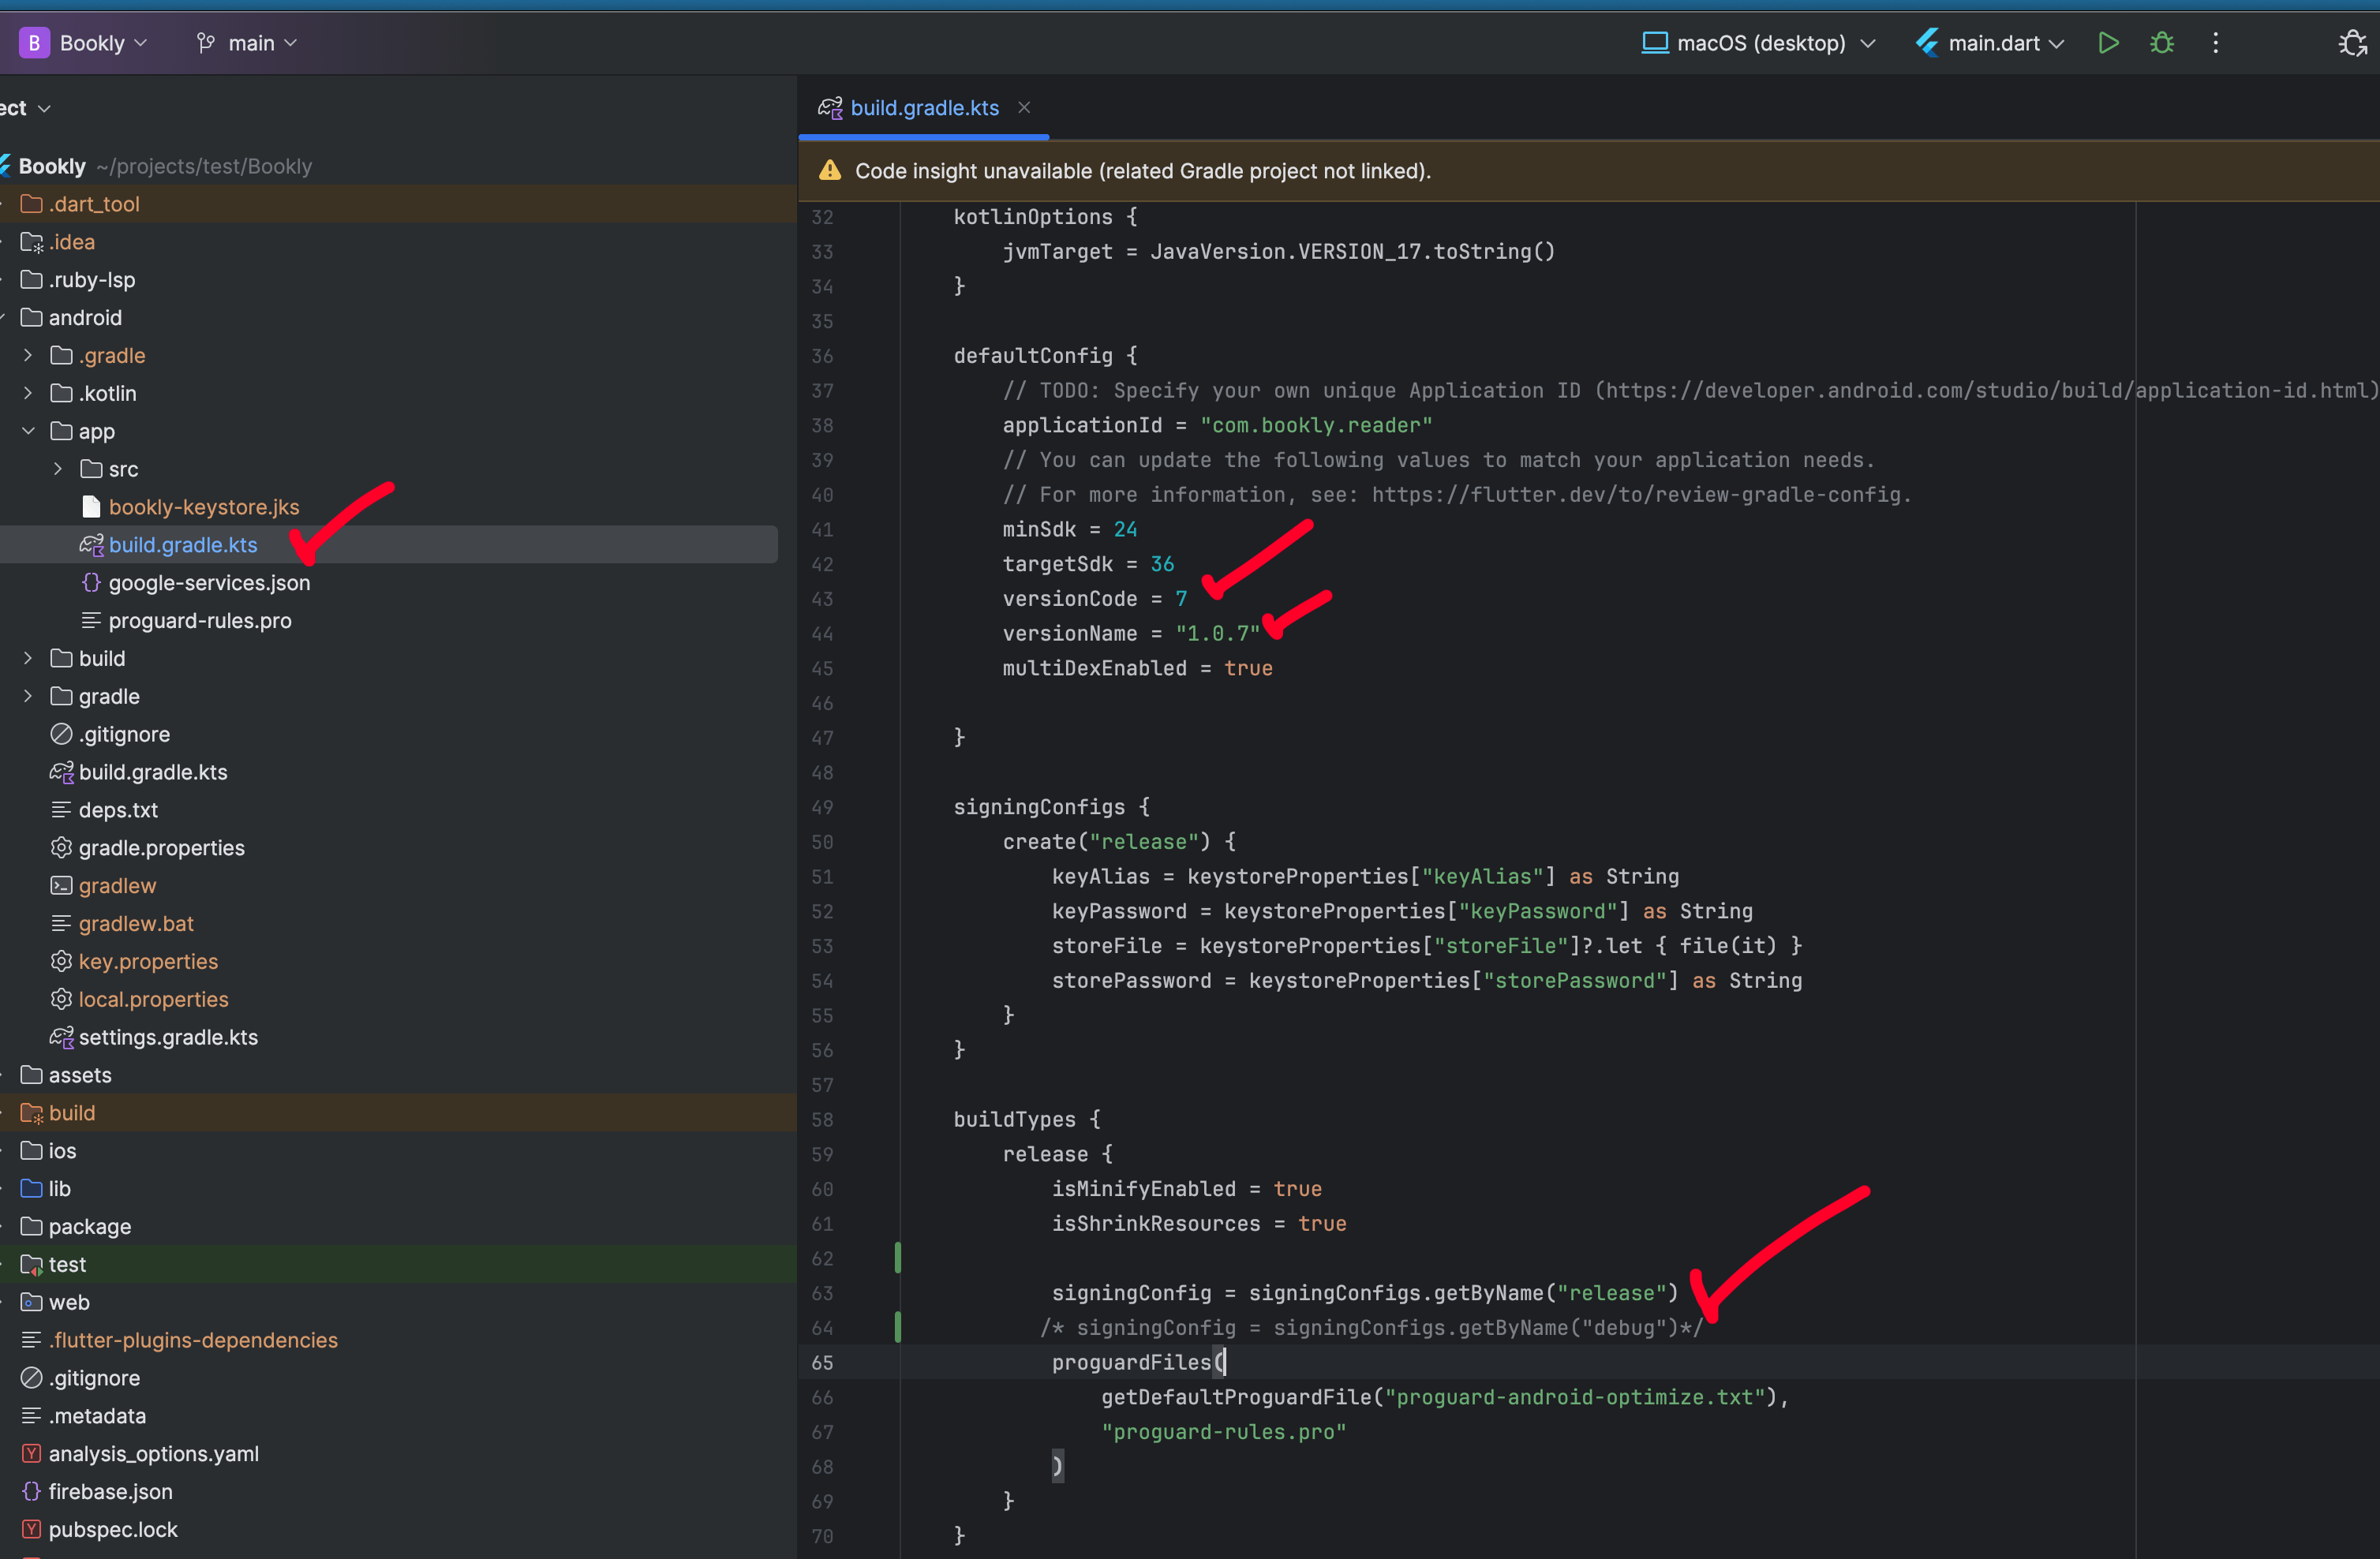
After generating upload-keystore.jks, replace the existing project bookly-keystore.jks with your new upload-keystore.jks in the <project>/android/app directory.
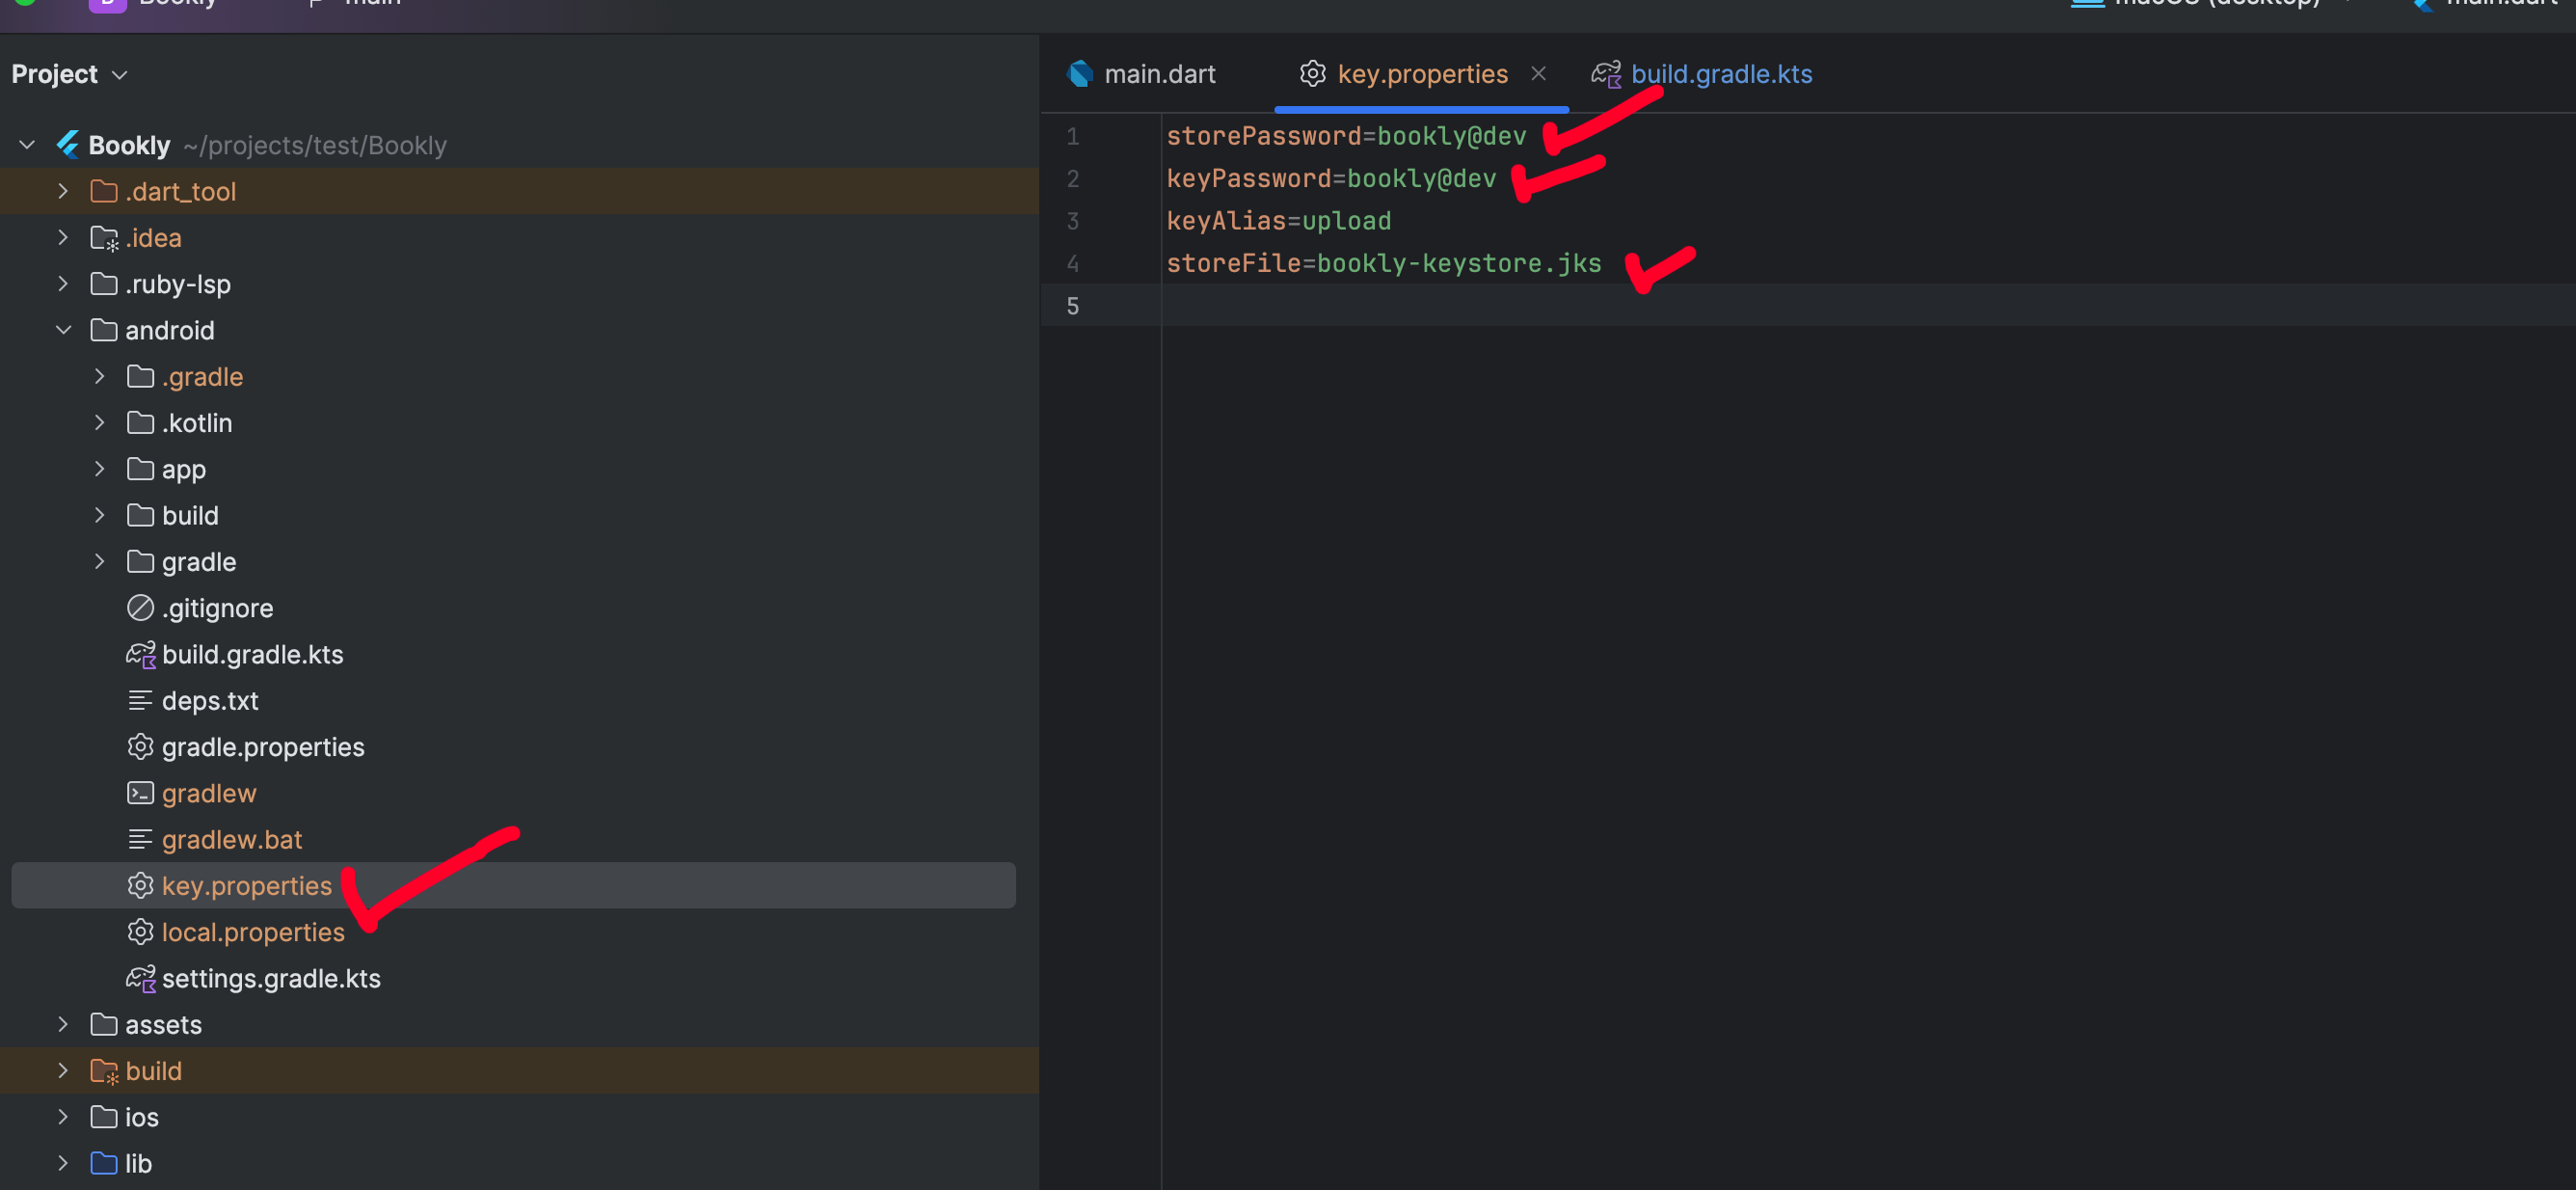
3. Update Key Properties
Update storePassword, keyPassword, and storeFile with your own credentials in <project>/android/key.properties.
4. Update App Version
Update your app version in <project>/android/app/build.gradle.kts.
5. Generate the App Bundle
Now you have completed all the release configurations. Generate the app bundle using the following command:
flutter build appbundle
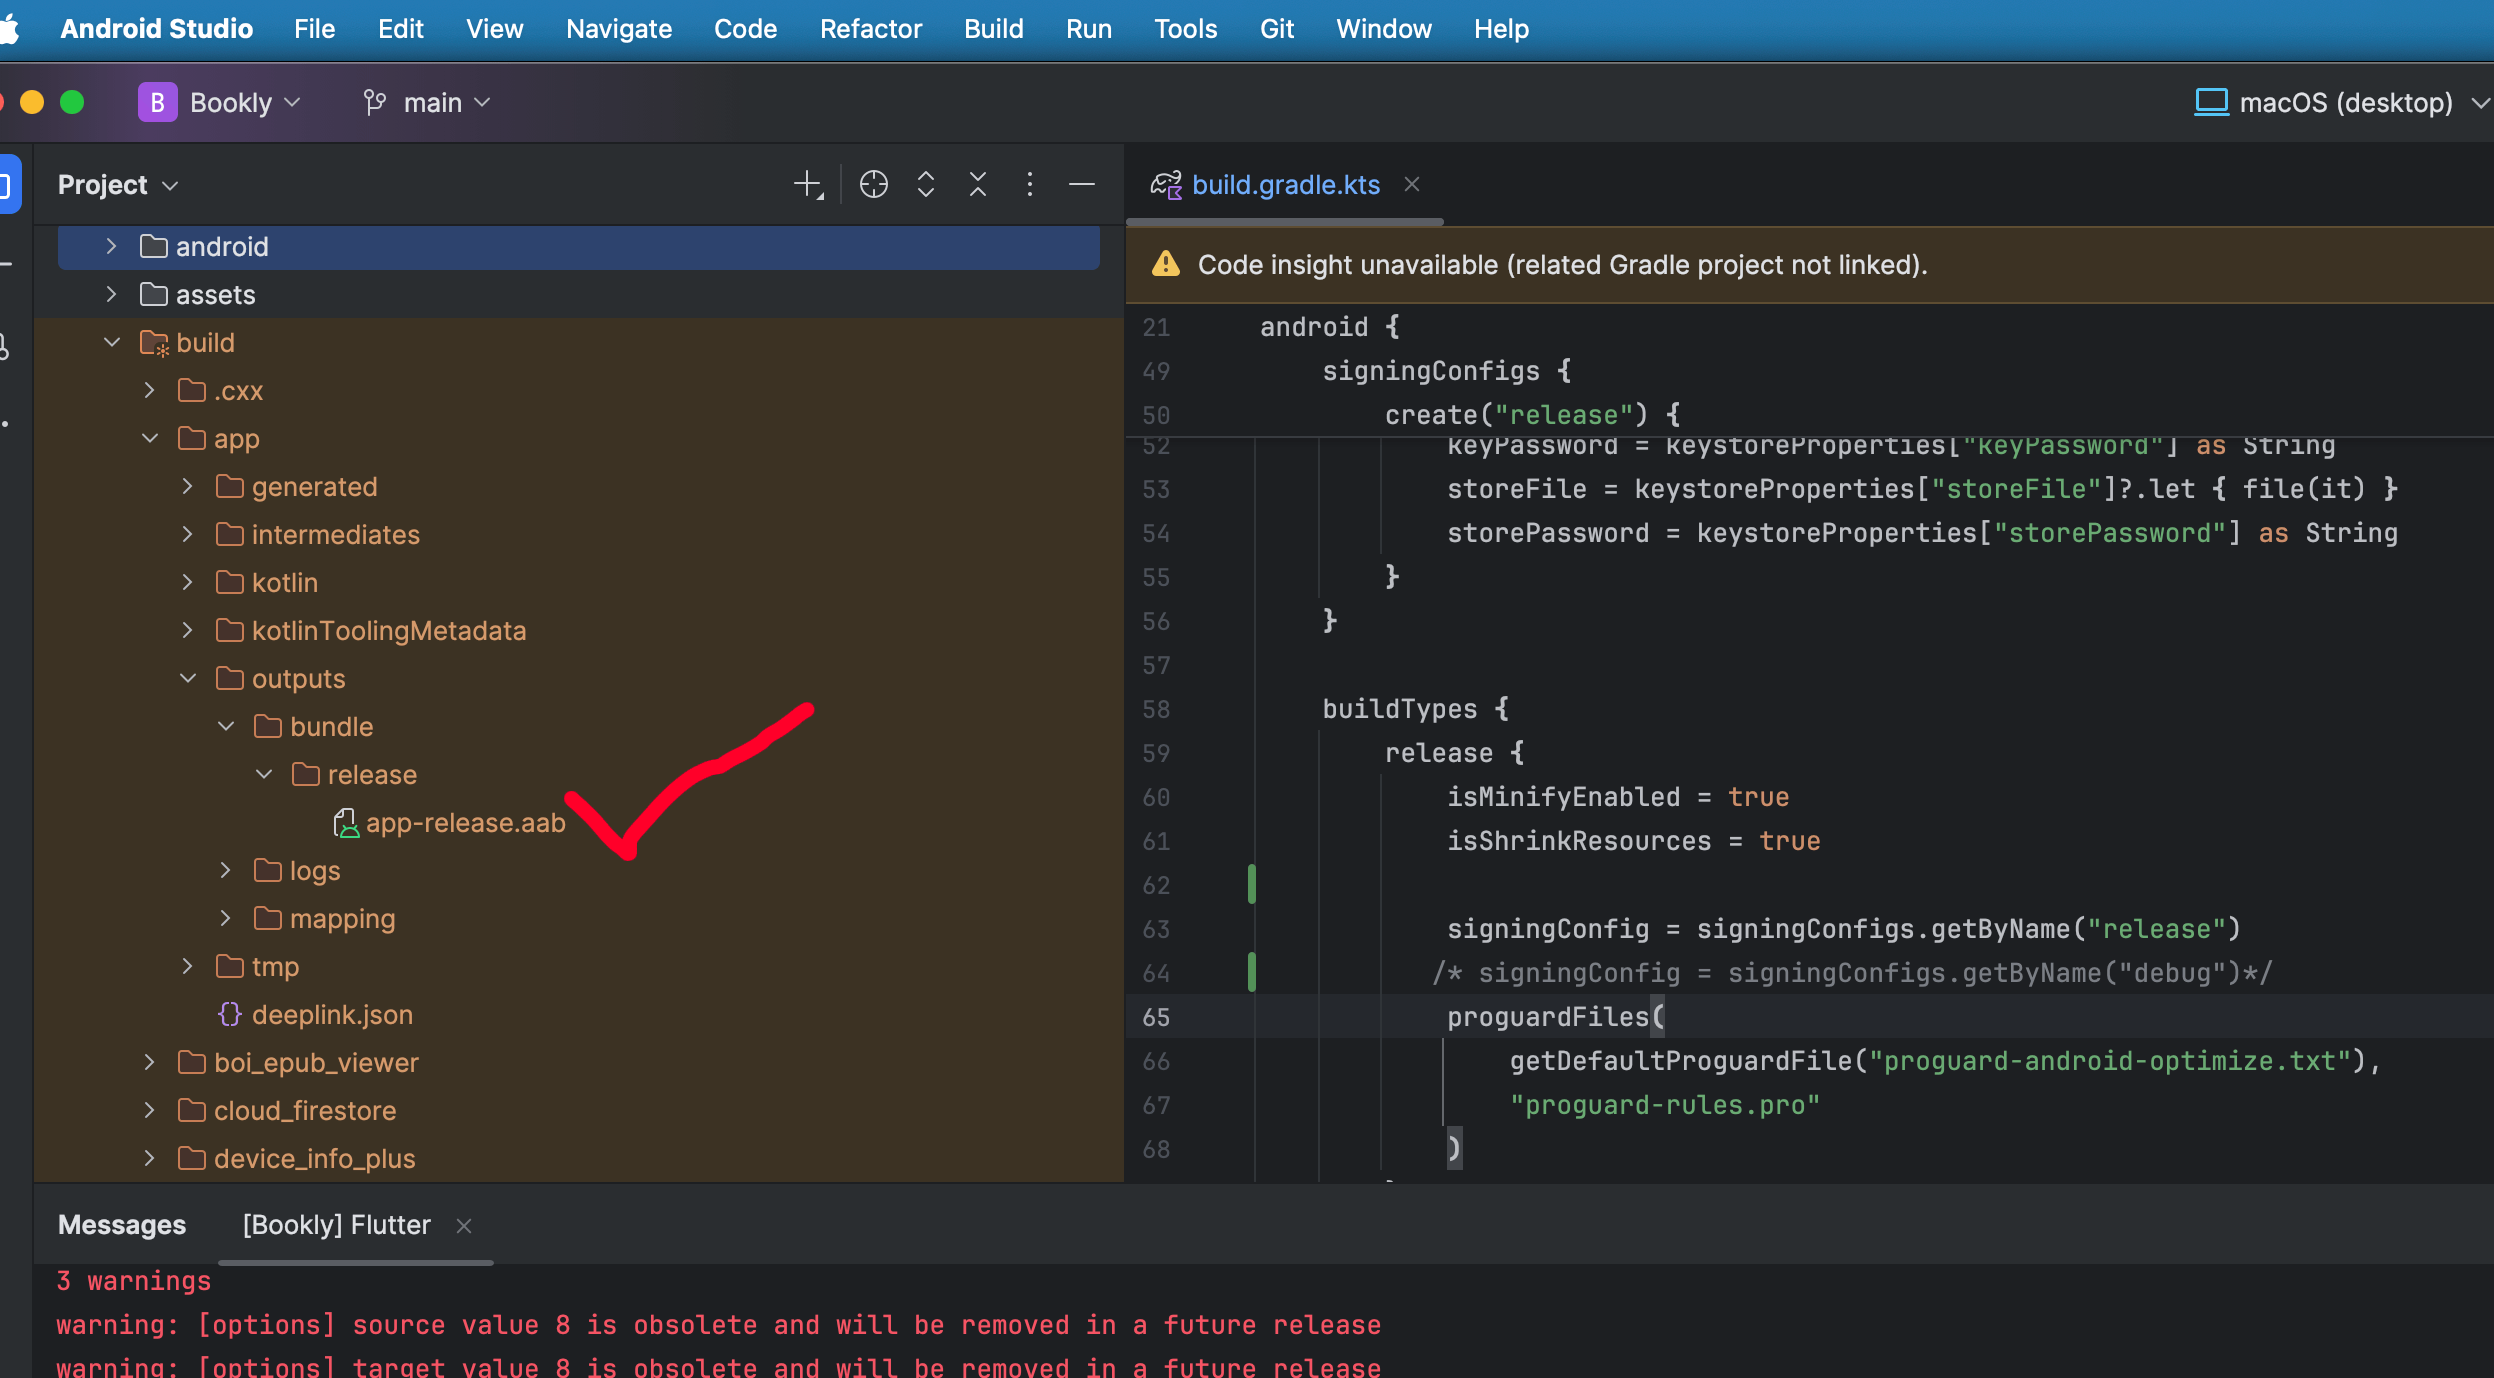
After a successful build, you will find your app bundle in <project>/build/app/outputs/bundle/release/app-release.aab. Now you can upload it to your Google Play Console.
Build for iOS
There is no general way to generate apps for iOS locally without the Apple ecosystem. Apple doesn’t allow you to install apps via direct download. If you want to install it on your iOS device for testing, you can run it directly using Xcode. For deploying to production, please follow the official Flutter documentation here: https://docs.flutter.dev/deployment/ios
Run on a Physical iOS Device
Configure Xcode: Open Xcode and go to Xcode > Settings... > Accounts. Sign in with your Apple ID (create a free account at developer.apple.com if needed). Add your Apple ID and select your team (usually your personal name for free accounts).
Enable Developer Mode (iOS 16 and later): On your iOS device, go to Settings > Privacy & Security. Scroll to Developer Mode and toggle it ON. Restart the device if prompted.
Trust the Developer: Connect your iOS device to your Mac via a USB cable. On the device, you may see a prompt to “Trust This Computer?” Tap Trust and enter your passcode. In Xcode, open Window > Devices and Simulators. Select your device and ensure it’s listed as connected.
Verify Device Detection: Run the following command in your terminal:
flutter devices
This lists your iOS device (e.g., iPhone 14 (ios)). If the device doesn’t appear, check the USB connection and ensure Xcode recognizes the device.
Run the App: In your Flutter project directory, run:
flutter run
If multiple devices are connected, specify the device:
flutter run -d iPhone-14
Example: Running on an iPhone 13
Connect the iPhone to your Mac.
Enable Developer Mode in Settings > Privacy & Security.
Trust the computer when prompted.
Run flutter devices to confirm detection (e.g., iPhone 13 (ios)).
Execute:
flutter run -d iPhone-13
Helpful Resource: For a more detailed guide on running Flutter on physical devices, check out this excellent article: Running Flutter on a Physical Device.
13. Backend Setup (NestJS API)
The backend powers both the mobile app and the admin panel. Set this up first — the app and admin panel cannot run without it.
Node.js
20 LTS or newer
PostgreSQL
14 or newer
Process Manager
PM2 (production)
Stack
NestJS 11 + TypeORM
Step 1: Install dependencies
Extract the backend folder onto your server or local machine.
Open a terminal in that folder and run:
npm ci
Step 2: Create the database
Create an empty PostgreSQL database:
createdb bookly
Or from inside psql:
CREATE DATABASE bookly;
Step 3: Configure your environment
Copy the example file:
cp .env.example .env
Open .env and fill in the required values below. Every other variable is optional — the matching feature simply stays switched off until you configure it.
Variable
What to set
DB_HOST DB_PORT DB_USER DB_PASSWORD DB_NAME
Your PostgreSQL connection details.
BASE_URL
The public address of this API, with no trailing slash. Example: https://api.your-domain.com
JWT_SECRET REFRESH_TOKEN_SECRET
Two different long random strings. Generate each with: openssl rand -hex 48
BOOTSTRAP_ADMIN_EMAIL BOOTSTRAP_ADMIN_PASSWORD
The first admin account. This is what you sign into the admin panel with.
DB_SYNC
Set to true for the very first run so the database tables are created for you.
APP_LOCALES
Active content languages, comma separated. Supported: en, bn, ar, hi
Never reuse the example secrets.JWT_SECRET and REFRESH_TOKEN_SECRET sign your users' login tokens. If you leave the placeholder values in place, anyone can forge a login for any account, including an administrator.
Step 4: First run
Start the server:
npm run start:dev
On the first boot against an empty database the server creates the role rows and your administrator account. Look for this line in the console:
Superadmin bootstrap complete for admin@your-domain.com
Open http://localhost:5008/api/docs to confirm the API is running. You should see the Swagger documentation page.
Backend is live. You can now set up the admin panel (section 14) and point the mobile app at this API (section 8).
Step 5: Lock it down after the first login
Once you have signed into the admin panel successfully, make these three changes in .env and restart the server:
Set DB_SYNC=false. Leaving it on lets schema changes be applied automatically, which you do not want on a live database.
Delete the BOOTSTRAP_ADMIN_EMAIL and BOOTSTRAP_ADMIN_PASSWORD lines. They are only needed once.
Change your administrator password from inside the admin panel.
Good to know: the bootstrap only runs while the database has no users at all. It will never overwrite an existing account, so leaving the variables in place is harmless — but removing them keeps the password out of your config file.
Step 6: File storage
Book covers, avatars, banners and the book files themselves (EPUB/PDF) need somewhere to live. The backend picks a storage driver automatically — the first fully configured one wins:
Cloudflare R2 — recommended for production.
Bunny.net — alternative CDN.
Local disk — the fallback. Files go to the uploads/ folder and are served from /uploads/. No configuration needed, which is why a fresh install works straight away.
To use Cloudflare R2, fill in all of these in .env:
Common mistake: if even one of those values is missing, R2 is skipped silently and the backend quietly falls back to local disk. There is no error message. If you expected files in your bucket but they keep appearing in the uploads/ folder, check that all six values are filled in — especially CLOUDFLARE_R2_PUBLIC_URL, which is easy to overlook.
Step 7: Optional integrations
All of these are switched off by default. The server starts and runs normally with every one of them unconfigured, so set up only what you need.
Taken from your Firebase service-account JSON (Project settings → Service accounts). Use the same Firebase project you set up for the app in section 4.
Needed only if you sell through the App Store / Play Store. See section 11.
Background jobs
PG_BOSS_ENABLED PG_BOSS_SCHEMA
Used for scheduled work such as rental-expiry reminders. Without it the app falls back to in-process scheduling, which is fine for a single server.
Firebase private key formatting: paste the key on a single line, wrapped in double quotes, keeping the \n escape sequences exactly as they appear in the JSON file:
If your hosting panel mangles that, use FIREBASE_PRIVATE_KEY_BASE64 instead and paste the same key base64-encoded.
Step 8: Going live with PM2
Build the project:
npm ci
npm run build
Open prod.config.js and change cwd to the folder you deployed into.
Start it:
pm2 start prod.config.js --env production
Check the logs:
pm2 logs bookly_backend --lines 30
Where do the secrets go?prod.config.js contains no credentials by design. The app reads them from the .env file sitting in the folder named by cwd, so make sure your .env is uploaded there.
Step 9: nginx configuration
If you serve the API through nginx, use the settings below. Both matter:
client_max_body_size must be at least as large as your HTTP_BODY_LIMIT (default 50mb), otherwise book uploads fail with a 413 error.
The X-Forwarded-For header lets the backend see each visitor's real IP address. Without it every visitor looks like the same person to the rate limiter, and they all get blocked together.
Step 10: Security settings
These are enabled out of the box. You may want to tune them for your deployment:
Variable
Default
What it does
CORS_ORIGINS
empty
Comma-separated list of web addresses allowed to call the API. Empty means any origin is allowed — fine locally, but in production set it to your admin panel's address. Mobile apps are unaffected either way.
RATE_LIMIT_MAX RATE_LIMIT_TTL
120 per 60s
General request limit per visitor.
AUTH_RATE_LIMIT_MAX AUTH_RATE_LIMIT_TTL
20 per 60s
Tighter limit on login, registration, OTP and password reset, to stop password-guessing attacks.
PROTECT_BOOK_FILES
false
Set to true to add an expiring signature to book file links, so a link that leaks cannot be reused. Your apps need no changes for this — the signature travels inside the link.
Paid books are already protected. Regardless of the setting above, the book file link is only ever given to a reader who has bought, rented or subscribed to that title. Free and ad-supported books remain open to everyone.
Troubleshooting
Problem
Solution
Warning at startup: Firebase is not configured
Normal if you have not set up push notifications. The server runs fine. Fill in the FIREBASE_* values to remove it.
Cannot sign into the admin panel
The admin account is only created when the database is completely empty. Check the startup logs for the Superadmin bootstrap complete line.
No tables were created
DB_SYNC=true is required for the first run.
413 error when uploading a book
Raise client_max_body_size in nginx (see step 9).
429 error when logging in
Rate limit reached. Wait a minute, raise AUTH_RATE_LIMIT_MAX, or check that nginx forwards X-Forwarded-For.
CORS errors in the admin panel
Add the admin panel's address to CORS_ORIGINS.
Files are not going to Cloudflare R2
One of the six R2 values is missing. See the warning in step 6.
Swagger shows the wrong address
Set SWAGGER_SERVER_URL to your public API address.
14. Admin Panel Setup (Next.js)
The admin panel is where you manage books, authors, users, subscriptions and everything else in your store. Complete the backend setup (section 13) first — the panel is only a front-end for that API.
Node.js
20 LTS or newer
Stack
Next.js 16 + React 19
Requires
A running backend
Default Port
3000 dev / 4000 live
Step 1: Install dependencies
Extract the admin panel folder.
Open a terminal in that folder and run:
npm ci
Step 2: Point it at your backend
Copy the example file:
cp .env.example .env
Open .env and set the three required values:
Variable
What to set
NEXT_PUBLIC_API_URL
Your backend address including /api/v1. Example: https://api.your-domain.com/api/v1
NEXT_PUBLIC_IMAGE_URL
The address your uploaded files are served from, without any /uploads ending. Local storage: https://api.your-domain.com Cloudflare R2 / Bunny: your CDN address
NEXT_PUBLIC_APP_LOCALES
Active languages, comma separated. Must match the backend's APP_LOCALES exactly. Example: en,bn,ar,hi
These two are the most common setup mistakes — please read carefully:
NEXT_PUBLIC_API_URLmust end in /api/v1. Endpoint names are added directly onto this address, so if you leave the version off, every single request returns a 404 and the panel appears completely broken.
NEXT_PUBLIC_IMAGE_URLmust not end in /uploads. The file paths already contain it, so adding it here produces addresses like .../uploads/uploads/cover.jpg and no images load.
A note on these settings: anything beginning with NEXT_PUBLIC_ is built into the browser files, so never put a password or secret key in this file. You must also run npm run build again after changing any of them — editing .env alone will not update an already-built panel.
Step 3: Run it
Start the development server:
npm run dev
Open http://localhost:3000.
Sign in with the BOOTSTRAP_ADMIN_EMAIL and BOOTSTRAP_ADMIN_PASSWORD you set in the backend's .env file.
You are in. Start by adding a few categories and authors, then add your first book. Change your password from the profile menu.
Step 4: Going live
Build the panel:
npm ci
npm run build
Start it directly:
npm run start
This runs on port 4000. To use a different port, edit the start script in package.json (for example next start -p 8080).
Or run it under PM2, which keeps it alive and restarts it after a reboot:
pm2 start prod.config.js --env production
Remember to set cwd in prod.config.js to your deployment folder first.
Do not forget the backend setting: once the panel is live, add its web address to CORS_ORIGINS in the backend's.env and restart the backend. Without this the browser blocks every request and the panel will not load any data.
CORS_ORIGINS=https://admin.your-domain.com
What you can manage
Section
What it covers
Dashboard
Totals for users, books, authors, publishers and categories.
Books
Add and edit books, upload EPUB/PDF files and covers, set pricing, publish or unpublish.
Authors / Publishers / Catalog
Manage the people and categories behind your catalogue.
Users
View and manage accounts and their roles.
Subscription Plans & Prices
Set up your plans, pricing and rental durations.
Book Sales / Subscription Sales
Review orders and active subscriptions.
Home & Banners
Arrange the app home screen sections and promotional banners.
Notifications
Send push notifications to your users (requires Firebase).
Reviews
Moderate reader reviews and comments.
Legal Pages
Edit your Privacy Policy and Terms, which the app displays.
App Version
Control the in-app update prompt.
Multi-language content
Books, authors, publishers and categories can hold a separate title and description per language. The language tabs shown in the panel come from NEXT_PUBLIC_APP_LOCALES.
Keep both sides in sync. If the panel's NEXT_PUBLIC_APP_LOCALES and the backend's APP_LOCALES do not match, you may enter content in a language the backend then discards.
Troubleshooting
Problem
Solution
Every page is empty and all requests return 404
NEXT_PUBLIC_API_URL is missing the /api/v1 ending. Fix it, then run npm run build again.
Images and covers do not load
Either NEXT_PUBLIC_IMAGE_URL wrongly ends in /uploads, or your image host is not allowed. For a separate CDN, add its hostname to NEXT_PUBLIC_EXTRA_IMAGE_HOSTS.
Browser console shows CORS errors
Add the panel's address to CORS_ORIGINS in the backend .env and restart the backend.
Login says the details are wrong
Use the BOOTSTRAP_ADMIN_* details from the backend .env. Confirm the backend created the account by checking its startup logs.
Too many login attempts / 429
The backend rate limiter has kicked in. Wait a minute and try again.
Changing .env has no effect
Settings are baked in when the panel is built. Run npm run build and restart.
Signed out unexpectedly
The login token has expired. Sign in again, or increase JWT_EXPIRES_IN in the backend .env.
15. API Reference
This section covers the request and response formats you will work with most often. The complete, always-current reference for all 166 endpoints is the Swagger UI served by your own backend:
http://localhost:5008/api/docs
Swagger is generated from the source code, so it can never drift out of date. Use Authorize there to paste a token and try any endpoint live.
Conventions
Item
Value
Base path
/api
Version
In the URL: /api/v1/...
Auth header
Authorization: Bearer <access_token>
Content type
application/json (uploads use multipart/form-data)
IDs
UUID v4
Timestamps
ISO 8601 UTC, e.g. 2026-09-19T10:30:00.000Z
The response envelope
Every response — success or failure — uses the same outer shape.
List endpoints add a pagination block. Some also add counts, which are totals across the whole resource and are not affected by your current search filter.
Common list query parameters: page, limit, search, sort, status.
Errors
{
  "success": false,
  "status_code": 401,
  "error": "Unauthorized",
  "message": "Authorization token is missing. Send a Bearer token in the Authorization header.",
  "timestamp": "2026-09-19T10:30:00.000Z"
}
Validation failures return message as an array of strings, one per invalid field:
{
  "success": false,
  "status_code": 400,
  "error": "Validation Error",
  "message": [
    "fullName must be longer than or equal to 2 characters",
    "otp_token must be a string"
  ],
  "timestamp": "2026-09-19T10:30:00.000Z"
}
Handling errors in your client: always check success first, then read status_code. Remember that message is a string for normal errors but an array for validation errors — handle both.
Code
Meaning
200 / 201
Success
400
Validation failed, or a feature is not configured (e.g. SMTP)
401
Missing, invalid or expired token
403
Signed in, but not allowed — or an expired signed book link
404
Not found
409
Conflict, e.g. the email is already registered
413
Upload too large — see the nginx note in section 13
429
Rate limit reached
Multilingual fields
Titles, names and descriptions are objects keyed by language code, not plain strings. Which languages are accepted comes from APP_LOCALES.
You do not have to send every language. Any you leave out come back as an empty string.
Authentication
Sign-up is a three-step flow
Registration is protected by an email one-time code, so it takes three calls.
SMTP is required for sign-up. Step 1 returns 400 "SMTP not configured" until you set MAIL_ENABLED=true and fill in the SMTP_* values (section 13, step 7). Existing accounts can still log in without SMTP — only new registrations are blocked.
Step 1 — request a code.POST /api/v1/auth/otp/send
user.sub is the user's UUID. Store both tokens; send the access token on every request.
Refreshing an expired token
Access tokens expire after JWT_EXPIRES_IN (4 hours by default). When a request returns 401, exchange your refresh token for a new pair rather than forcing the user to log in again.
Other auth endpoints: POST /auth/logout, POST /auth/forgot-password, POST /auth/reset-password, POST /auth/change-password, POST /auth/firebase (social sign-in).
Reading the catalogue
Book list
GET /api/v1/books?page=1&limit=20&search=moby — returns the paginated envelope shown above.
Book details
GET /api/v1/books/{id} — send the user's token so the response reflects what that reader is entitled to.
Why file_path may be an empty string. The book file link is only included for a reader who is entitled to that title — one who bought it, rented it, or has an active subscription — plus anyone at all for free and ad-supported books. For everyone else it is "", which is the same value a book with no file uploaded yet returns.
Use access_control.can_access to decide whether to show the reader or the purchase screen. Do not treat an empty file_path as an error.
Creating content (admin)
Admin endpoints need a token belonging to a user with the admin role. Multilingual fields are sent as objects.
POST /api/v1/categories
{
  "name": { "en": "Fiction", "bn": "কল্পকাহিনী" },
  "description": { "en": "Novels and short stories" },
  "slug": "fiction"
}
POST /api/v1/uploads/file
Authorization: Bearer <token>
Content-Type: multipart/form-data

file: <binary>
Limits: images up to 10 MB, EPUB/PDF up to 100 MB. Exceeding the limit returns 413 — if that happens on a server, raise client_max_body_size in nginx as well (section 13).
Endpoint groups
Prefix
Purpose
/auth
Register, login, refresh, OTP, password reset
/users
Profiles, roles, admin user management
/books
Catalogue, uploads, publishing workflow
/authors, /publishers, /categories, /tags
Catalogue metadata
/book-access
What a reader may open
/orders, /payments
Purchases, rentals, gateways
/subscriptions, /subscription-plans
Plans and active subscriptions
/reading
Progress, sessions, highlights
/engagement
Reviews and comments
/home, /home-sections, /home-banner
App home screen and admin dashboard
/notifications
In-app records and push
/legal-pages, /app-version
Policy pages and the update prompt
16. Database Schema
Bookly uses PostgreSQL with 44 tables. You normally never touch them directly — the backend creates everything on first run — but this section is here for anyone integrating with the data or reviewing the structure before deploying.
You do not need to create these tables by hand. Set DB_SYNC=true for the first run and the backend builds the entire schema from its entity definitions. See section 13, step 4.
The schema file
A complete, ready-to-run SQL file ships with the backend at database/schema.sql. Use it if you prefer to create the schema manually, or to review it up front:
Remember the files too. The database stores only the paths to covers and book files. If you are on local disk storage, back up the uploads/ folder alongside the database or your restored catalogue will have no files. With Cloudflare R2 or Bunny the files already live in your bucket.
17. FAQ & Common Build Errors
The problems buyers hit most often, and what fixes them. If your issue is not here, please get in touch — we are happy to help.
Before anything else
Most build failures come from a version mismatch. Confirm these first:
Java 21.0.9 — run java -version. Other major versions are the single most common cause of Android build errors.
Flutter 3.44.x or newer — run flutter --version.
Node.js 20 LTS or newer — run node -v, for the backend and admin panel.
PostgreSQL 14 or newer — run psql --version.
Then run flutter doctor and resolve anything it flags.
Flutter app — build errors
Unsupported class file major version / Gradle fails immediately
Your Java version is wrong. Install Java 21.0.9 and point Android Studio at it in Settings → Build, Execution, Deployment → Build Tools → Gradle → Gradle JDK. Then:
flutter clean
flutter pub get
Execution failed for task ':app:processDebugGoogleServices'
google-services.json is missing, or its package name does not match your app. Download a fresh one from your Firebase project and place it at android/app/google-services.json. The package_name inside it must equal the applicationId in android/app/build.gradle.kts. See section 4.
Could not resolve all files for configuration / Gradle download stalls
Usually a network or cache problem. Clear the caches and retry:
cd android
./gradlew clean
cd ..
flutter clean
flutter pub get
If it still fails, delete the Gradle cache (~/.gradle/caches) and let it download again.
Version solving failed / dependency conflicts after flutter pub get
flutter clean
rm pubspec.lock
flutter pub get
The lock file ships with the package so you get the exact versions we tested. Only delete it if you have deliberately changed a dependency.
Minimum supported Gradle version / Android Gradle Plugin errors
Open the project with the bundled Gradle wrapper rather than a system Gradle. Always open the project root in Android Studio, not the android/ folder on its own.
iOS: CocoaPods errors or missing pods
cd ios
pod repo update
pod install --repo-update
cd ..
flutter clean
flutter pub get
Requires CocoaPods 1.16.2 or newer (pod --version). On Apple Silicon, if pod install fails try arch -x86_64 pod install.
iOS: Signing for "Runner" requires a development team
Open ios/Runner.xcworkspace in Xcode, select the Runner target, go to Signing & Capabilities and choose your Apple developer team. See section 12.
The app builds but shows a blank screen or no books
It cannot reach the backend. Check in this order:
Is the backend running? Open /api/docs in a browser.
Is the API address in the app correct (section 8)?
On a real device, localhost means the phone. Use your computer's LAN IP or a public address.
Android blocks plain HTTP by default — use HTTPS for anything other than local testing.
Have any books been added and published in the admin panel? Drafts do not appear in the app.
Backend
Sign-up fails with 400 "SMTP not configured"
Registration sends an email one-time code, so it needs a working mail server. Set MAIL_ENABLED=true and fill in the SMTP_* values (section 13, step 7). Existing accounts can still log in without SMTP — only new sign-ups are blocked.
No tables were created
DB_SYNC=true is required on the first run. Alternatively load database/schema.sql by hand (section 16).
"Superadmin bootstrap complete" never appears, and I cannot log in
The first admin is only created when the database has no users at all. If you have already created one, the bootstrap is skipped by design. Either use the original account, or start from an empty database.
Warning at startup: "Firebase is not configured"
Expected when you have not set up push notifications. The server runs normally; push and Firebase sign-in are simply disabled until you add the FIREBASE_* values.
Error: listen EADDRINUSE — port already in use
# See what is using the port
lsof -i :5008
# Stop it, or pick another port in .env
PORT=5009
Files keep landing in uploads/ instead of Cloudflare R2
R2 needs all of CLOUDFLARE_R2_ACCESS_KEY_ID, CLOUDFLARE_R2_SECRET_ACCESS_KEY, CLOUDFLARE_R2_BUCKET, CLOUDFLARE_R2_ENDPOINT and CLOUDFLARE_R2_PUBLIC_URL. If one is missing it falls back to local disk without an error message. CLOUDFLARE_R2_PUBLIC_URL is the one people forget.
413 when uploading a book
Raise client_max_body_size in nginx to at least your HTTP_BODY_LIMIT (section 13, step 9), then reload nginx.
429 Too Many Requests when logging in
The brute-force limiter. Wait a minute, or raise AUTH_RATE_LIMIT_MAX. If all your users are being limited at once, nginx is not forwarding X-Forwarded-For, so everyone looks like one visitor — see section 13, step 9.
PM2 starts, then the app immediately stops
pm2 logs bookly_backend --lines 50
Usually a missing .env in the folder named by cwd in prod.config.js, or wrong database credentials.
Admin panel
Every page is empty and the browser console shows 404s
NEXT_PUBLIC_API_URL is missing the /api/v1 ending. It must be, for example, https://api.your-domain.com/api/v1. Fix it and run npm run build again.
Covers and images do not load
Either NEXT_PUBLIC_IMAGE_URL wrongly ends in /uploads (the paths already contain it), or your CDN hostname is not allowed — add it to NEXT_PUBLIC_EXTRA_IMAGE_HOSTS.
CORS errors in the console
Add the admin panel's address to CORS_ORIGINS in the backend.env, then restart the backend.
I changed .env but nothing happened
NEXT_PUBLIC_* values are compiled into the browser bundle. Run npm run build and restart.
General questions
Do I need the backend to run the app?
Yes. The app is a client for the Bookly API — the catalogue, accounts, purchases and reading progress all live there.
Can I host the backend and admin panel on the same server?
Yes. Run them on different ports (5008 and 4000 by default) and put nginx in front of both.
Can I use MySQL instead of PostgreSQL?
No. The schema relies on PostgreSQL-specific features such as jsonb for multilingual fields and native enum types.
Which languages are supported?
English, Bangla, Arabic and Hindi out of the box, including right-to-left layout for Arabic. Set the active list in APP_LOCALES (backend) and NEXT_PUBLIC_APP_LOCALES (admin panel) — they must match. Adding another language is covered in section 9.
How do I add a book?
In the admin panel: Books → Add Book. Upload the EPUB or PDF and a cover, fill in the details for each language, set pricing, then publish. Draft books do not appear in the app.
Do I have to use PipraPay?
No. It is off by default. The payment layer is provider-based, and Google Play / Apple in-app purchases are supported separately.
Where are uploaded files stored?
Cloudflare R2, Bunny.net, or the local uploads/ folder — whichever is configured first. See section 13, step 6.
How do I stop people sharing book download links?
Set PROTECT_BOOK_FILES=true. Links then carry an expiring signature and cannot be reused elsewhere. Your apps need no changes. Note that paid books are already withheld from readers who have not bought them.
Can I remove AdMob or in-app purchases?
Yes — both are configurable. See sections 10 and 11.
Still stuck? Send us the exact error text plus the output of flutter doctor -v (app issues) or pm2 logs (backend issues), and we will get you moving. Contact details are in section 18.
18. Support
If you need help, reach out using any of the channels below.
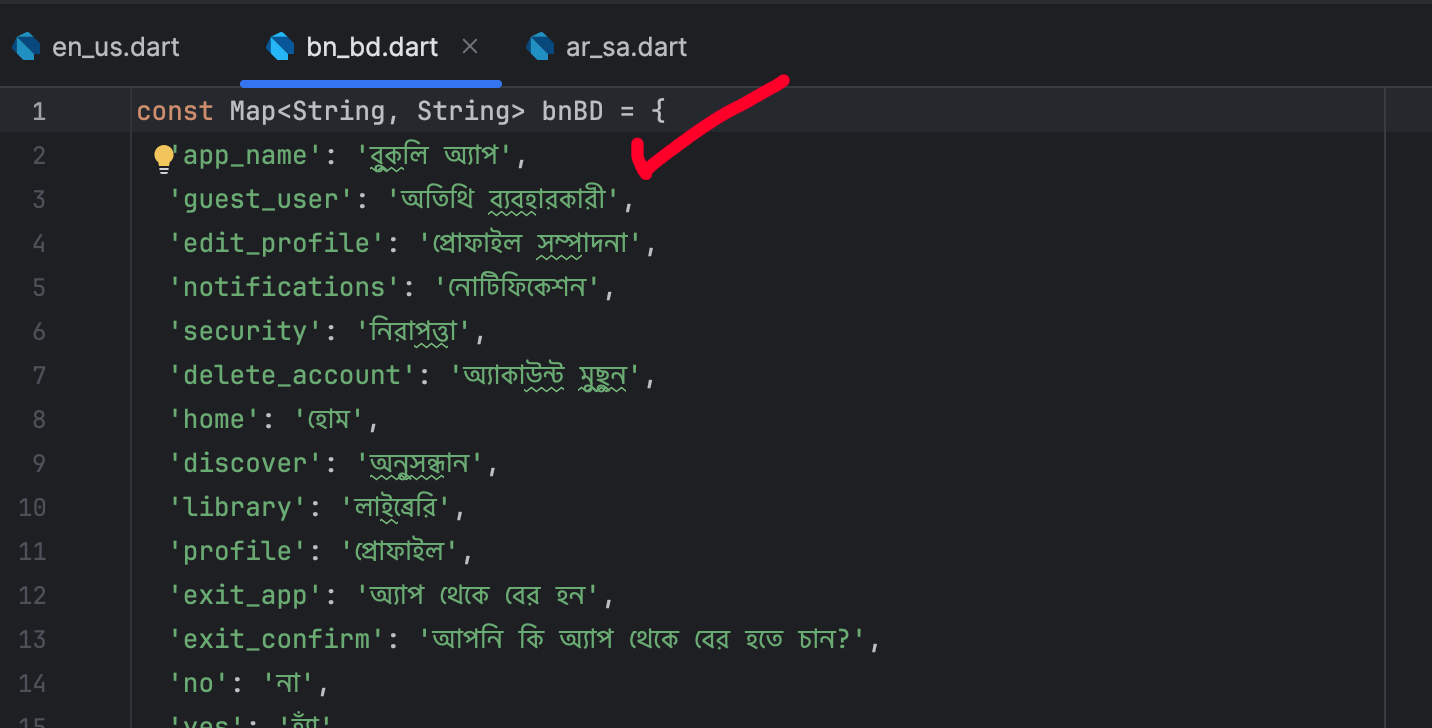
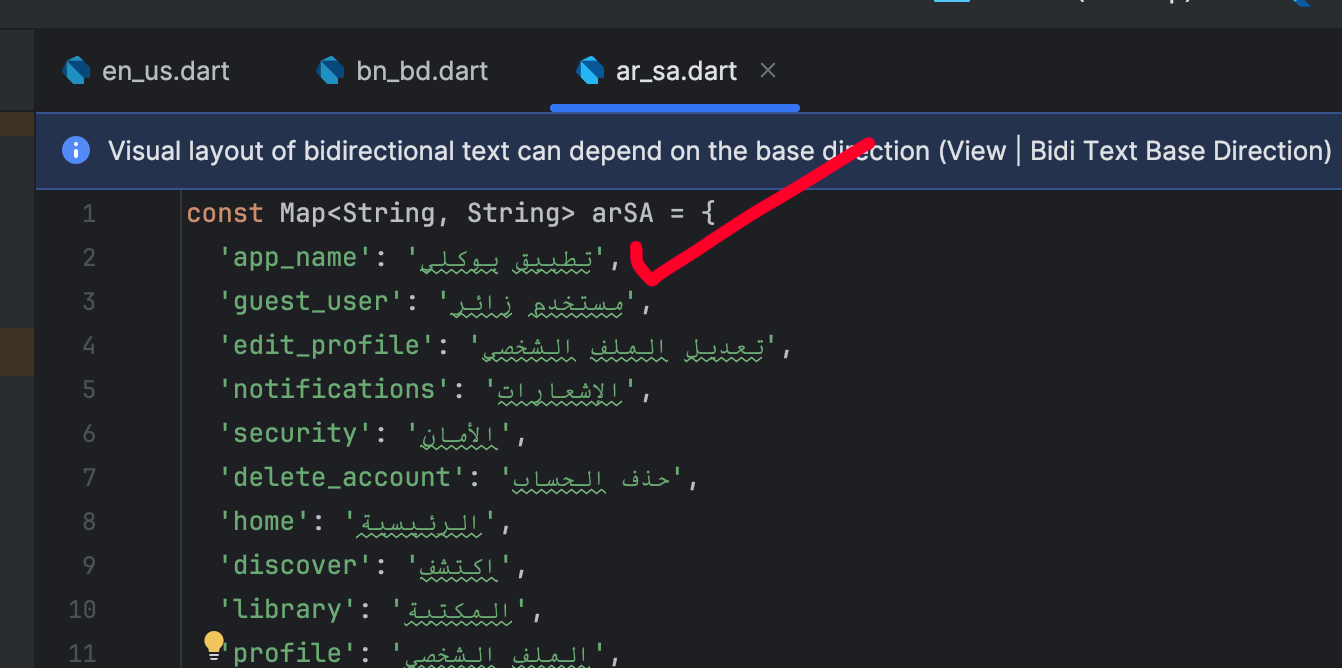
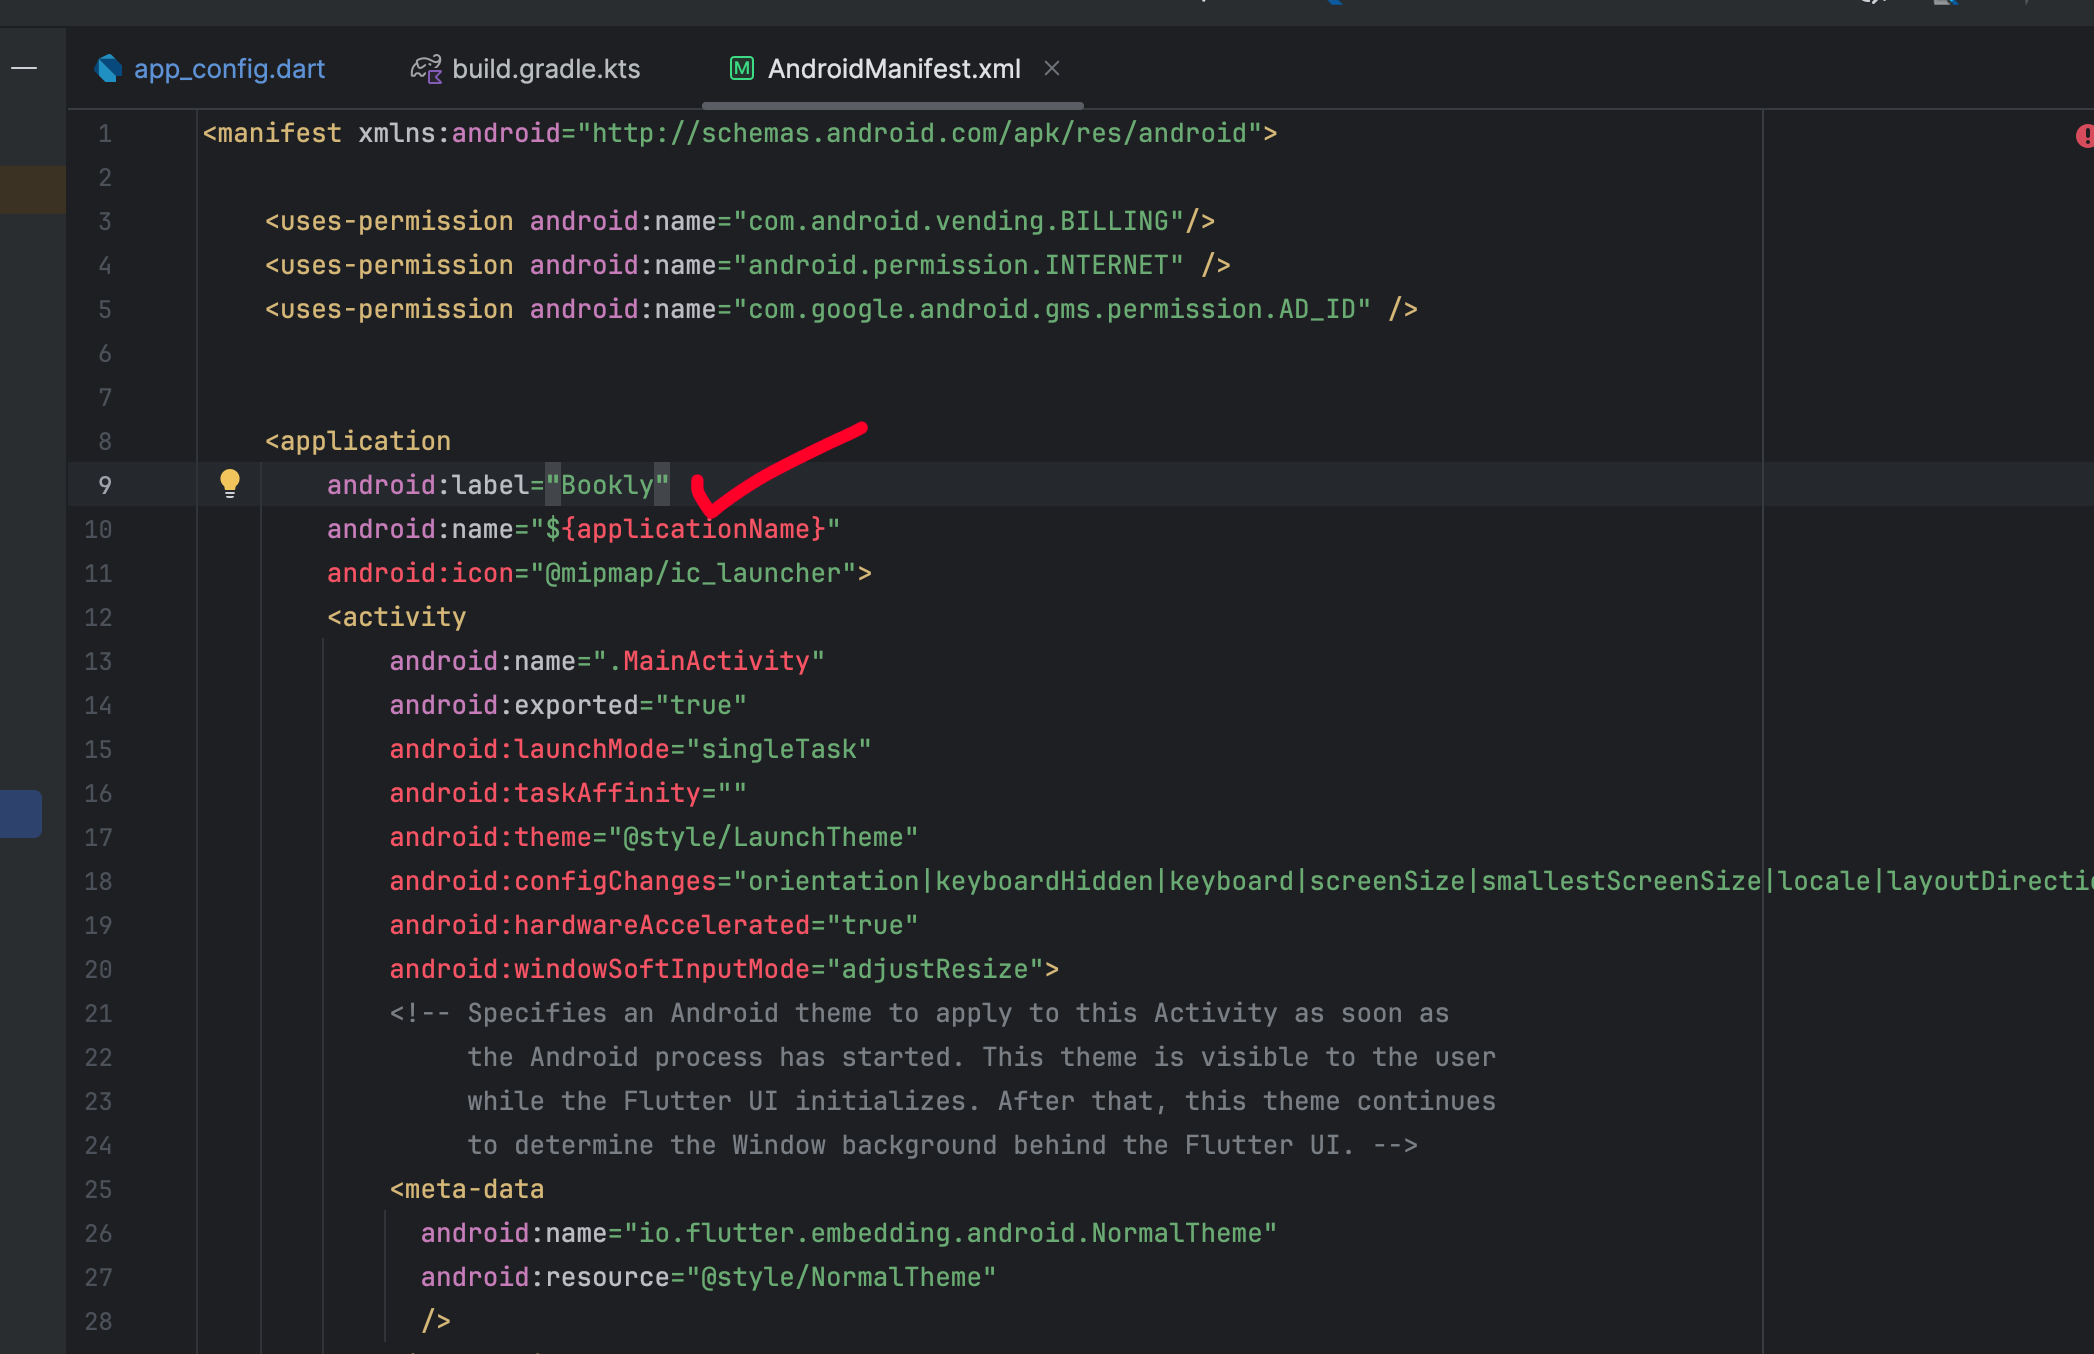
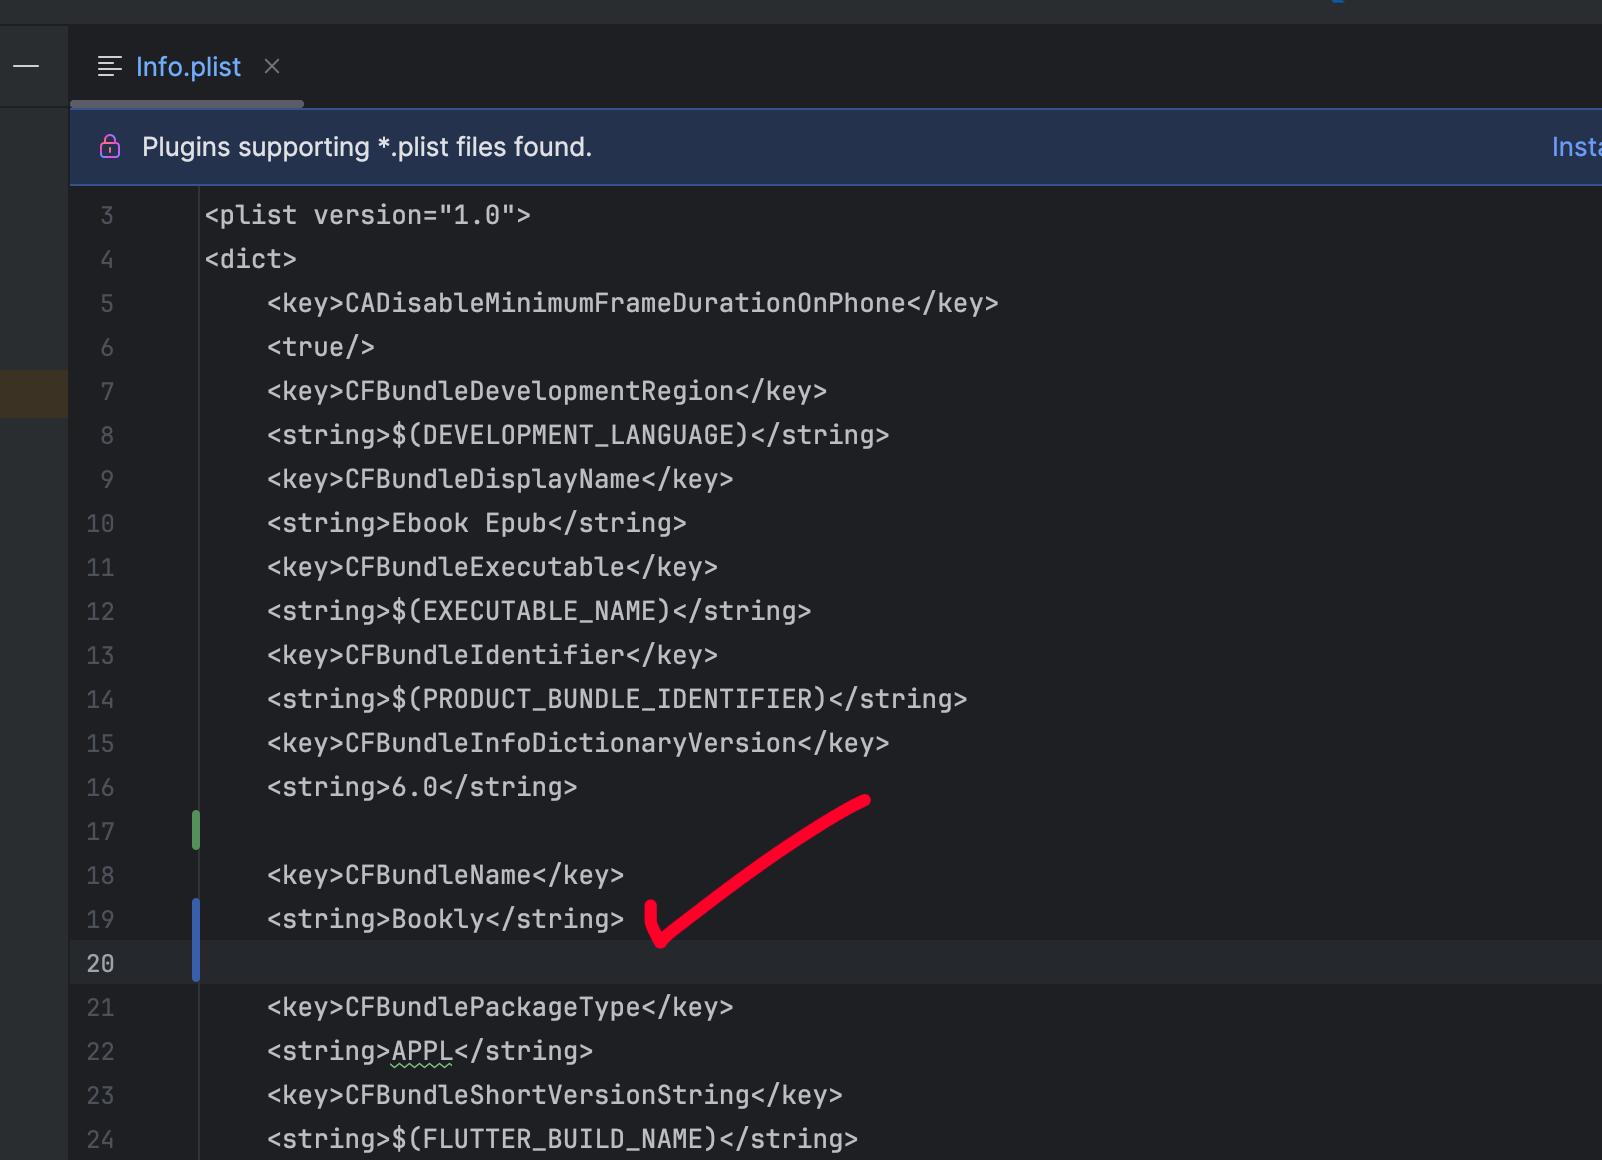
5. Social Sign In Config
To enable social authentication methods for your app, you need to configure the providers in your Firebase console.
You need to place your Apple Service ID and Redirect URL in the project configuration file located at
lib/core/config/app_config.dart.For detailed instructions on how to set up your Service ID and Redirect URL, please follow this guide: