Welcome to the documentation for Sable, a self-hosted VPN platform made of three projects: a Flutter VPN app for Android and iOS, a NestJS backend API with an agent for your VPN servers, and a Next.js admin panel. Follow this guide to set everything up, brand it and publish it.
What is in this package:
sable-vpn/ — the Flutter app (Android and iOS, including the iOS tunnel extension).
sable-backend/ — the NestJS + PostgreSQL API, plus the VPN node agent in sable-backend/node-agent/.
sable-admin/ — the Next.js admin panel.
Documentation/ — this guide.
Setting up for the first time? Start with the backend (section 13), then the admin panel (section 14), then add your first VPN server (section 15), then come back to section 1 for the app. The app and the admin panel both need a running backend, and the app needs at least one active VPN server to connect to.
A plain-language tour of what the app does, so you can find your way around before touching any code. Nothing in this section needs programming knowledge — the technical setup starts at section 1.
First launch and sign-in
Sign in — email and password, or Google. New users create an account with their email; the backend emails a one-time code to confirm it. A forgotten password is reset the same way.
Device limit — each plan allows a number of devices at once (1 on Free, 5 on Premium by default). When the limit is reached, the user is asked to sign out another device first.
Maintenance and updates — if you turn on maintenance mode or require a newer app version in the admin panel, users see that message at launch.
Connecting
One-tap connect — the Home screen has a large connect button. Once connected it shows the connection time, upload and download speed and the data used.
Locations — users search locations, see recent and favourite servers and each server's current load. Each location is Free, Ads (unlocked by watching an ad) or Premium.
Protocol — WireGuard, V2Ray (VMess over TLS) or Auto, which lets the app choose.
Light and dark theme — the whole app follows the system setting or the user's choice.
Free time, rewarded ads and Premium
Daily free time — Free users get a daily allowance of VPN time (60 minutes a day by default).
Rewarded ads — users watch a short ad to add time or to unlock an Ads location. Each step on the reward ladder adds more minutes. The backend adds the time only after AdMob confirms the ad was watched.
Premium — monthly or yearly subscriptions through Google Play and the App Store (via RevenueCat): all locations, no ads, more devices and no time limit. Users can restore purchases.
Promo codes — codes you create in the admin panel give a plan for a set time.
Tools
Speed test — measures latency, jitter, download and upload speed through the tunnel.
Split tunneling — on Android, users choose apps that skip the VPN. On iOS, they choose domains, because iOS does not allow per-app splitting.
Kill switch — on iOS, a setting in the app blocks traffic when the VPN drops. On Android, the app guides users to the system's Always-on VPN setting.
Account and settings
Current plan, change password, signed-in devices (sign any of them out), theme, language (English, Bangla, Arabic, Russian and Ukrainian), support messages, debug logs, legal pages, sign out and delete account.
What you control from the admin panel
Almost everything users see is managed in the browser, without rebuilding the app: VPN servers and regions, plans and store products, promo codes, rewarded-ad rules, announcements, push notifications, minimum app version and maintenance mode, the privacy policy, terms and about pages, app users, support messages and integration keys. The full list is in section 14.
Recommended first hour. Set up the backend (section 13), start the admin panel (section 14) and sign in. Add a region and one VPN server with the install command (section 15) and activate it. Then point the app at your backend (section 8) and run it on a real phone — create an account, tap Connect and check that your IP address changes. Once that round trip works, move on to branding, Firebase and store setup.
Third-Party Services and Costs
Sable is self-hosted: you receive the full source code, with no licence keys and nothing payable to us. Some features connect to outside services that are not included in the purchase.
Buyers are responsible for all fees charged by third-party services. This includes hosting, VPN servers and their bandwidth, developer accounts, app store commissions, email sending and any usage beyond a provider's free tier. The item price covers the source code and documentation only. Prices change; check each provider's current rates.
Accounts you create yourself. Sable ships no credentials of ours. Depending on the features you keep, you need:
Your own servers for the backend and admin panel, and for VPN traffic (section 1, section 15).
Your own SMTP account for sign-up and password-reset codes (section 13).
Your own Firebase project for Google sign-in, push notifications, Analytics and Crashlytics (firebase_core, firebase_auth, firebase_messaging, firebase_analytics, firebase_crashlytics in the app, firebase-admin in the backend). You accept Google's Firebase Terms of Service and pay any usage beyond the free tier (section 4).
Your own RevenueCat account and store products for Premium (section 11).
Your own AdMob account if you show ads. The package contains only Google's test IDs (section 10).
Service
Required?
Used for
Who bills you
VPS or cloud server
Required
Runs the backend (Node.js 24, PostgreSQL 14+) and the admin panel
Your hosting provider
VPN servers (Ubuntu or Debian)
Required
Carry your users' VPN traffic. One or more per location; each runs WireGuard, Xray (V2Ray) and the node agent. Watch the bandwidth allowance of each server
Your hosting provider
SMTP email
Required for email sign-up
One-time codes for sign-up and password reset
Your email provider, beyond its free tier
Google Play Developer account
Required for Android
Publishing the app; USD 25 one-time
Google
Apple Developer Program
Required for iOS
Publishing the app, and the Network Extension capability for the VPN tunnel; USD 99 per year
Apple
Firebase (your own project)
Optional
Google sign-in, push notifications, Analytics, Crashlytics. Without it, email sign-in still works and these features are off
Google, beyond the free tier
RevenueCat
Optional
Premium subscriptions: manages Google Play and App Store purchases and calls your backend's webhook
RevenueCat: free tier, then a share of tracked revenue
Google Play Billing
Optional (through RevenueCat)
Premium on Android. Google takes a commission on each sale, typically 15–30%
Google (deducted from sales)
Apple In-App Purchase
Optional (through RevenueCat)
Premium on iOS. Apple takes a commission on each sale, typically 15–30%
Apple (deducted from sales)
bKash and Nagad
Not integrated
The database contains switched-off placeholder rows for these two gateways, but no checkout is included. They stay off; enabling them needs your own development work
—
Stripe, PayPal and other gateways
Not integrated
No checkout integration ships for these
—
Google AdMob (your own account)
Optional
Rewarded and interstitial ads. You must follow AdMob's policies (section 10)
Free to join; you are responsible for policy compliance and any costs related to your account or traffic
Cloudflare R2
Optional
Images uploaded from the admin panel
Cloudflare, beyond the free tier
Microsoft Clarity
Optional
Session analytics in the app; off until you set a project ID
Free
Axiom
Optional
Remote app logs; off until you set a token
Axiom, beyond the free tier
Cloudflare speed test endpoints
Used by default
The in-app speed test downloads from and uploads to speed.cloudflare.com. You can point it to your own server (section 8)
Free public service
VPN services are regulated in some countries. You are responsible for following the laws of the countries where you run servers and offer the app, the terms of your server providers, and the Google Play and App Store policies for VPN apps. Both stores have extra rules and declarations for VPN apps; read the current Google Play VpnService policy and Apple's App Review Guidelines before you submit.
How the Pieces Connect (Architecture)
Sable is three projects plus one small agent on every VPN server. Only the backend talks to the database and holds secrets. The app never sees another user's data, and the admin panel never talks to PostgreSQL directly.
Connection
What happens
App → Backend
Every request goes to https://api.your-domain.com/api/v1/... with the user's Sable access token in Authorization: Bearer and device headers (X-Device-Id, X-Platform, X-App-Version). Access tokens last 15 minutes and are renewed with a refresh token.
App → Firebase → Backend
For Google sign-in, Firebase returns an ID token. The app sends it to POST /auth/social; the backend checks it with the Firebase Admin SDK and returns Sable tokens. Email sign-in does not use Firebase.
App → Backend → VPN server
When the user taps Connect, the backend picks a server, creates a WireGuard peer or a V2Ray user for that session and returns the tunnel settings. The app then connects straight to the VPN server. VPN traffic never passes through the backend.
VPN server (node agent) → Backend
The agent on each server sends health and load every 30 seconds and applies new or removed peers every 5 seconds. It signs in with the agent token from the install command.
Admin panel → Backend
The admin signs in with the email and password set in the backend .env. The panel keeps the admin token in an httpOnly cookie and forwards each browser request to /api/v1/admin/... from its own server, so the browser never talks to the API directly and no CORS setup is needed.
Backend → PostgreSQL
All data lives here. Only the backend connects.
Backend → SMTP, R2
One-time codes for sign-up and password reset are sent by email through your SMTP account. Images uploaded in the admin panel (region flags, push images) go to Cloudflare R2.
Backend → Firebase Cloud Messaging
Push notifications written in the admin panel are sent by the backend.
App ↔ RevenueCat → Backend
The app buys a subscription through Google Play or the App Store with the RevenueCat SDK. RevenueCat then calls the backend's webhook, and the backend grants or removes Premium.
App ↔ AdMob → Backend
A free user watches a rewarded ad. AdMob calls the backend's server-side verification URL, and only then does the backend add VPN time.
1. Prerequisites
Use these versions for the smoothest build. The project was built and tested with the versions marked "tested".
Flutter SDKTested: 3.47.6 (pinned in .fvmrc)
Java (JDK)21 to run Gradle (the app targets Java 17)
Android SDKCompile/target 36 Min SDK 24
Xcode26.2 or newer iOS 15.6 or newer
CocoaPodsLatest (1.16 or newer)
Node.js24 LTS (backend) 20.9+ (admin panel)
PostgreSQL14 or newer (tested on 17)
Real devicesAn Android phone (ARM) and/or an iPhone
Server size
You need two kinds of server: one for the backend and admin panel, and one or more for VPN traffic.
Server
CPU
RAM
Disk
Notes
Backend + admin panel, minimum
1 vCPU
2 GB (plus 2 GB swap)
20 GB SSD
Testing and a small user base
Backend + admin panel, recommended
2 vCPU
4 GB
40 GB SSD
Launch and thousands of users. Consider a managed PostgreSQL as you grow
Each VPN server
1 vCPU or more
1 GB or more
10 GB+
Ubuntu 22.04 / 24.04 or Debian 12, a public IPv4 and generous bandwidth. Capacity depends mostly on network speed and bandwidth allowance, not CPU
Building the admin panel (npm run build) needs about 1.5 GB of free RAM; on a 2 GB server add swap first. Shared hosting (cPanel without SSH and Node.js) is not enough; you need VPS or cloud servers with root SSH access.
Test on real devices. The VPN tunnel cannot run in the iOS Simulator (Network Extensions are not supported there), and the Android VPN core ships only ARM libraries (arm64-v8a, armeabi-v7a), so it does not run on x86 Android emulators. The rest of the app opens in emulators, but Connect needs a phone.
2. Environment Setup
Select your operating system to see the setup steps.
Android Studio
Download Android Studio from the official page, run the installer and let it download the SDK components.
Optional: create an emulator in the Device Manager.
Flutter SDK
Download the stable Windows release from the Flutter download page and extract it, for example to C:\flutter.
Add C:\flutter\bin to the Path environment variable (This PC > Properties > Advanced system settings > Environment Variables).
Open a new Command Prompt and run flutter doctor. Fix anything it reports.
IDE
In Android Studio open File > Settings > Plugins > Marketplace, install the Flutter and Dart plugins and restart.
cd sable-vpn
flutter pub get
flutter run                 # on a connected real device
Before the app can sign in and connect, point it at your backend (section 8). There is no code generation step: translations and models are plain Dart files.
To check the project builds cleanly:
flutter analyze
flutter test
3. Change Package Name and Bundle ID
Every app needs a unique identifier, for example com.yourcompany.vpn. The defaults are com.sablevpn.app (Android and iOS), com.sablevpn.app.VpnTunnel (the iOS tunnel extension) and the App Group group.com.sablevpn.app. Change them before you set up Firebase, because Firebase apps are registered by this identifier.
Android
File
Change
android/app/build.gradle
namespace and applicationId (currently com.sablevpn.app)
android/app/src/main/kotlin/com/sablevpn/app/
The package line at the top of every .kt file in this folder and its widget/ and vpn_controller/ subfolders. You may also move the files into folders that match the new package (optional)
android/app/src/main/AndroidManifest.xml
The widget actions com.sablevpn.app.widget.ACTION_CONNECT and ACTION_DISCONNECT. Keep them identical to the constants in widget/WidgetActionBroadcastReceiver.kt
The change_app_package_name tool in dev_dependencies can do most of the Android part: dart run change_app_package_name:main com.yourcompany.vpn. Check the widget actions afterwards.
The VPN plugin in packages/flutter_vpncore has its own ID, com.sablevpn.core. It is internal and does not need to change.
iOS
Open ios/Runner.xcworkspace in Xcode and change the Bundle Identifier on Signing & Capabilities for both targets:
Runner → for example com.yourcompany.vpn
VpnTunnel → the Runner ID plus .VpnTunnel, for example com.yourcompany.vpn.VpnTunnel
Then update the same values in code. The app and the tunnel extension share data through the App Group, and the app starts the tunnel by its bundle ID. If any of these values differ, the app still builds but Connect fails on the device:
Use group. followed by your Runner bundle ID as the new App Group, and register it in your Apple Developer account (section 12).
Tip: the Dart package name in pubspec.yaml (sable) is internal and never shown to users. Leave it as is; renaming it means updating every package:sable/ import.
4. Firebase Setup
Firebase provides Google sign-in, push notifications, Analytics and Crashlytics. It is optional: without it the app runs with email sign-in, and the Google button, push, Analytics and Crashlytics are switched off automatically.
Use your own Firebase project. The package ships placeholder files with values such as YOUR_FIREBASE_.... They let the project compile, but Firebase features stay off until you replace them:
sable-vpn/lib/firebase_options.dart
sable-vpn/android/app/google-services.json
sable-vpn/firebase.json
There is no iOS Firebase file in the package, so on iOS Firebase only works after step 2 below. No Firebase project of ours is included.
Step 1: Create a Firebase project
Open the Firebase console and click Create a project. Enter a name and accept the terms.
Choose whether to enable Gemini, and enable Google Analytics if you want the in-app Analytics, then click Create project.
Step 2: Connect the app (FlutterFire CLI)
Change the package name and bundle ID first (section 3). The FlutterFire CLI then registers your Android and iOS apps and writes the config files:
npm install -g firebase-tools
firebase login
dart pub global activate flutterfire_cli
cd sable-vpn
flutterfire configure --project=<your-firebase-project-id>
Select android and ios and confirm your IDs. The command updates lib/firebase_options.dart, android/app/google-services.json, ios/Runner/GoogleService-Info.plist and firebase.json. The Android build turns on the Firebase and Crashlytics Gradle plugins by itself once google-services.json no longer contains placeholders.
Step 3: Enable sign-in methods
Open Build > Authentication > Sign-in method and enable Google. (Email sign-in does not use Firebase; the Sable backend handles it.)
Step 4: Service account for the backend
The backend checks Google sign-ins and sends push notifications with a Firebase service account: Project settings > Service accounts > Generate new private key. Paste the JSON in the admin panel (Settings > Integrations) or put it in the backend .env (section 13, step 7).
Enable Google in Firebase Authentication (section 4, step 3).
Android: add your SHA-1 and SHA-256 fingerprints in Project settings > Your apps > Android: the debug key, your upload key and, after publishing, the App signing key from Play Console. Get local fingerprints with cd android && ./gradlew signingReport. Without them sign-in fails with error 10. Download google-services.json again afterwards.
iOS: in ios/Runner/Info.plist, replace YOUR_IOS_CLIENT_ID in two places with the iOS client ID from GoogleService-Info.plist: the GIDClientID value (<id>.apps.googleusercontent.com) and the URL scheme com.googleusercontent.apps.<id> (the REVERSED_CLIENT_ID).
Apple
Sign in with Apple is not included in this version. The backend accepts only Google tokens, so the Apple button is hidden in the app. The code is kept but commented out in lib/data/auth/firebase_social_identity.dart for a future update. Email and Google sign-in are not affected.
Apple's App Review Guideline 4.8 asks apps that offer a third-party sign-in such as Google to also offer an equivalent private sign-in option. Email and password sign-in is available in Sable; check the current guideline before you submit and be ready to explain your sign-in options to App Review.
Push notifications
Android: works once google-services.json is in place and the backend has the service account. Notifications use the channel high_priority_channel.
iOS: in Xcode select the Runner target > Signing & Capabilities > + Capability > Push Notifications (Remote notifications background mode is already set in Info.plist). Create an APNs key in your Apple Developer account and upload it in Firebase: Project settings > Cloud Messaging > Apple app configuration.
The app registers each device's push token with the backend, and the admin panel sends to those tokens. There is no topic name to keep in sync.
Tip: search lib/, android/app/src/, ios/ and packages/flutter_vpncore/ for Sable to find every user-visible occurrence.
7. App Icon, Splash, Colours and Font
App icon and splash
All launcher icons, the notification icon and the splash image are generated from one picture, assets/brand/sable_silhouette.png:
Replace assets/brand/sable_silhouette.png with your own logo (a PNG with a transparent background, the same pixel size as the original).
Run flutter test tool/generate_brand_icons.dart. It writes the Android mipmap-* icons, launch_image.png and the ic_stat_sable_logo notification icons, and the iOS AppIcon.appiconset and LaunchImage.imageset.
The icon and splash background colour is #16408C, set in android/app/src/main/res/values/colors.xml (splash_primary) and res/values/ic_launcher_background.xml. Change both to your brand colour before you generate.
The animated start screen in the app is lib/design/brand/sable_boot_artwork.dart; the logo mark is lib/design/brand/sable_mark.dart.
Brand colours
All app colours are in lib/design/tokens/sable_colors.dart, with a light set (SableColors.light) and a dark set (SableColors.dark). Flutter writes colours as 0xAARRGGBB: FF (fully opaque) followed by the normal hex code.
// lib/design/tokens/sable_colors.dart
// SableColors.light
primary: Color(0xFF16408C),        // brand blue #16408C
connected: Color(0xFF1D50B5),      // the connect dial when connected

// SableColors.dark
primary: Color(0xFF5B8DEF),        // brand blue for dark mode #5B8DEF
connected: Color(0xFF6FA0FF),
Example: to use orange #FF6B00, change the light primary to Color(0xFFFF6B00) and pick a lighter orange for dark mode, then stop the app and run it again (hot reload does not update const colours). Screens read colours only from this file; a test (test/design/tokens_test.dart) fails if a screen uses a hard-coded colour.
Font
The app uses Inter Tight through the google_fonts package, which downloads the font the first time the app opens. On networks that block Google Fonts the app falls back to the system font. To ship the font inside the app instead, add the font files under flutter: fonts: in pubspec.yaml and change face in lib/design/tokens/sable_typography.dart to use fontFamily.
8. Connect the App to Your Backend
Set your backend address in lib/core/config/auth_api_config.dart:
// lib/core/config/auth_api_config.dart
static const String origin = String.fromEnvironment(
  'AUTH_API_BASE_URL',
  defaultValue: 'https://api.your-domain.com',   // ← your backend, origin only
);
Enter the origin only (no /api/v1); the app adds /api/v1/... itself. You can also leave the file alone and pass the address when you build: --dart-define=AUTH_API_BASE_URL=https://api.your-domain.com.
HTTPS in release builds. Release builds only allow HTTPS. Plain HTTP is allowed only in Android debug builds (for testing against http://<your-computer-ip>:3001 on the same Wi-Fi). Put the backend behind HTTPS before you test a release build or an iPhone build.
Other build-time settings
All of these are optional. Pass them with --dart-define=NAME=value, or put them in a secrets.json file (ignored by Git) and build with --dart-define-from-file=secrets.json. A missing value turns that feature off.
Name
Default
What it does
AUTH_API_BASE_URL
https://your-domain.com
Backend origin (see above)
REVENUECAT_ANDROID_KEY, REVENUECAT_IOS_KEY
empty
Fallback RevenueCat SDK keys. Normally you set them in the admin panel instead (section 11)
Speed test targets. Point them to your own server if you prefer
Everything else the app needs (plans, locations, ad units, RevenueCat keys, maintenance mode, minimum version, announcements, legal pages) comes from the backend at run time and is set in the admin panel.
9. Languages
The app ships with English, Bangla, Arabic, Russian and Ukrainian. Users pick a language on Account > Language; the app starts in English until they do.
What a language entry looks like
All texts live in one Dart file, lib/core/i18n/app_strings.dart. The keys are in lib/core/i18n/string_keys.dart. Each key has one line per language:
In lib/features/preferences/bloc/locale_cubit.dart, add an entry for French to languages (the code and the name shown in the picker, Français).
In lib/app/app.dart, add Locale('fr') to supportedLocales.
Remove a language
Do the same steps in reverse: remove the code from AppStrings.supported, _getLocal(), LocaleCubit.languages and supportedLocales. The extra lines in localStrings can stay; they are simply not used.
Default language
English is the default in three places: languageCode = 'en' in app_strings.dart, and the starting value and fallback in locale_cubit.dart. Change all three to start in another language.
Right-to-left layout. Arabic texts are translated, but in this version the screen layout stays left-to-right. To mirror the layout for Arabic, add the flutter_localizations package and set localizationsDelegates (with GlobalWidgetsLocalizations.delegate) on the MaterialApp in lib/app/app.dart. A few labels, such as the bottom tab names in lib/app/router/shell/app_shell_page.dart, are written in English directly in the code.
10. AdMob and Rewarded Ads
Free users watch rewarded ads to add VPN time or unlock Ads locations; you can also show banner and interstitial ads. The package contains only Google's official test IDs (publisher ca-app-pub-3940256099942544), so ads show "Test Ad" until you add your own. Debug builds always use test ads.
Your AdMob account, your responsibility. AdMob is free to join. You must follow the AdMob and Google ad network policies (including asking for consent where required; the app uses Google's UMP consent form) and you are responsible for any costs related to your account or traffic.
Step 1: App IDs (built into the app)
Create your app in AdMob and replace Google's sample app IDs:
Platform
File
Value to replace
Android
android/app/build.gradle (admobAppId in defaultConfig and in the release block)
ios/Flutter/Release.xcconfig and ios/Flutter/Debug.xcconfig (GAD_APPLICATION_IDENTIFIER)
ca-app-pub-3940256099942544~1458002511
Step 2: Ad unit IDs (in the admin panel)
Create a Rewarded ad unit (and optionally Banner and Interstitial units) for each platform. Then in the admin panel open Plans & billing > Rewarded ads and enter the unit IDs. Release builds use these values; no new app build is needed to change them. As a fallback you can also put your Android rewarded unit in liveAndroidRewardedUnitId in lib/core/config/admob_config.dart.
Step 3: Server-side verification (required for rewards)
The backend adds time only after Google confirms the ad was watched. In AdMob, open your Rewarded ad unit > Server-side verification and set the callback URL to:
The app passes the user's ID and a one-time code with each ad; the backend checks Google's signature and the code before adding time. Optionally restrict which ad units may grant rewards with ADMOB_REWARDED_AD_UNIT_IDS in the backend .env or the ad unit list on the Rewarded ads page.
Reward rules
On Plans & billing > Rewarded ads you set: rewards on or off, the reward ladder (minutes per ad, by default 30, 50, 60, 90 and 120), rewards per day per user and per device (5), the wait between ads, the most time a user can bank (4 hours), banner on or off, interstitial on or off and how often (every 3 connects). The same page shows a log of every reward and why any was refused.
11. Premium Subscriptions (RevenueCat)
Premium is sold as Google Play and App Store subscriptions through RevenueCat. The app buys through the RevenueCat SDK; RevenueCat tells your backend about every purchase, renewal, cancellation and refund through a webhook, and the backend grants or removes Premium. The app never grants Premium by itself.
Step 1: Create the products in the stores
Google Play Console > your app > Monetize > Subscriptions: create a subscription with base plans, for example a monthly and a yearly one. (Upload a build with billing to a testing track first; Play Console requires it.)
App Store Connect > your app > Subscriptions: create a subscription group with a monthly and a yearly product.
Step 2: Set up RevenueCat
Create a RevenueCat project, add your Android and iOS apps and connect them to the stores (Google service-account credentials and the App Store in-app purchase key, as RevenueCat's setup guide describes).
Import your products and create a current offering with a monthly and a yearly package.
Copy the public SDK keys (they start with goog_ and appl_).
Step 3: Connect RevenueCat to Sable
In the admin panel open Settings > Integrations and enter the RevenueCat Android key and iOS key. The app reads them from the backend at start.
Generate a webhook secret: openssl rand -hex 32. Enter it as RevenueCat webhook secret on the same page (or REVENUECAT_WEBHOOK_AUTH in the backend .env).
In RevenueCat open Integrations > Webhooks, add https://api.your-domain.com/api/v1/webhooks/revenuecat and set the Authorization header to exactly the same secret.
Step 4: Match the products to your plans
In the admin panel open Plans & billing > Store products. For each store product, enter the exact product ID from the store and choose the plan it grants. The first start created example products (com.sablevpn.app.premium.monthly, com.sablevpn.app.premium.yearly, and sable_primium_subscription:monthly-premium-base-pack / ...:yearly-premium-base-pack for Google Play): change them to your own IDs. For Google Play use the subscriptionId:basePlanId form.
Then check the plans on Plans & billing > Plans: name, price and currency shown on the paywall, devices, limits and features. The example plans use BDT prices; change them to your own currency and prices.
How it works
The paywall lists the active plans from the backend and buys the matching store product. Users must be signed in to buy, and the purchase is linked to their Sable account.
After a purchase the app waits for the backend to confirm Premium (usually a few seconds). Restore purchases on the paywall handles reinstalls and new phones.
Failed webhook events are retried every 10 minutes and can be replayed on Plans & billing > Payment events.
Keep RevenueCat sandbox switched on in Settings: App Review tests your app with sandbox purchases.
You can also give Premium without a purchase: on a user's page in the admin panel use Grant premium, or create promo codes.
Not included: Stripe, PayPal and other web checkouts. bKash and Nagad appear as switched-off rows in the database but have no checkout; leave them off.
12. Build and Release
Version number
Set version: in pubspec.yaml (for example 1.0.1+3: version name 1.0.1, build number 3). Android and iOS both read it. Raise the build number for every upload. In Xcode, give the VpnTunnel target the same version and build as the app, or App Store Connect warns that the extension version does not match.
Keep the keystore and passwords safe and private. If you lose them you cannot update your app on Google Play. Never commit them to a public repository.
Android: key.properties
Create android/key.properties:
storePassword=<password from previous step>
keyPassword=<password from previous step>
keyAlias=upload
storeFile=<full path to upload-keystore.jks>
android/app/build.gradle already reads this file. If it is missing, release builds are signed with the debug key so they still build — Google Play will not accept those.
Android: build
flutter build apk --release          # APK for direct install / testing
flutter build appbundle --release    # App Bundle for Google Play
The App Bundle is created at build/app/outputs/bundle/release/app-release.aab. Upload it in Play Console.
Google Play declarations for a VPN app. Play Console asks for extra information about apps that use the VPN service. The app also lists installed apps for split tunneling, which needs the QUERY_ALL_PACKAGES permission and its own declaration. Before you submit, review the permissions in android/app/src/main/AndroidManifest.xml and remove any your version does not need. The app does not ask for the camera, the microphone or storage.
iOS: Apple Developer setup
The VPN tunnel is an iOS app extension, so iOS needs a paid Apple Developer account and a little more setup than a normal app. In your Apple Developer account (Certificates, Identifiers & Profiles):
Register an App Group, for example group.com.yourcompany.vpn (the same value you set in section 3).
Register two App IDs: the app (com.yourcompany.vpn) and the tunnel (com.yourcompany.vpn.VpnTunnel). Enable Network Extensions and App Groups on both, and Push Notifications on the app ID.
Then in Xcode (ios/Runner.xcworkspace), for both the Runner and VpnTunnel targets:
Signing & Capabilities: choose your Team (automatic signing) and check the bundle ID.
Check the capabilities: Network Extensions with Packet Tunnel ticked, and App Groups with your group ticked. On Runner, add Push Notifications if you use push.
iOS: build
cd ios && pod install && cd ..
flutter build ipa --release
The minimum iOS version is 15.6, set in both the Xcode project and the Podfile. Nothing to change.
The VPN core framework in ios/Frameworks/ is linked only into the VpnTunnel extension. Do not add it to the Runner target.
Upload build/ios/ipa/*.ipa with Xcode's Organizer or the Transporter app. See Flutter's iOS deployment guide.
Test on a real device
Android: enable USB debugging, connect the phone and run flutter run --release. Accept the VPN permission dialog on first connect.
iOS: connect the iPhone, trust the computer, select it in Xcode and press Run. On first connect iOS asks to add a VPN configuration.
After connecting, open a "what is my IP" website in the phone's browser: it should show your VPN server's address.
13. Backend Setup (NestJS)
The backend lives in sable-backend/. It is a NestJS 11 + TypeORM API on PostgreSQL. The app, the admin panel and the agents on your VPN servers talk only to this API.
Step 1: Install
cd sable-backend
npm ci
cp .env.example .env
Step 2: Create the database
Use PostgreSQL 14 or newer (tested on 17). In psql as a superuser:
The first start creates four extensions: citext, pg_trgm, pgcrypto and uuid-ossp. On PostgreSQL 13 and newer the database owner may create them. If your host refuses ("permission denied to create extension"), run these once as a superuser:
\c sable
CREATE EXTENSION IF NOT EXISTS citext;
CREATE EXTENSION IF NOT EXISTS pg_trgm;
CREATE EXTENSION IF NOT EXISTS pgcrypto;
CREATE EXTENSION IF NOT EXISTS "uuid-ossp";
Step 3: Configure .env
Every variable is explained in .env.example. Only the REQUIRED block must be filled in; every optional feature stays off until you configure it. Generate each secret with openssl rand -hex 48.
Variable
What to set
NODE_ENV
development on your computer, production on the server
PORT
API port, default 3001
API_PREFIX
Keep api. Every route is served under /api/v1, and the admin panel expects it
PUBLIC_API_URL
Your public API address including/api/v1, e.g. https://api.your-domain.com/api/v1. It is printed into the install command for new VPN servers, so it must be reachable from them
DB_HOST, DB_PORT, DB_USER, DB_PASSWORD, DB_NAME
Your PostgreSQL connection. Set DB_SSL=true for managed databases that require TLS
DB_RUN_MIGRATIONS
Keep true: the bundled migrations create and update every table at start. Keep DB_SYNCHRONIZE=false
JWT_ACCESS_SECRET
Signs app tokens. At least 32 characters
JWT_ACCESS_TTL_SEC, JWT_REFRESH_TTL_SEC
Token lifetimes: 900 s (15 minutes) and 2592000 s (30 days) by default
Your email account for sign-up and password-reset codes. Port 465 with SMTP_SECURE=true, or 587 with false (STARTTLS). SMTP_USER and SMTP_FROM_EMAIL must be email addresses
ADMIN_EMAIL
The email you sign in to the admin panel with
ADMIN_PASSWORD_HASH
The hash of your admin password (step 4). Never the plain password
ADMIN_JWT_SECRET
Signs admin tokens. At least 32 characters, and different from JWT_ACCESS_SECRET
Useful optional settings:
Variable
What it does
TRUST_PROXY
loopback when nginx runs on the same server, so rate limits, the login lockout and the audit log see real client IPs
SWAGGER_ENABLED
Swagger UI at /api/docs. Keep it false on a public production server (the example file sets false; set true while developing). If you remove the line, Swagger is on in development and off in production
CORS_ORIGINS
Browser origins allowed to call the API. The admin panel calls the API from its own server, so it does not need an entry here
ADMIN_IP_ALLOWLIST
Comma-separated IPs or CIDRs allowed to reach /api/v1/admin/*. Empty means no IP restriction
When a silent VPN server is marked unreachable (120 s), how often agents pick up new peers (5 s), and when an idle session is closed (1800 s)
Startup check. The server validates .env at start and lists every problem in one "Config validation error" message. Secrets shorter than 32 characters are rejected (the example placeholders are too short on purpose), and with NODE_ENV=production the admin email, an argon2 ADMIN_PASSWORD_HASH and ADMIN_JWT_SECRET are required. The check does not catch every placeholder: replace DB_PASSWORD and the SMTP_* values yourself.
Step 4: Your admin account
Sable has a single admin account, defined in .env (there is no admin table). Create the password hash and paste the printed line into .env:
npm run admin:hash -- "your-admin-password"

# prints:
ADMIN_PASSWORD_HASH='$argon2id$v=19$m=65536,p=4,t=3$...'
The password needs at least 10 characters. Keep the single quotes: the hash contains $ signs. To change the password later, run the command again, replace the line and restart the backend.
Step 5: First run
npm run start:dev # development, with auto-reload; API at http://localhost:3001/api/v1
What a successful first run looks like
This is the real output of npm run start:dev on an empty PostgreSQL 17 database, with only the REQUIRED block of .env filled in (Firebase and R2 not configured yet). The run used PORT=3101 because port 3001 was busy on the test machine; yours will show your own port. About 230 lines that list modules and routes are shortened in the middle.
> sable-backend@1.0.0 start:dev
> nest start --watch
[4:18:08 PM] Starting compilation in watch mode...
1[4:18:11 PM] Found 0 errors. Watching for file changes.
[16:18:11.670] INFO (64421): Starting Nest application... {"context":"NestFactory"}
[16:18:11.670] INFO (64421): TypeOrmModule dependencies initialized {"context":"InstanceLoader"}
[16:18:11.670] INFO (64421): MailerModule dependencies initialized {"context":"InstanceLoader"}
[16:18:11.670] INFO (64421): UsersModule dependencies initialized {"context":"InstanceLoader"}
[... 51 more "InstanceLoader ... dependencies initialized" lines ...]
2[16:18:11.671] WARN (64421): Unsupported route path: "/api/*". In previous versions, the symbols ?, *, and + were used to denote optional or repeating path parameters. ... Attempting to auto-convert to "/api/{*path}"... {"context":"LegacyRouteConverter"}
[16:18:11.671] INFO (64421): HealthController {/api/health} (version: 1): {"context":"RoutesResolver"}
[16:18:11.671] INFO (64421): Mapped {/api/health, GET} (version: 1) route {"context":"RouterExplorer"}
[... 172 more "RoutesResolver" / "Mapped {...} route" lines ...]
3[16:18:11.671] WARN (64421): CLOUDFLARE_R2_* not set — image uploads disabled {"context":"StorageService"}4[16:18:11.671] WARN (64421): No Firebase service account — push and social login are off {"context":"FirebaseService"}5[16:18:11.671] INFO (64421): Partitions ensured at boot: vpn_sessions_2026_10, vpn_sessions_2026_11, vpn_sessions_2026_12 {"context":"SessionsService"}6[16:18:11.671] INFO (64421): Nest application successfully started {"context":"NestApplication"}
Found 0 errors: the TypeScript code compiled.
WARN "Unsupported route path": comes from the NestJS router while it converts a catch-all route. It is harmless and can be ignored.
WARN CLOUDFLARE_R2_*: normal until you set up R2 (step 6). Only image uploads in the admin panel are off.
WARN No Firebase service account: normal until you add it (step 7). Email sign-in still works; Google sign-in and push notifications are off.
Partitions ensured: the monthly tables for VPN session history were prepared.
Nest application successfully started: success. The API is ready. The migrations already created every table and the default data before this line.
If the output stops with a red error before line 6, compare it with the troubleshooting list below. The most common causes are a wrong database password or port, a database that does not exist yet, and a port that is already in use (EADDRINUSE).
A reply like this means the API, the database and the default data all work. Open http://localhost:3001/api/docs in your browser to see the interactive Swagger API docs:
Swagger at /api/docs after a successful first run.
The first start creates every table and this default data:
Data
Default
Plans
free (1 device, 60 minutes a day, ads), reward (earned with an ad), premium (for manual grants), premium_monthly and premium_yearly (5 devices, no limits, no ads). Edit prices, limits and texts in the admin panel
Store products
Example App Store and Google Play product IDs linked to the monthly and yearly plans. Replace them with your own (section 11)
Payment gateways
Google Play and App Store (through RevenueCat), active. bKash and Nagad rows exist but are switched off and not integrated
Sample location
Region Jakarta with server jkt01.your-domain.com (203.0.113.10, a documentation address). It is only an example: delete it, or edit it to match your real server (section 15)
Rewarded ads
Reward ladder 30, 50, 60, 90, 120 minutes, 5 rewards a day, and Google's test rewarded ad unit
App pages
Empty privacy policy and terms, and a short About page
No app users are created. Sign in to the admin panel with ADMIN_EMAIL and your password once it is running (section 14).
Step 6: Image storage (Cloudflare R2, optional)
In Cloudflare, open R2, create a bucket and connect a custom domain (for example cdn.your-domain.com) or enable its public r2.dev URL.
Create an R2 API token with Object Read & Write on that bucket.
Fill in CLOUDFLARE_R2_ENDPOINT (https://<account-id>.r2.cloudflarestorage.com), CLOUDFLARE_R2_ACCESS_KEY_ID, CLOUDFLARE_R2_SECRET_ACCESS_KEY, CLOUDFLARE_R2_BUCKET, CLOUDFLARE_R2_PUBLIC_URL (https) and optionally CLOUDFLARE_R2_PREFIX (a folder inside the bucket), then restart.
R2 is used for images you upload in the admin panel: push notification images, region flags and pictures in app pages. PNG, JPEG, WebP and GIF up to 2 MB. Without R2 the upload button reports that uploads are not configured; you can still paste https image links instead.
Step 7: Firebase service account (optional)
The backend uses a Firebase service account to verify Google sign-in and to send push notifications. In the Firebase console open Project settings > Service accounts > Generate new private key, then either:
paste the whole JSON in the admin panel: Settings > Integrations > Firebase service account (takes effect within 30 seconds, no restart), or
encode it and put it in .env: base64 -i service-account.json | tr -d '\n' → FIREBASE_SERVICE_ACCOUNT_B64=..., then restart.
The service account must belong to the same Firebase project as the app (section 4).
Step 8: Go live with PM2 and nginx
npm ci
npm run build
npm install -g pm2
pm2 start prod.config.js      # app name "sable-api", NODE_ENV=production
pm2 save && pm2 startup        # restart automatically after a reboot
Or run bash scripts/deploy-production.sh, which checks for .env, builds, and starts or reloads sable-api. Keep one PM2 instance: the scheduled jobs (free-time limits, idle sessions, server health, push sending, subscription expiry and clean-up) run inside the process.
Put nginx in front with HTTPS (for example with Let's Encrypt / certbot):
Then run sudo certbot --nginx -d api.your-domain.com and set TRUST_PROXY=loopback in .env. Release builds of the app only talk to HTTPS addresses.
Troubleshooting
Problem
Fix
"Config validation error" at start
Read the list; it names every variable to fix (see the startup check above)
ECONNREFUSED or "password authentication failed"
Check the DB_* values and that PostgreSQL is running and accepts connections
"database … does not exist"
Create it first (step 2), and check DB_NAME
"permission denied to create extension"
Run the CREATE EXTENSION lines from step 2 as a superuser
EADDRINUSE (port already in use)
Another program uses the port. Change PORT in .env and in your nginx proxy_pass
Sign-up codes never arrive
Check the server log for "mail send failed". Fix the SMTP_* values; for testing set OTP_DEV_CODE=true in development
"No Firebase service account" warning
Normal until step 7. Google sign-in and push are off until then
Google sign-in returns 400 "Social sign-in is not available"
Firebase service account missing (step 7), or GOOGLE_SIGNIN_ENABLED=false
Image uploads fail
R2 is not configured or wrong (step 6). Images are limited to 2 MB
RevenueCat webhook gets 503 or 401
503: the webhook secret is not set. 401: the Authorization value in RevenueCat does not match exactly (section 11)
Admin login answers 429
Too many failed attempts from your IP. Wait until the lockout window ends (15 minutes by default; the message says how long)
Admin login answers 403 IP_NOT_ALLOWED
Your IP is not in ADMIN_IP_ALLOWLIST
14. Admin Panel Setup (Next.js)
The admin panel lives in sable-admin/. It is a Next.js 16 web app (React 19, Tailwind 4) that talks to the backend. It needs Node.js 20.9 or newer (tested on 24).
Step 1: Install and configure
cd sable-admin
npm ci
cp .env.example .env
Variable
What to set
API_BASE_URL
Your backend address without/api/v1, e.g. http://localhost:3001 locally or https://api.your-domain.com in production. The panel adds /api/v1/admin/ itself
NEXT_PUBLIC_APP_NAME
Name in the sidebar, sign-in page and browser tab (default Sable Admin). Run npm run build again after changing it
SESSION_COOKIE_NAME
Name of the sign-in cookie (default sable_admin). No need to change it
How the panel reaches the API.API_BASE_URL is read only by the panel's own server, never by the browser. The browser calls the panel, and the panel forwards each request to the backend with the admin token from an httpOnly cookie. So the backend does not need a CORS entry for the panel, and the token is never readable by page scripts.
Step 2: Run
npm run dev # http://localhost:5101
Start the backend first. A successful start looks like this (real output):
> sable-admin@1.0.0 dev
> next dev -p 5101
▲ Next.js 16.3.8 (Turbopack)
- Local: http://localhost:5101
- Network: http://<your-computer-ip>:5101
3- Environments: .env1✓ Ready in 212ms
✓ Running next.config.ts took 906ms
4✓ Generated AGENTS.md and CLAUDE.md for AI agents. Set `agentRules: false` in next.config to disable.2 GET /login 200 in 2.3s (next.js: 2.1s, proxy.ts: 81ms, application-code: 106ms)
Ready: the admin panel is running at http://localhost:5101.
GET /login 200: your browser opened the sign-in page.
Environments: .env: your settings file was found. If this line is missing, the panel uses the default backend address http://localhost:3001.
Generated AGENTS.md and CLAUDE.md: Next.js 16 writes two helper files for AI coding tools into the project folder on next dev. They are not used by the panel; you can delete them or ignore them.
Open http://localhost:5101. You should see the sign-in page:
The admin sign-in page. Sign in with the backend's ADMIN_EMAIL and the password you hashed with npm run admin:hash.
After signing in you land on the Dashboard. On a new installation most numbers are 0 until users connect. If sign-in fails with "Cannot reach the server", check that the backend is running and that API_BASE_URL is right.
Step 3: Go live
npm ci
npm run build
pm2 start prod.config.js     # app name "sable-admin", runs "next start" on port 5101
pm2 save
Put nginx in front with HTTPS. HTTPS is required in production: the sign-in cookie is marked Secure, so the browser will not send it over plain HTTP.
Then run sudo certbot --nginx -d admin.your-domain.com. Vercel also works: import the sable-admin folder, set API_BASE_URL in the project settings and deploy. npm run build downloads the Geist fonts from Google Fonts, so the build machine needs internet access.
Accounts and security
There is one admin account, set in the backend .env (ADMIN_EMAIL and ADMIN_PASSWORD_HASH). There are no staff roles; the admin can use every page.
A session lasts one hour by default (ADMIN_TOKEN_TTL_SEC in the backend). When it expires the panel returns you to the sign-in page with "Your session expired".
Five wrong passwords from one IP lock sign-in for 15 minutes. Use ADMIN_IP_ALLOWLIST in the backend to allow the admin API only from your own IPs.
Every change made in the panel is recorded in the Audit log with the time, IP and the values before and after.
What you can manage
Page
What it does
Dashboard
Active users (24 h), sign-ups today, paid subscribers, estimated revenue, ad rewards today, bandwidth today, servers and stale servers, a trend chart and a server table. Refreshes every 30 seconds
Servers
Every VPN server with region, protocols, status, health, load, peers, traffic and last heartbeat. Search, filter and sort; Add server opens the setup wizard (section 15)
Server detail
Tabs for Overview (CPU, memory, load, peers, bandwidth), Protocols, IP pools, Sessions and Settings. Actions: Activate, Maintenance, Drain, Disable, Re-enable, Rotate agent token, Disconnect all and Delete
Regions
Locations shown in the app: code, name, country, city, map position, flag, access level (Free, Ads or Premium), order and active switch
Plans & billing > Plans
Price, currency, billing period, trial days, access level, daily time, data allowance, speed limit, devices at once, ads, features, and whether the plan is sold on the paywall. Apply to current holders pushes a changed limit to existing users
Store products
Google Play and App Store product IDs and which plan each one grants
Subscriptions / Payment events
Every subscription with filters, and every RevenueCat event with its result. A failed event can be replayed
Promo codes
Code, plan, duration, start and end dates, total and per-user limits, and redemptions
Rewarded ads
The ad reward log and the ad settings: rewards on or off, reward ladder, daily limits, cooldown, ad unit IDs, banner and interstitial switches
Users
Search and filter users. User detail shows devices, sessions, subscription, payments and ad rewards. Actions: grant or revoke Premium, send a password reset code, sign out everywhere or one device, suspend, delete. Users who asked to delete their account show as Deletion requested with the date it will be deleted (see Account deletion)
Support
Contact messages and problem reports sent from the app, with notes and resolved / open status
App config
Maintenance mode and feature switches (ads, social sign-in, promo codes); Announcements (banners in the app); Push notifications to everyone, a plan, a platform or one user, now or scheduled; Versions (latest and minimum version per platform, force update); Pages (privacy policy, terms, about, with a rich-text editor)
Audit log
Who changed what and when, with the values before and after
Settings
Integration keys: Firebase service account, RevenueCat webhook secret, RevenueCat sandbox switch, RevenueCat Android and iOS SDK keys, how long logs are kept, and the account deletion grace period. Secrets are write-only. The AdMob app ID and the Firebase files are built into the app and cannot be set here
Admin panel tour
Screenshots from the demo, so you know your way around before you add your own servers. Server addresses are examples.
Dashboard: active users, sign-ups, revenue, ad rewards, bandwidth and server healthServers: every VPN server with its status, health, load and peersServer detail: load, peers, CPU, memory, bandwidth and the server actionsRegions: the locations users see in the appAdd a region: flag, city, map position and access levelPlans & billing: plans with their prices, access level and limitsPush notifications: audience, message, image, link and schedule
Account deletion
Apple and Google require that users can delete their account from inside the app. Sable does this in two steps, the common pattern for apps with paid plans: the account is blocked at once, then deleted automatically after a grace period, so a request made by mistake can still be cancelled.
The user asks. In the app: Account → Delete account. An email account confirms with its password; a Google account does not need one. The screen says when the account will be deleted and that an app store subscription is not cancelled with it.
Blocked at once. Every device is signed out, VPN tunnels close and push notifications stop. Signing in again shows “This account is scheduled for deletion”. In the admin panel the user shows as Deletion requested, with the reason and the deletion date.
Deleted automatically. Every hour the backend deletes the accounts whose grace period has passed. Set the period in Settings → Data retention → Account deletion grace period (days): 0 to 30, default 30. With 0 the account is deleted the moment the user asks.
Admin options during the grace period. On the user's page: Cancel request (the account is active again, nothing was lost) or Delete permanently (deleted now).
Deleted
Kept, without personal details
Name, email, phone number and password; the user name becomes deleted-<id>@deleted.invalid
Subscriptions and payment events (needed for accounting and refunds)
Sign-in tokens and verification codes
Rewarded-ad events and daily usage totals
Support messages, including those sent signed out from the account's email
Audit log entries: the email is replaced with “deleted user”, and the IP address and deletion reason of the user's own request are cleared
Device model, OS version, language and push token; open VPN sessions end
Store subscriptions are not cancelled. Deleting an account cannot stop Google Play or App Store billing; the user must cancel the subscription in the store. Mention this, and your grace period, in your privacy policy.
Branding the admin panel
What
Where
Name
NEXT_PUBLIC_APP_NAME in .env; the page description is in src/app/layout.tsx
Colours (light and dark)
src/app/globals.css: :root for light, .dark for dark. The primary colour is #16408c (light) and #5b8def (dark)
Logo icon
The shield icon in src/components/layout/sidebar.tsx and src/features/auth/login-form.tsx
Favicon
src/app/favicon.ico
The panel is in English. Dates and numbers follow the browser's language.
Troubleshooting
Problem
Fix
"Cannot reach the server" or 502 on every page
The backend is not running, or API_BASE_URL is wrong. It must not end in /api/v1
"Invalid email or password"
Use the backend's ADMIN_EMAIL and the password you hashed. If you forgot it, run npm run admin:hash again in sable-backend, replace the line in .env and restart the backend
Sign-in works locally but not on the server (you stay on the sign-in page)
Use HTTPS. In production the cookie is only sent over HTTPS
"Your session expired"
Normal after one hour. Sign in again, or raise ADMIN_TOKEN_TTL_SEC in the backend
Change -p 5101 in the dev and start scripts in package.json and in prod.config.js
15. VPN Servers and the Node Agent
Your users' traffic flows through VPN servers that you rent and control. Each one runs WireGuard, optionally Xray for V2Ray (VMess over TLS), and the small Sable node agent, which keeps the server in sync with the backend. You add servers from the admin panel; one copy-and-paste command sets each one up.
What a VPN server needs
Requirement
Operating system
Ubuntu 22.04 or 24.04, or Debian 12, with systemd. The installer refuses other systems
CPU and memory
x86_64 or ARM64, at least 1 GB RAM
Network
A public IPv4 address and outbound HTTPS to your API. Choose a plan with enough monthly bandwidth: every byte your users send and receive passes through this server
Access
Root (or sudo) over SSH
Firewall
Open UDP 51820 for WireGuard. For V2Ray also open TCP 443 and TCP 80 (80 is used to get the TLS certificate). Open them in your provider's cloud firewall too; the installer opens ufw itself when ufw is active
Domain (V2Ray only)
A hostname such as sg1.your-domain.com whose DNS A record points to the server's public IP, so a Let's Encrypt certificate can be issued
Use a separate, clean server for VPN traffic, not the one that runs the backend. Do not run nginx or another web server on it: the V2Ray setup needs ports 80 and 443 for itself.
Step 1: Add a region
In the admin panel open Regions and add the location: code (for example sg-sin-01), name, country code, city, map position, a flag image, the access level (Free, Ads or Premium) and the sort order. The first start of the backend created an example region, Jakarta, with a placeholder server; edit or delete them.
Step 2: Add the server (the wizard)
Open Servers > Add server. The wizard has five steps:
Details — region, display name, hostname, public IPv4, provider, access level, maximum connections and bandwidth. Turn WireGuard on (UDP port 51820) and, if you want, V2Ray (VMess) with its TCP port and TLS.
IP pool — the private addresses given to WireGuard clients. The default 10.8.0.0/24 (gateway 10.8.0.1, DNS 1.1.1.1, 1.0.0.1) serves about 250 users at once; use 10.8.0.0/22 for more. This step is skipped when WireGuard is off.
Install — the panel creates the server in maintenance mode and shows a one-time install command. The agent token inside it is shown only once; copy the command before you continue.
Verify — run the command on the server (step 3). The panel checks every 3 seconds until the agent has reached the API, registered its WireGuard key and sent its first heartbeat.
Go live — the panel lists anything still missing. Click Activate server to make it available in the app.
The IP pool step of the wizardThe install step: copy the one-time command (the token is example data)
Step 3: Run the install command on the server
SSH into the new server and paste the command from the panel. It looks like this:
checks it runs as root on a supported system, and installs curl, jq and a few basic tools;
asks the API for this server's settings (a 401 here means a wrong server ID or token);
installs Node.js 22 from nodejs.org (checksum verified) if Node.js 20 or newer is missing;
WireGuard: installs it, creates /etc/wireguard/wg0.conf with a new key and NAT, starts wg-quick@wg0 and registers the public key with the API;
V2Ray (if enabled): installs Xray-core (checksum verified) as the xray service, gets a Let's Encrypt certificate for the hostname, and blocks traffic to private addresses;
Agent: installs it in /opt/vpn-node-agent, writes its settings to /opt/vpn-node-agent/.env (readable by root only) and starts the vpn-node-agent systemd service.
It ends with "Agent is running". Back in the panel the Verify step turns green.
Options: --skip-wireguard (V2Ray only), --iface NAME (WireGuard interface name, default wg0), and --insecure-http (allows an http:// API address; only for testing on a private network).
What the agent does
Every 30 seconds it sends a heartbeat: CPU, memory, load, connected peers and bandwidth. These numbers appear on the Dashboard and the server page.
Every 5 seconds it asks the API for peers to add or remove, and applies them to WireGuard and Xray. So a user can connect a few seconds after tapping Connect.
It signs every request with its own agent token. The backend stores only a hash of the token.
It opens no ports. If a server stops sending heartbeats for 120 seconds, the backend marks it unreachable and stops sending users to it.
Check a server
systemctl status vpn-node-agent                      # should be active (running)
journalctl -u vpn-node-agent -n 30 --no-pager        # no "401" or "failed" lines
wg show                                              # WireGuard interface and peers
systemctl status xray                                # if V2Ray is enabled
certbot certificates                                 # if V2Ray is enabled
Day-to-day operations
Action (server page)
Effect
Maintenance
No new connections; current users stay connected
Drain
No new connections, so current users leave over time (before you remove a server)
Disable
Disconnects everyone and takes the server out of use
Re-enable
Moves a disabled server back to maintenance; click Activate when it is ready
Disconnect all
Ends every current session on the server
Rotate agent token
Issues a new install command and makes the old token useless. Run the new command on the server
Delete
Removes the server. Refused while users are connected; drain or disable it first
To update the agent on a server later, run the update command (no arguments; it reads the existing settings):
Wrong server ID or token, or the token was already rotated. Use Rotate agent token on the server page and run the new command
Install stops with 409
The server is not ready in the panel yet; finish the wizard's Details step
Install refuses an http:// API address
Put HTTPS on the API (section 13), and check PUBLIC_API_URL in the backend .env
Certificate fails (V2Ray)
The hostname's DNS must point to this server, and TCP port 80 must be open and free
Server shows "stale" or "never seen"
journalctl -u vpn-node-agent -n 50. Check outbound HTTPS to the API and that wg show works
App connects but no traffic passes
UDP 51820 (WireGuard) or TCP 443 (V2Ray) is blocked in the provider's firewall
App says the location is full
The IP pool or max_connections is used up. Use a bigger pool (/22) or add another server to the region
16. API Reference
All endpoints live under https://api.your-domain.com/api/v1. The full, always-current reference with every request body is the Swagger UI at /api/docs (when SWAGGER_ENABLED is on). This section covers the conventions and the most important calls. The JSON below was captured from a real server or built from the request classes in the code.
Conventions
Requests and responses are JSON. Uploads use multipart/form-data with a field named file.
Unknown fields in a request body are rejected with 400 ("property … should not exist").
IDs are UUIDs. Times are ISO 8601 in UTC.
Rate limit: 100 requests per 60 seconds per IP by default (THROTTLE_TTL_MS, THROTTLE_LIMIT), with tighter limits on sign-in, codes, connect and promo codes. Admin routes allow 60 per minute. Over the limit you get 429.
Device headers.auth/signup, auth/login and auth/social require X-Device-Id (a stable ID per install, up to 128 characters) and X-Platform (android, ios, windows, macos, linux or tv). Optional: X-Device-Model, X-OS-Version, X-App-Version, X-App-Build, X-Locale. Other routes take the device from the token.
The response envelope
// success
{ "success": true, "data": { ... } }

// error (real response)
{ "success": false,
  "error": { "code": "UNAUTHORIZED", "message": "Invalid credentials" },
  "path": "/api/v1/auth/login", "timestamp": "2026-10-25T10:19:58.275Z" }

// validation error: message is a list (real response)
{ "success": false,
  "error": { "code": "BAD_REQUEST", "message": ["user_name must be an email", "password must be a string"] },
  "path": "/api/v1/auth/login", "timestamp": "2026-10-25T10:19:53.928Z" }
The health check (GET /health) and the agent files (GET /node-agent/:name) are not wrapped. Some errors carry extra fields; for example DEVICE_LIMIT_EXCEEDED includes limit, devices and a device_manage_token the app uses to sign another device out.
Pagination (admin lists): ?page=1&limit=20 (maximum 100). The response data is { "items": [...], "page": 1, "limit": 20, "total": 57 }.
Other auth calls: POST /auth/social with a Firebase ID token (Google), POST /auth/refresh with { "refresh_token" } (a reused refresh token signs that device out), POST /auth/logout, GET/PATCH /auth/me, POST /auth/change-password and POST /auth/delete-account.
Admins sign in separately; admin and user tokens are signed with different secrets and cannot replace each other:
Send "protocol": null to let the backend choose (Auto). For V2Ray, config is a VMess client configuration instead. peer_ready becomes true once the server's agent has applied the peer (within about 5 seconds). Errors include REQUIRES_UPGRADE and REQUIRES_AD (location needs Premium or an ad), DAILY_LIMIT_REACHED, DATA_LIMIT_REACHED, NO_SERVER_AVAILABLE, AT_CAPACITY and MAINTENANCE.
The plan price and currency are what the paywall shows; the store charge comes from each store product. Change both in the admin panel to match your own store prices.
Endpoint groups
Every path below is relative to /api/v1. Access: public (no token), user (app token), admin (admin token, optional IP allowlist), node (a VPN server's agent token).
Group
Method and path
Access
Health
GET /health
public
Email codes
POST /otp/send POST /otp/verify
public
Auth
POST /auth/signup POST /auth/login POST /auth/social POST /auth/refresh POST /auth/reset-password
public
Account
POST /auth/logout GET /auth/me PATCH /auth/me POST /auth/change-password POST /auth/delete-account
user
Devices
GET /devices POST /devices/push-token DELETE /devices/:id
user
Catalogue
GET /plans GET /protocols GET /regions
public
Servers and connect
GET /servers GET /servers/recommended POST /connect POST /disconnect GET /sessions/current
user
Ads and promo
GET /ads/config POST /ads/rewards/nonce POST /promo/redeem
user
App content
GET /app/config GET /app/announcements GET /app/version-check GET /app/pages/:key GET /app/pages/:key/view
public
Support
POST /support/messages
public (token optional)
Webhooks
POST /webhooks/revenuecat GET /webhooks/admob-ssv
RevenueCat secret / Google signature
Node agent
GET /internal/nodes/:serverId/setup POST /internal/nodes/:serverId/register POST /internal/nodes/:serverId/heartbeat GET /internal/nodes/:serverId/peers POST /internal/nodes/:serverId/peers/report
node
Agent files
GET /node-agent/:name (install script, agent, unit file)
public
Admin: sign-in
POST /admin/auth/login GET /admin/auth/me
public / admin
Admin: dashboard
GET /admin/stats/overview GET /admin/stats/timeseries
admin
Admin: servers
GET, POST /admin/servers GET, PATCH, DELETE /admin/servers/:id POST /admin/servers/:id/activate, /maintenance, /drain, /disable, /enable, /rotate-token, /disconnect-all GET /admin/servers/:id/status, /health, /sessions POST /admin/servers/:id/sessions/:sessionId/disconnect GET, POST /admin/servers/:id/pools, /protocols PATCH, DELETE /admin/pools/:id, /admin/protocols/:id
admin
Admin: regions
GET, POST /admin/regions GET, PATCH, DELETE /admin/regions/:id
admin
Admin: billing
GET, POST /admin/plans; GET, PATCH, DELETE /admin/plans/:id POST /admin/plans/:id/activate, /deactivate, /apply-to-subscribers GET /admin/gateways GET, POST /admin/products; GET, PATCH, DELETE /admin/products/:id GET /admin/subscriptions, /admin/subscriptions/:id GET /admin/payment-events, /admin/payment-events/:id; POST /admin/payment-events/:id/replay GET, POST /admin/promo-codes; GET, PATCH, DELETE /admin/promo-codes/:id; GET /admin/promo-codes/:id/redemptions GET /admin/ads/events
admin
Admin: users
GET /admin/users; GET, DELETE /admin/users/:id GET /admin/users/:id/devices, /sessions, /subscriptions, /payment-events, /ad-events POST /admin/users/:id/suspend, /unsuspend, /cancel-deletion, /logout, /reset-password, /grant, /revoke-grant DELETE /admin/users/:id/devices/:deviceId
admin
Admin: app content
GET, POST /admin/announcements; GET, PATCH, DELETE /admin/announcements/:id GET /admin/app/pages; GET, PUT /admin/app/pages/:key GET /admin/app/versions; PUT /admin/app/versions/:platform
admin
Admin: push
GET /admin/notifications, /admin/notifications/audience, /admin/notifications/:id POST /admin/notifications/send (10 per hour) POST /admin/notifications/:id/cancel
admin
Admin: other
POST /admin/uploads?purpose=notification|region|page GET /admin/audit GET, PUT /admin/settings; PUT, DELETE /admin/settings/:key GET /admin/support/messages; GET, PATCH /admin/support/messages/:id
admin
17. Database Schema
PostgreSQL 14 or newer, managed with TypeORM. The tables are created by the migrations in sable-backend/src/database/migrations/, which run when the server starts (DB_RUN_MIGRATIONS=true). sable-backend/database/schema.sql holds the same schema and default data if you prefer to create the database by hand.
Conventions
IDs are UUIDs; times are timestamptz.
Email addresses use citext, so they are compared without regard to case.
Lists and settings are stored as jsonb (plan features, protocol settings, app settings, audit before/after).
vpn_sessions is partitioned by month on started_at. The backend creates the next two months' partitions at start and every night at 02:00.
npm run migration:show       # list applied and pending migrations
npm run migration:run        # apply pending migrations by hand
npm run migration:revert     # undo the last migration
Backups
pg_dump -Fc -d sable -f sable-$(date +%F).dump        # back up
pg_restore -d sable --clean sable-2026-01-15.dump      # restore
Schedule a daily backup (for example with cron) and keep copies off the server. The backend deletes old session and log data after the number of days set on the admin panel's Settings page (30 by default).
18. FAQ and Common Build Errors
Before anything else
Run flutter doctor and fix every item it reports.
Run flutter clean then flutter pub get, and try again.
Flutter app
Error or problem
Fix
"Unsupported class file major version" / Gradle fails to start
Run Gradle with JDK 21: flutter config --jdk-dir "<Android Studio>/jbr" (Android Studio's bundled JDK)
"Your project's Gradle / Android Gradle Plugin / Kotlin version is lower than Flutter's minimum"
Use Flutter 3.47.6 as tested. On a newer Flutter, raise the versions in android/settings.gradle and android/gradle/wrapper/gradle-wrapper.properties to the values in the message
NDK not found
Install the NDK version named in the error from Android Studio's SDK Manager > SDK Tools > NDK (Side by side)
Connect does nothing on an Android emulator
Expected: the VPN core is built for ARM phones only. Use a real Android phone
Connect does nothing in the iOS Simulator
Expected: iOS VPN extensions do not run in the Simulator. Use a real iPhone
iOS: Connect fails right away, or "permission denied" for the VPN configuration
The App Group or tunnel bundle ID differs between the targets and the code (section 3), or Network Extensions / App Groups are missing from one target (section 12)
"No matching client found for package name"
google-services.json does not match applicationId. Run flutterfire configure again for your package name
Google sign-in fails on Android (error 10 / DEVELOPER_ERROR)
Add the SHA-1 and SHA-256 of the key you are running with (debug, upload or Play app signing) in Firebase
Google sign-in crashes on iOS
Replace YOUR_IOS_CLIENT_ID in Info.plist (section 5)
No Google button at all
Firebase is not configured yet (section 4); the app hides social sign-in without it
"Cannot reach the server" / every list is empty
Check AUTH_API_BASE_URL (section 8). Release builds need HTTPS. On a phone, localhost is the phone itself: use your computer's network IP in a debug build
Sign-up code never arrives
The backend cannot send email: check the SMTP_* values and the server log (section 13)
"Device limit reached" at sign-in
The plan allows only that many devices. Sign another device out from the dialog, or raise the plan's device limit in the admin panel
A location shows "Premium" or "Ad"
The location's access level is Premium or Ads. Change it on the admin panel's Regions page, or buy Premium / watch an ad
Connected, but no websites load
The VPN server's firewall blocks UDP 51820 (WireGuard) or TCP 443 (V2Ray), or the server is unhealthy. See section 15, Troubleshooting
CocoaPods errors (pod install fails)
cd ios && pod repo update && pod install. If it still fails, delete ios/Pods and ios/Podfile.lock and run pod install again
iOS "No signing certificate" / "requires a development team"
Select your Team for both the Runner and VpnTunnel targets
Premium plans do not appear, or buying fails
RevenueCat keys missing (section 11), the store product IDs in the admin panel do not match the stores, the app is not installed from a Play testing track / TestFlight, or the user is not signed in
Purchased but still not Premium
The webhook is not reaching the backend. Check the RevenueCat webhook URL and Authorization header, and the admin panel's Payment events page
Watched an ad but no time was added
Server-side verification is not set on the AdMob ad unit (section 10), or the daily limit was reached. See the log on the Rewarded ads page
Ads show "Test Ad"
Expected in debug builds and with the default IDs. Set your own app IDs and ad units (section 10)
Push notifications do not arrive on iOS
Add the Push Notifications capability and upload an APNs key in Firebase (section 5). Test on a real device
No. You rent your own servers from any provider and add them in the admin panel; one command sets each one up (section 15).
How many users can one server handle?
It depends mostly on its network speed and bandwidth allowance. By default each server accepts 250 connections and each IP pool gives out about 250 addresses; raise both for bigger servers.
Which protocols are supported?
WireGuard and V2Ray (VMess over TLS), plus Auto. V2Ray is offered only on plans without a speed limit, because speed limits are applied to WireGuard.
Can I sell Premium on both Android and iOS?
Yes, through Google Play and the App Store via RevenueCat (section 11).
Can I add another payment gateway?
Yes, as custom development. Plans, gateways and products are separate tables, so a new gateway needs a checkout and a webhook that grants the plan.
Does the app work without Firebase?
Yes. Email sign-in, connecting, ads and Premium work; Google sign-in, push, Analytics and Crashlytics are off.
Can I host the backend and admin panel on one server?
Yes. Use two nginx server blocks (for example api. and admin. subdomains). Keep VPN servers separate.
What is lib/main.demo.dart?
A developer preview entry point (flutter run -t lib/main.demo.dart) that skips Firebase and fakes the signed-in session. It still needs a running backend for servers and plans. Use the normal lib/main.dart for real builds.
Are any files minified or obfuscated?
No. All three projects ship as readable source code. The only pre-built binaries are the VPN core libraries in packages/flutter_vpncore/android/libs/ and ios/Frameworks/.
19. Support
Questions before or after purchase? Please use the Support tab on the CodeCanyon item page. All support is handled through the official Envato item support system.
Support covers bugs and questions about the included features. Customisation, and installation on your own servers, are not part of item support.
Flutter app, backend, admin panel or a VPN server, and the documentation section you were following
Platform and versions
Android or iOS and the device model; your computer's OS; for the app the output of flutter doctor -v; for the server the output of node -v and psql --version and the server's OS; for a VPN server the output of lsb_release -a
The exact error message
Copy and paste the text, not a summary. A screenshot of the full screen or terminal helps too
Log output
App: the red error lines from flutter run, or the in-app debug logs. Backend: pm2 logs sable-api --lines 100. Admin panel: pm2 logs sable-admin --lines 100 and the browser console (F12 > Console). VPN server: journalctl -u vpn-node-agent -n 100
Steps to reproduce
What you did, what you expected, and what happened instead
Never send secrets. Remove passwords, JWT_ACCESS_SECRET, ADMIN_JWT_SECRET, agent tokens, service-account JSON, API keys and keystore passwords from anything you paste. We will never ask for them.
More resources
Live demo: the admin panel and Android demo app linked on the item page.
Initial release: Flutter VPN app (Android and iOS), NestJS backend with VPN node agent, and Next.js admin panel.
21. Upgrading to a New Version
When a new version of Sable is released, download it from your CodeCanyon Downloads page and read its changelog first. Your users, servers, plans, subscriptions and settings live in your PostgreSQL database, not in the code, so updating the code does not delete them.
Keep your own changes in Git, or note which files you edited, so you can carry them over.
Never overwrite these files with the ones from the new package; they hold your settings:
Project
Keep your copy of
Backend
.env, and prod.config.js if you changed the PM2 name or memory limit
Admin panel
.env, and prod.config.js or the port in package.json if you changed them
Flutter app
lib/firebase_options.dart, android/app/google-services.json, ios/Runner/GoogleService-Info.plist, android/key.properties and your keystore, secrets.json, lib/core/config/auth_api_config.dart, lib/core/config/admob_config.dart, ios/Flutter/*.xcconfig, ios/Runner/Info.plist, your bundle IDs and App Group (section 3), your icons and assets/brand/, and lib/design/tokens/sable_colors.dart
Compare the new .env.example files with your .env files and add any new variables.
Carrying your own code changes forward
If you edited source files (not only settings), do not copy the new version straight over them. The safest way is Git:
# one time, before your first customisation
cd sable-backend            # or sable-admin, or sable-vpn
git init && git add -A && git commit -m "Sable 1.0.0 original"
# ...make your changes and commit them as usual...

# when a new version arrives
git checkout -b upgrade
# copy the new package files over the folder (keep the files listed above)
git add -A && git commit -m "Sable 1.x.x original"
git checkout main && git merge upgrade      # Git combines both; fix any conflicts it lists
Without Git, compare your old folder and the new one with a diff tool (VS Code: right-click two files > Compare Selected) and re-apply your edits to the new files.
1. Backend
cd sable-backend
# copy the new files over your old folder, keeping your .env
npm ci
npm run build
pm2 reload sable-api
Database changes are applied automatically. With DB_RUN_MIGRATIONS=true the server runs every new migration when it starts. Each migration runs once and is recorded in the migrations table.
Migrations keep your existing rows. If a release ever needs to change existing data, its changelog says so.
Check what ran: npm run migration:show. If something goes wrong, npm run migration:revert undoes the last migration, or restore the backup with pg_restore -d sable --clean sable-before-upgrade.dump and go back to the old code.
Never edit an existing migration file; add a new one instead (npm run migration:generate).
2. VPN servers
If the changelog mentions the node agent, run the update command on each VPN server (section 15). It keeps the server's settings and token.
3. Admin panel
cd sable-admin
# copy the new files over your old folder, keeping .env
npm ci
npm run build
pm2 restart sable-admin
The admin panel stores nothing itself; all data comes from the backend. Upgrade the backend first.
4. Flutter app
Copy the new lib/, packages/, assets/ and pubspec.yaml over your project, then restore the files you customised (list above). If you use Git, commit first and review the diff.
Run:
flutter clean
flutter pub get
cd ios && pod install && cd ..
flutter run
Raise version: in pubspec.yaml (for example 1.0.1+2) and publish the update as in section 12.
Old app versions keep working with the new backend unless the changelog says otherwise. To make everyone update, raise the minimum version on the admin panel's App config > Versions page.
22. Open-Source Licences
The app's VPN core is GPL-3.0. Read this before you publish the app. The VPN tunnel on Android and iOS runs on libbox, the mobile library of sing-box (v1.13.16), licensed under the GNU General Public License v3.0 or later. Sable is not affiliated with or endorsed by sing-box or SagerNet.
Component
Where
Licence
libbox (sing-box)
packages/flutter_vpncore/android/libs/libbox.aar, ios/Frameworks/Libbox.xcframework. Rebuild with tool/build_libbox.sh; versions in packages/flutter_vpncore/CORE_VERSION.md
GPL-3.0-or-later, plus a term forbidding use of the sing-box name for a derived product
Code adapted from sing-box-for-android
Android VPN service in packages/flutter_vpncore/android/
GPL-3.0-or-later
Code adapted from sing-box-for-apple
iOS tunnel extension in ios/VpnTunnel/
GPL-3.0-or-later
Code from shadowsocks-android
DefaultNetworkListener.kt
GPL-3.0-or-later
Each adapted file carries a header naming its source. The full notices are in sable-vpn/NOTICE and the licence text in sable-vpn/LICENSE-GPL-3.0.
What this means for you
Because the app links this core, the Flutter app (sable-vpn/) is licensed under GPL-3.0-or-later (see sable-vpn/LICENSE.md). You may use, change and publish it, commercially too. When you distribute it (for example on Google Play or the App Store) you must:
Make the complete corresponding source code of the app you distribute available to its users under GPL-3.0-or-later, as a public repository link or a written offer valid for at least three years.
Include the GPL-3.0 licence text and the notices. The app's About us page is seeded with this notice and a source-code request address: in the admin panel open App config → Pages → About us and replace support@example.com with your own address. You may reword the page, but keep the notice and the way to get the source.
Not add terms that restrict your users' GPL-3.0 rights.
Not name your app after sing-box or suggest any association with it.
The backend and the admin panel do not include sing-box; they are licensed under the Envato Market licence you purchased, which adds no restriction to the app's GPL-3.0 rights. This section is a summary, not legal advice; if you are unsure, ask a lawyer before you publish.
Other libraries
The app, backend and admin panel install their other libraries from pubspec.yaml and package.json; each keeps its own licence (mostly MIT, BSD and Apache 2.0).
The VPN servers use WireGuard and Xray-core, which the install script downloads from their official sources onto your server; they are not part of the package.
The sable silhouette used in the logo is by Margot Michaud, published under CC0 (public domain) on PhyloPic.
23. AI Disclosure
AI tools were used to help create parts of this item:
Code: AI-assisted writing and review of source code in the app, the backend and the admin panel.
Documentation and description: this documentation, the README files and the item description were written and edited with AI assistance.
Graphics: the preview images and screenshots were edited with AI tools.
All of it was reviewed, tested and finished by the author.
The item has no AI features: the app, the backend and the admin panel do not use or call any AI service or model.
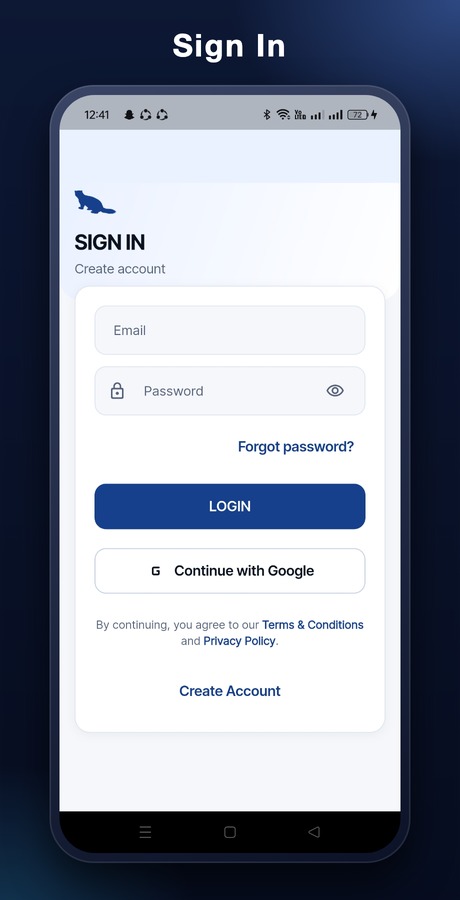
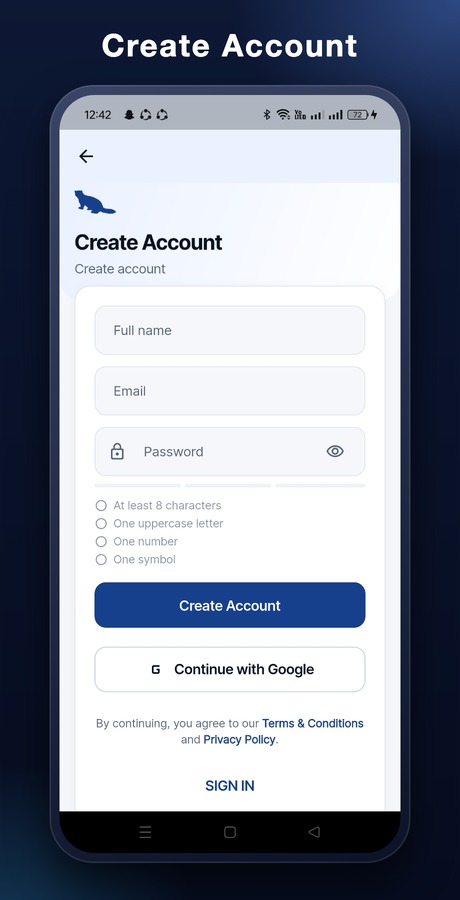
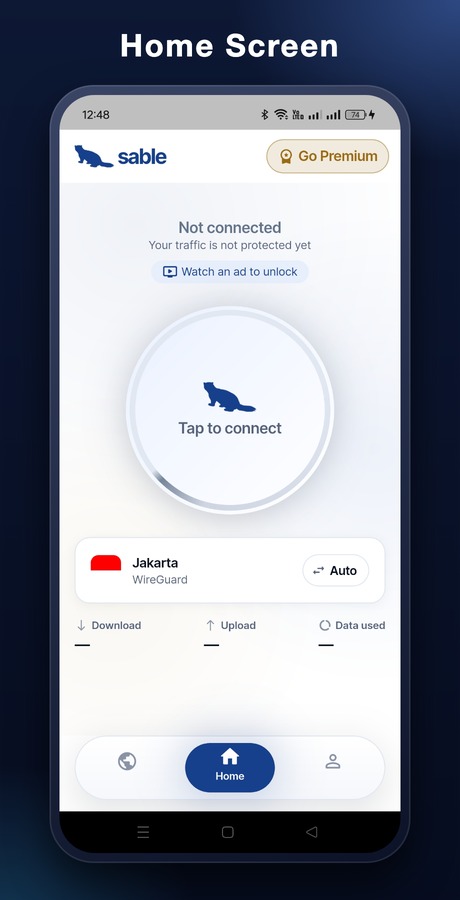
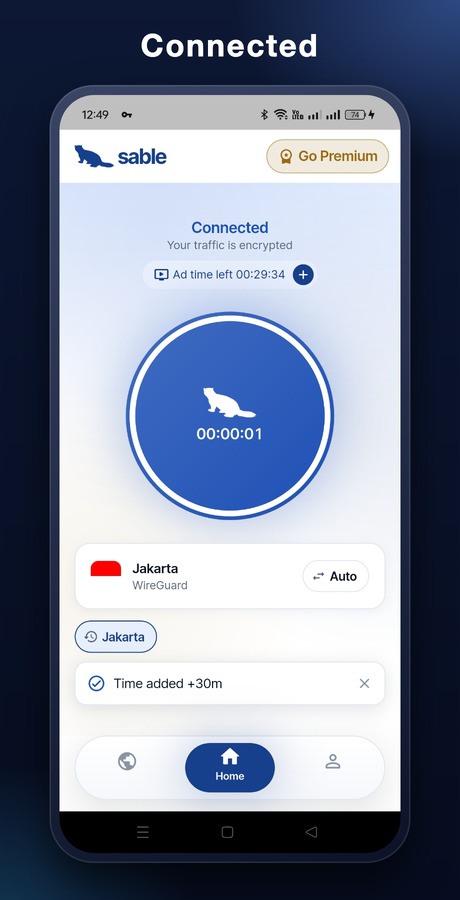
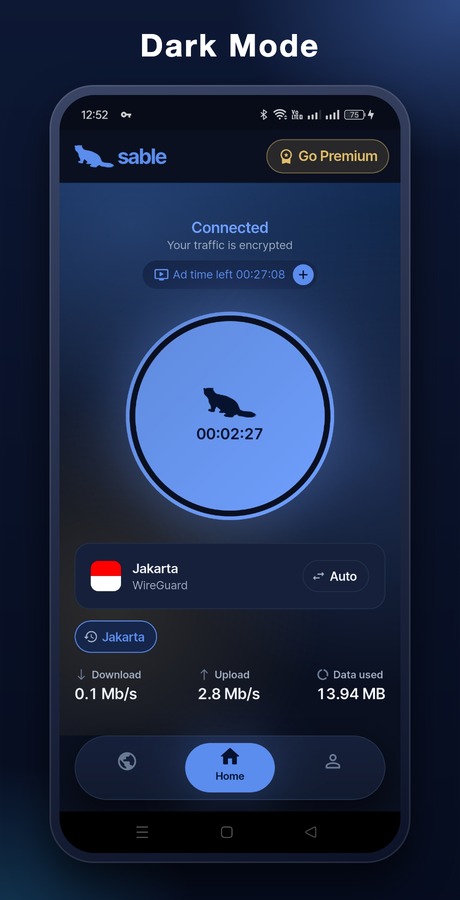
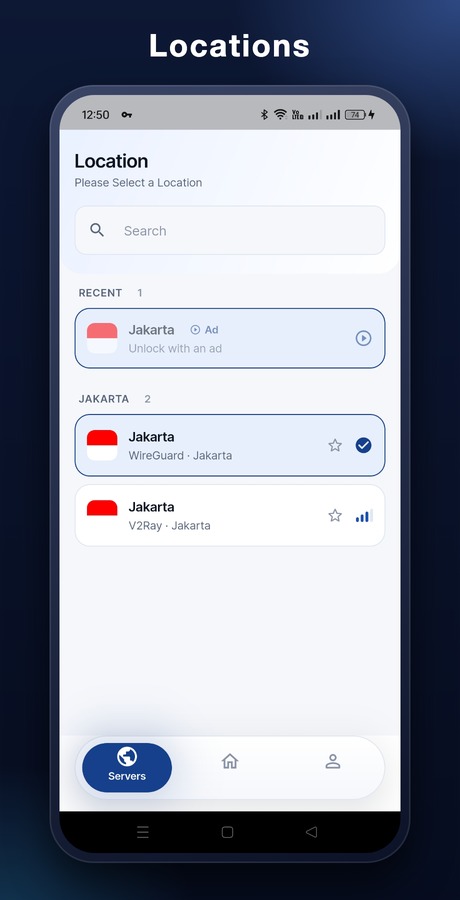
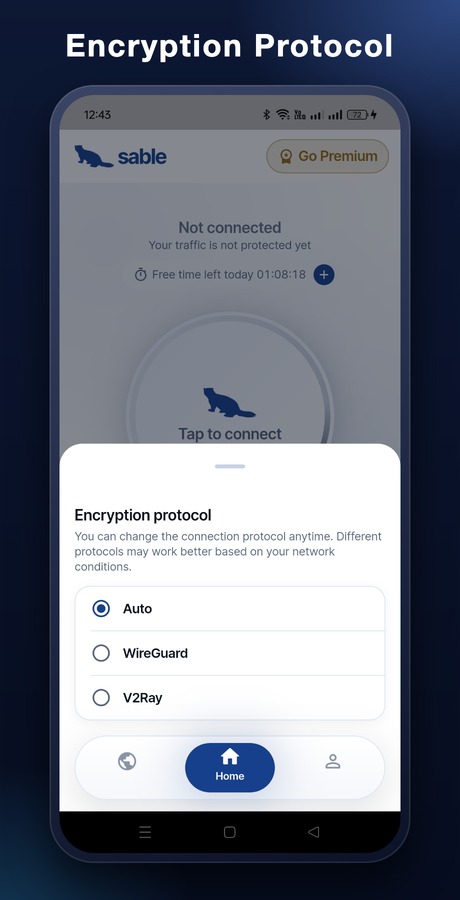
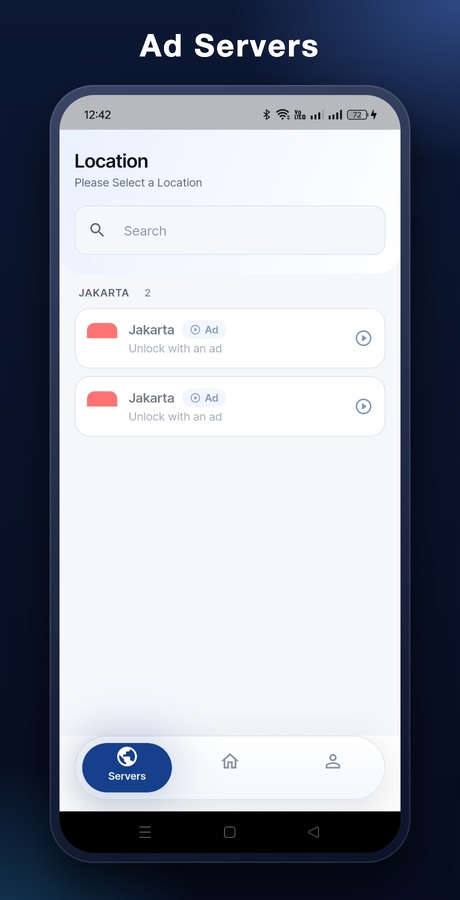
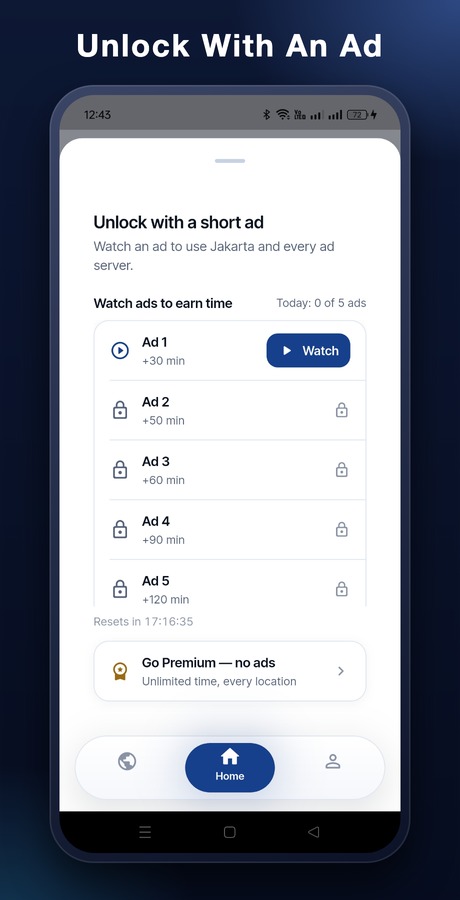
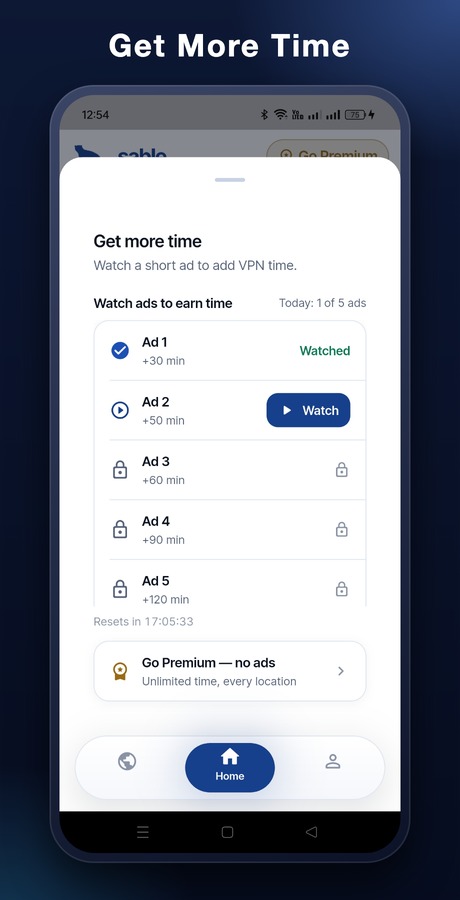
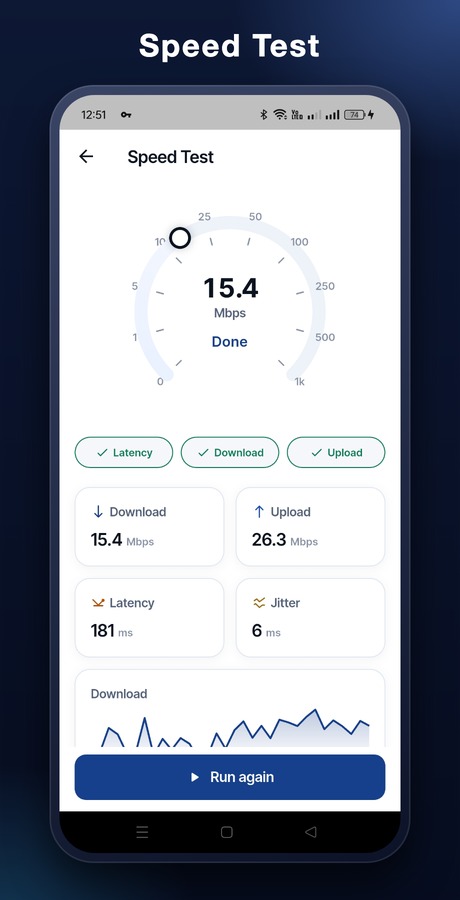
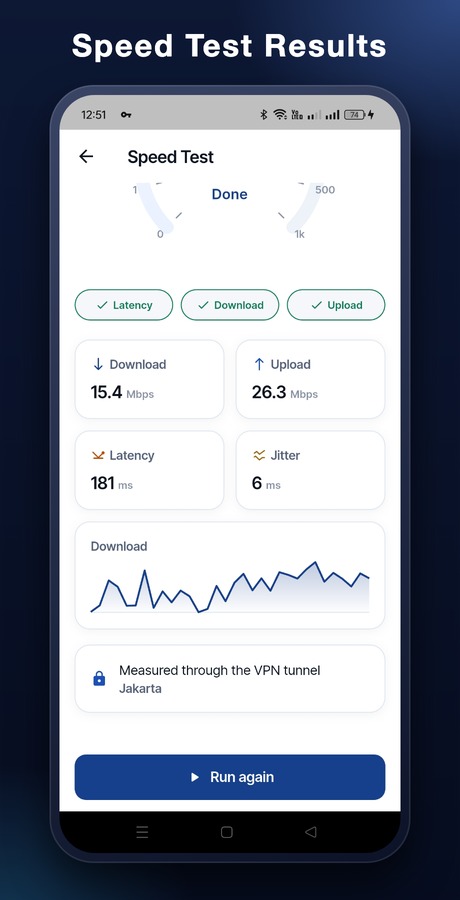
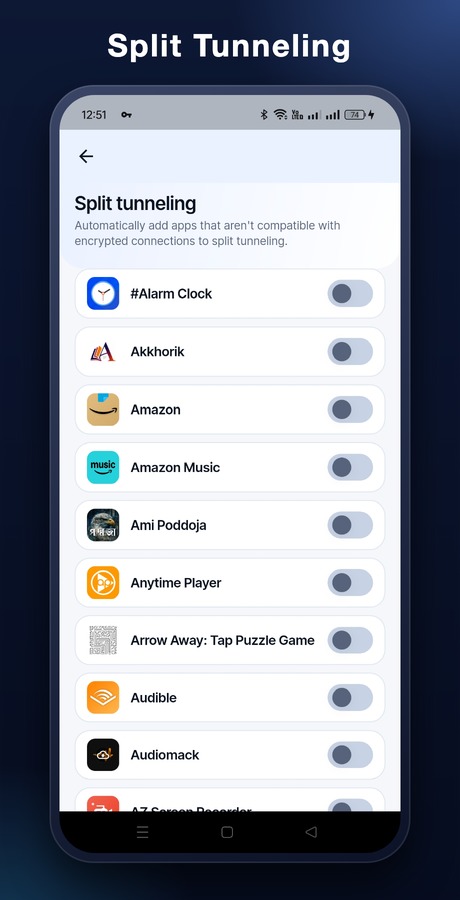
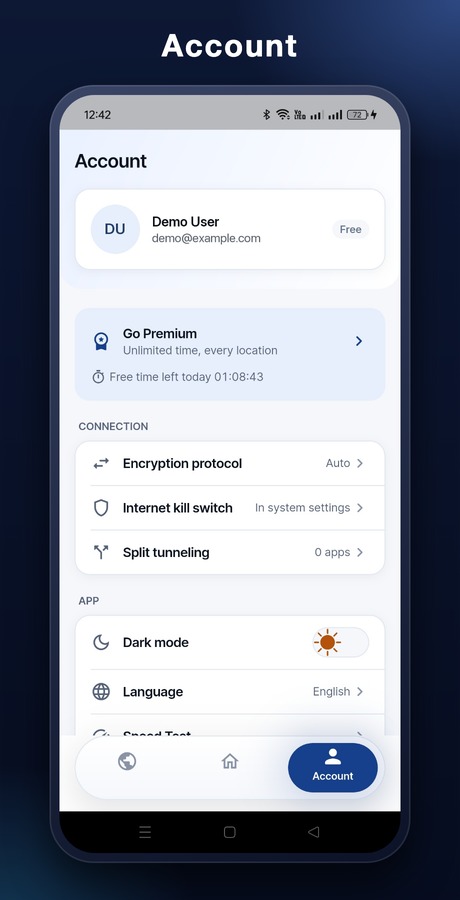
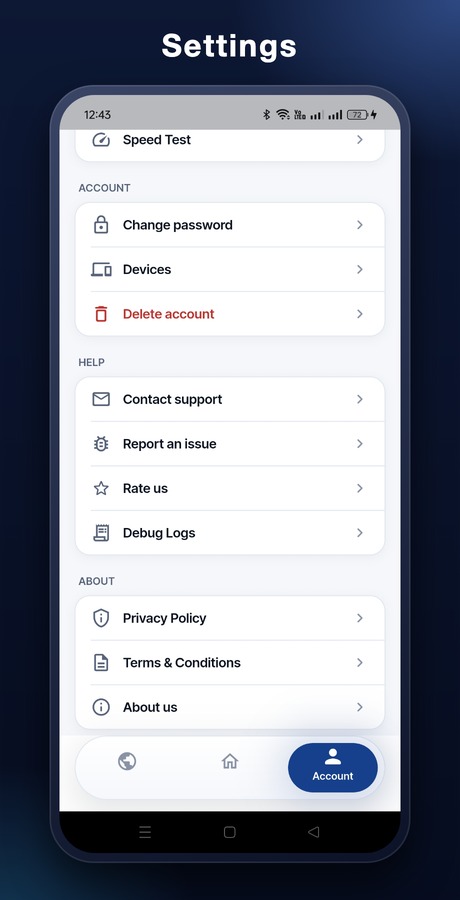
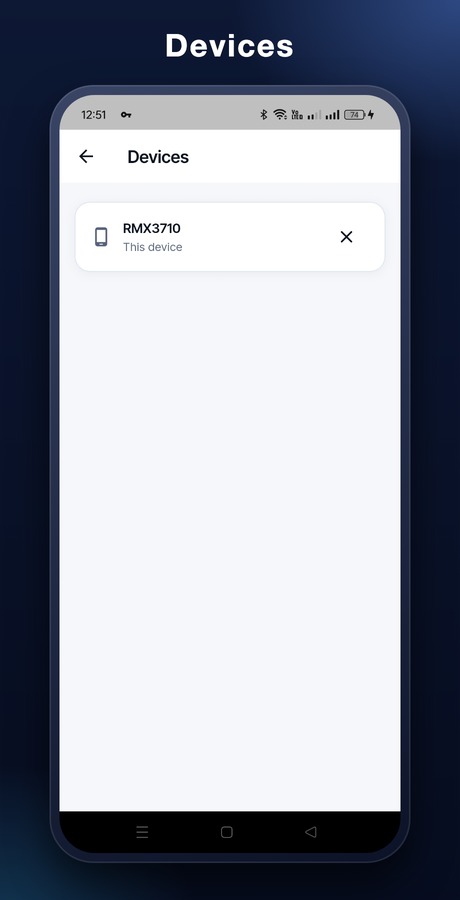
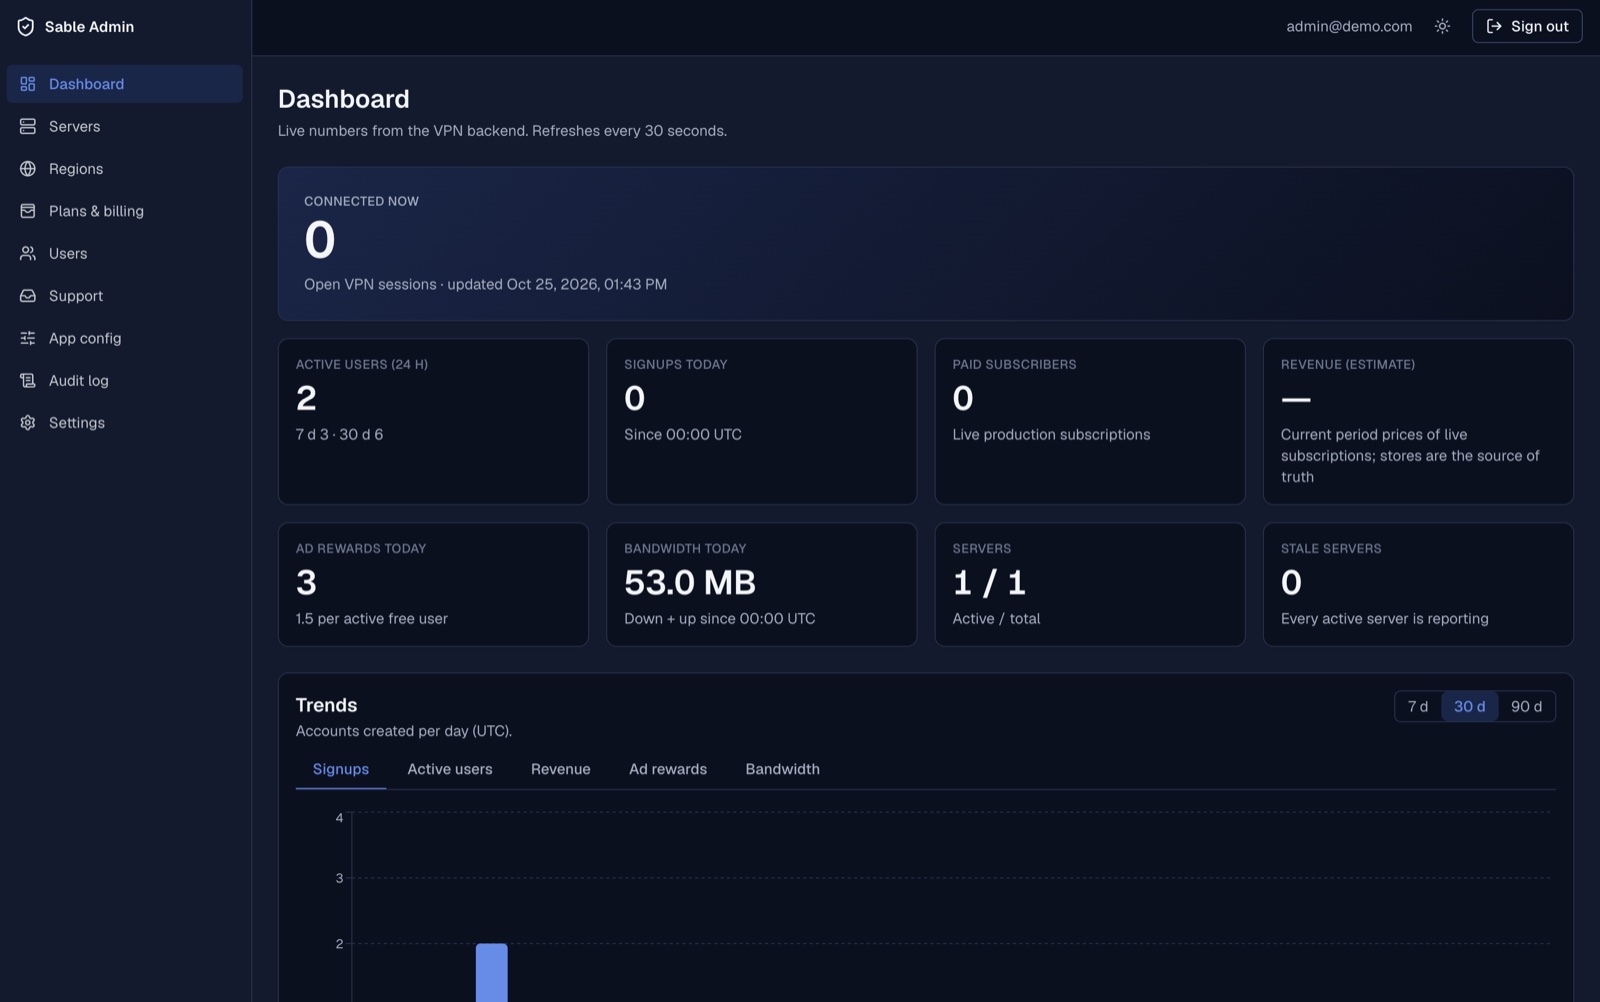
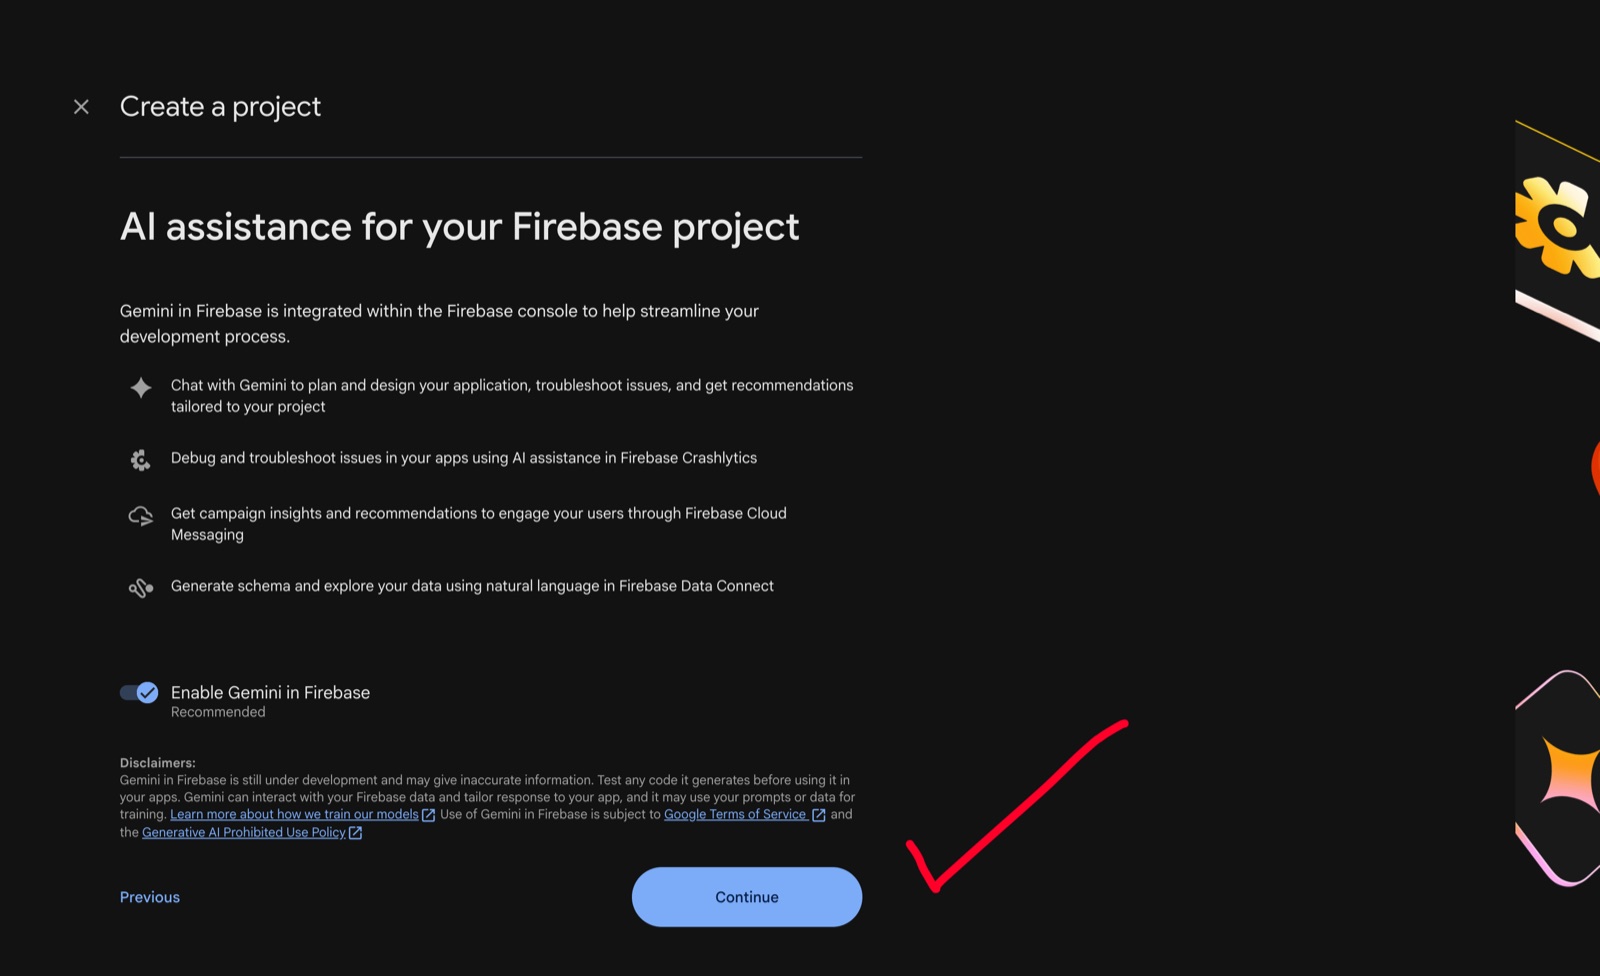
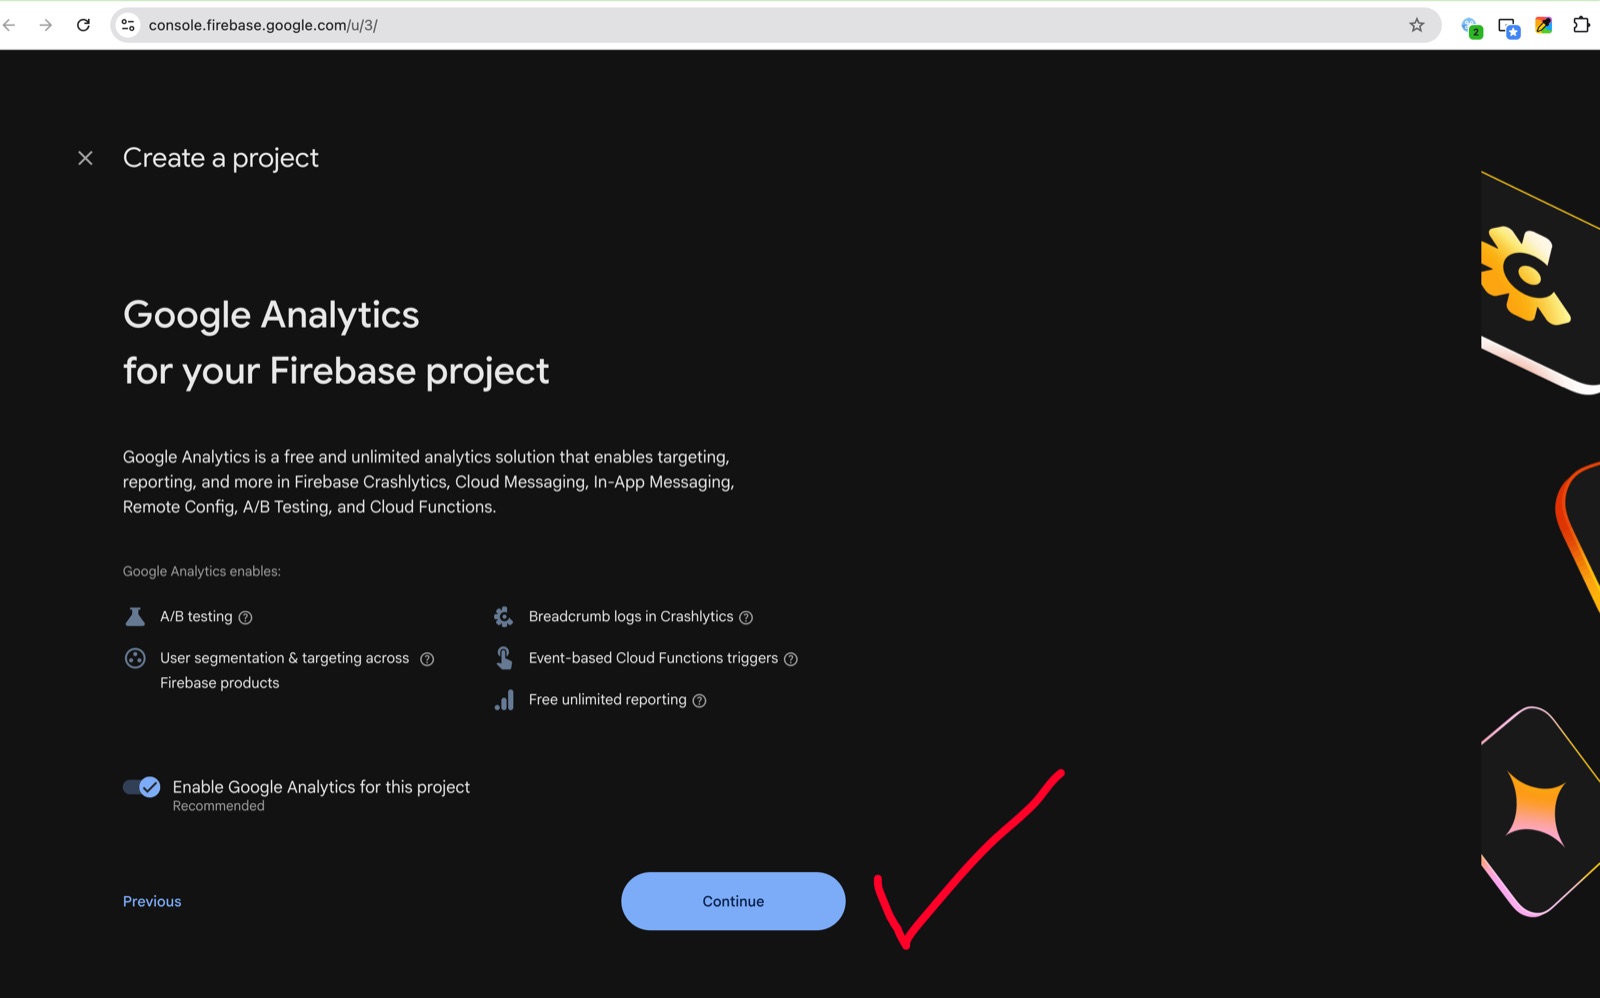
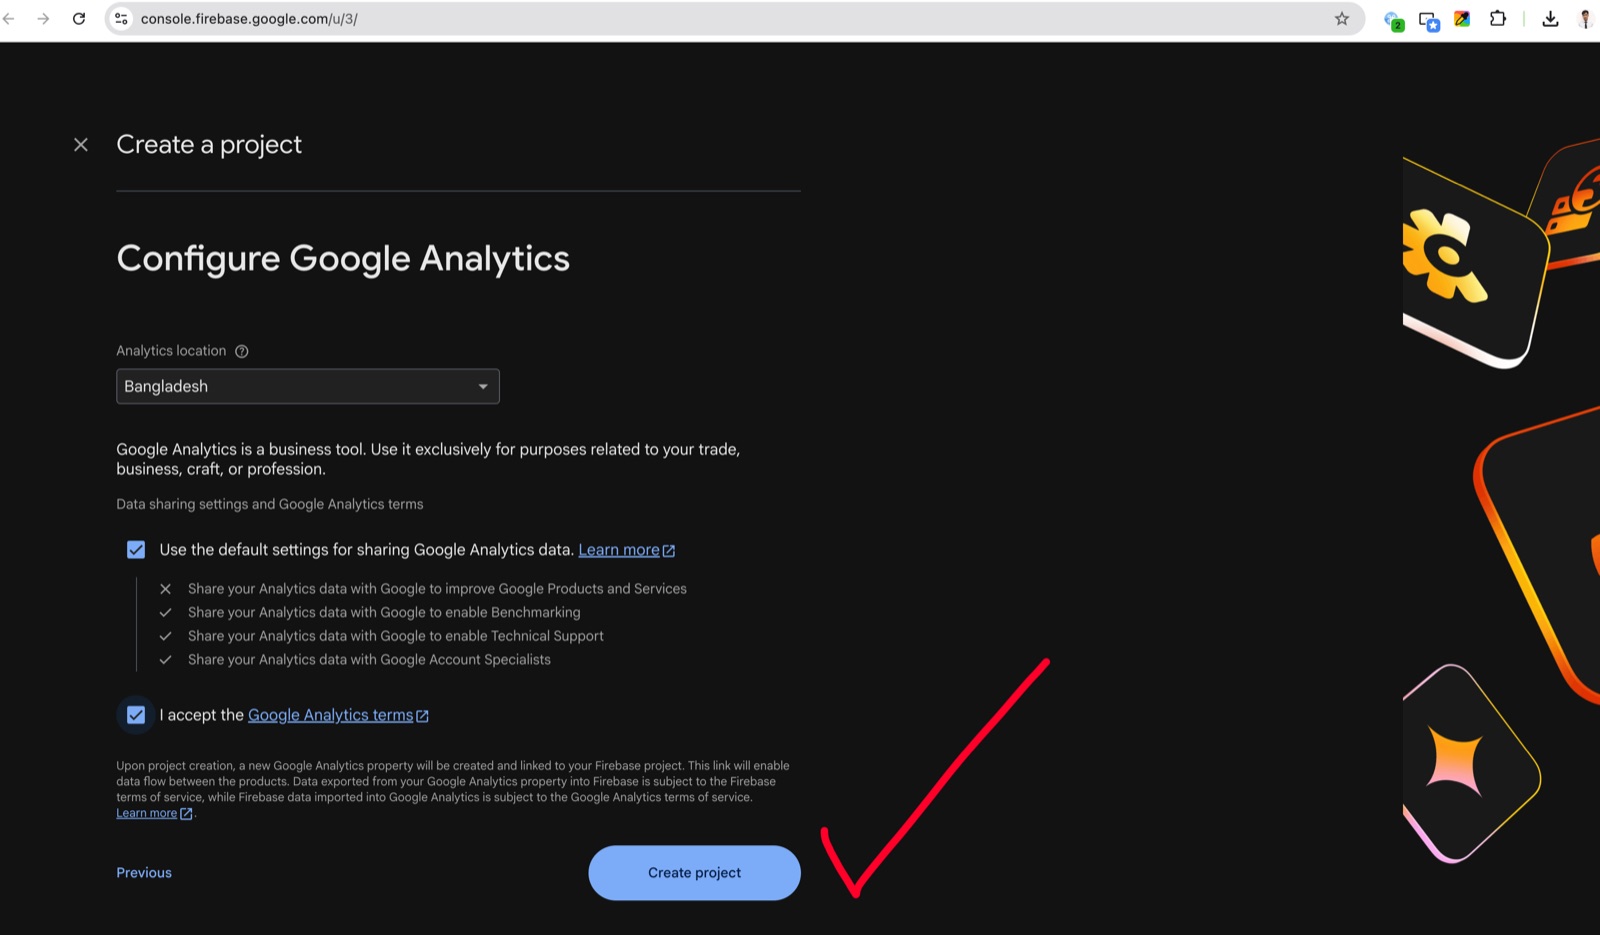
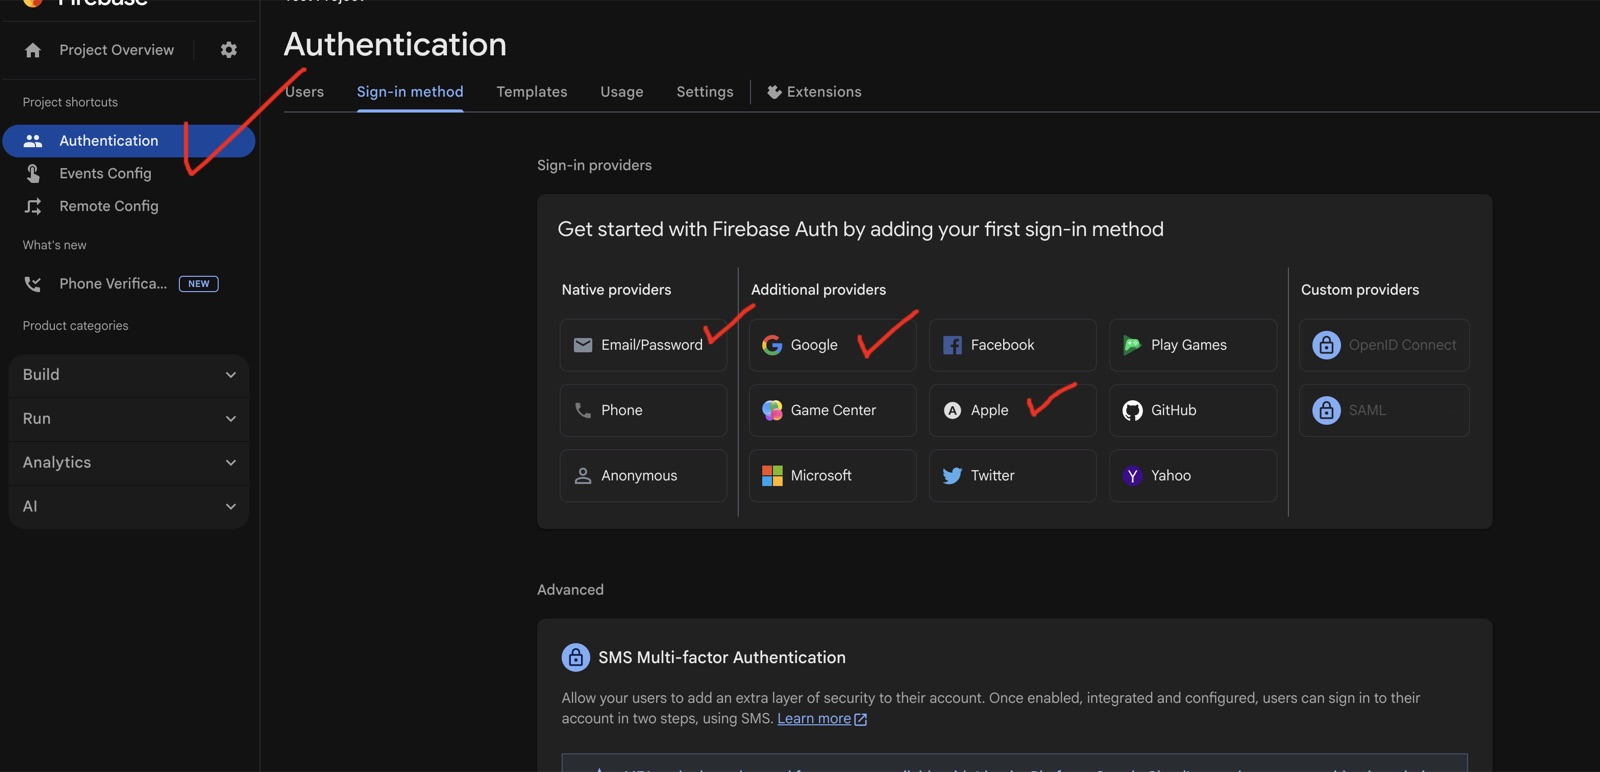
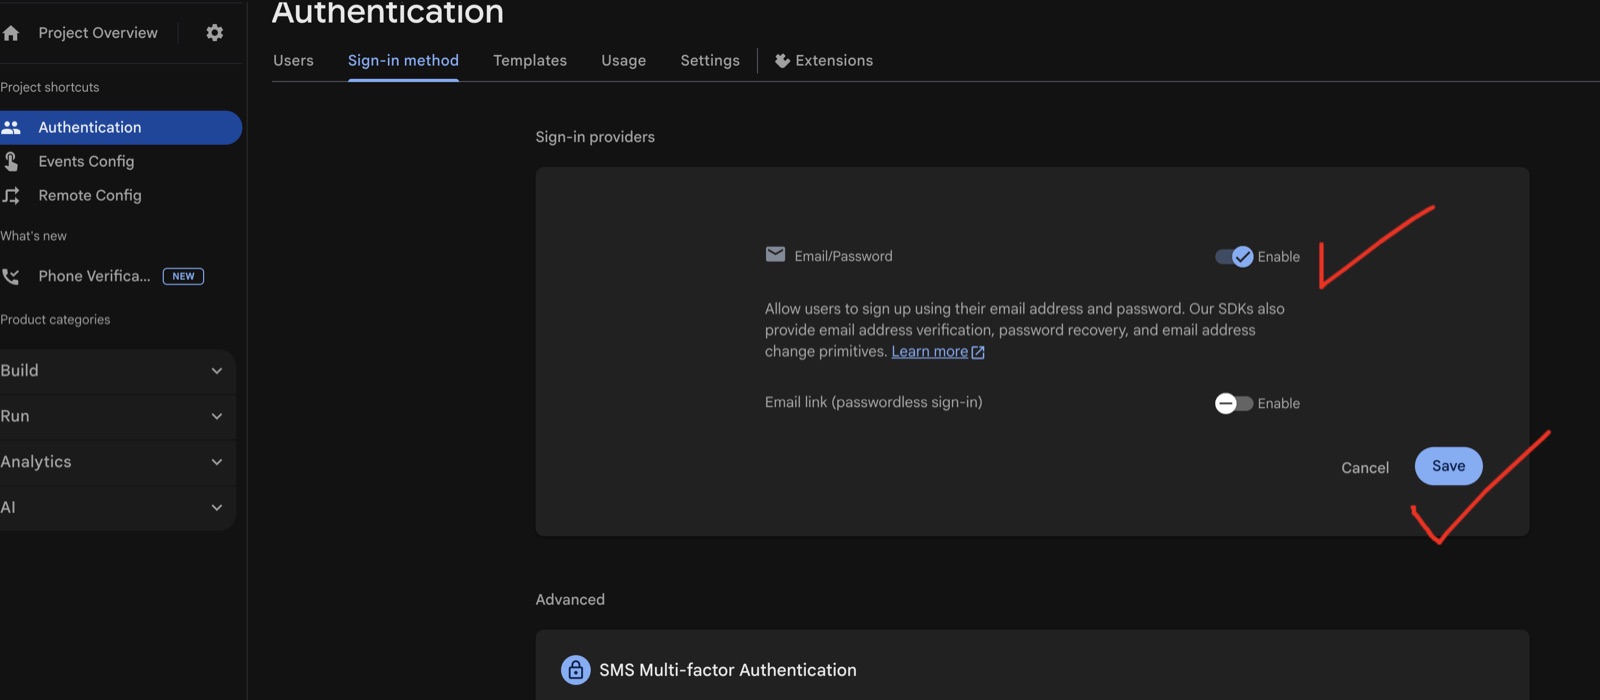
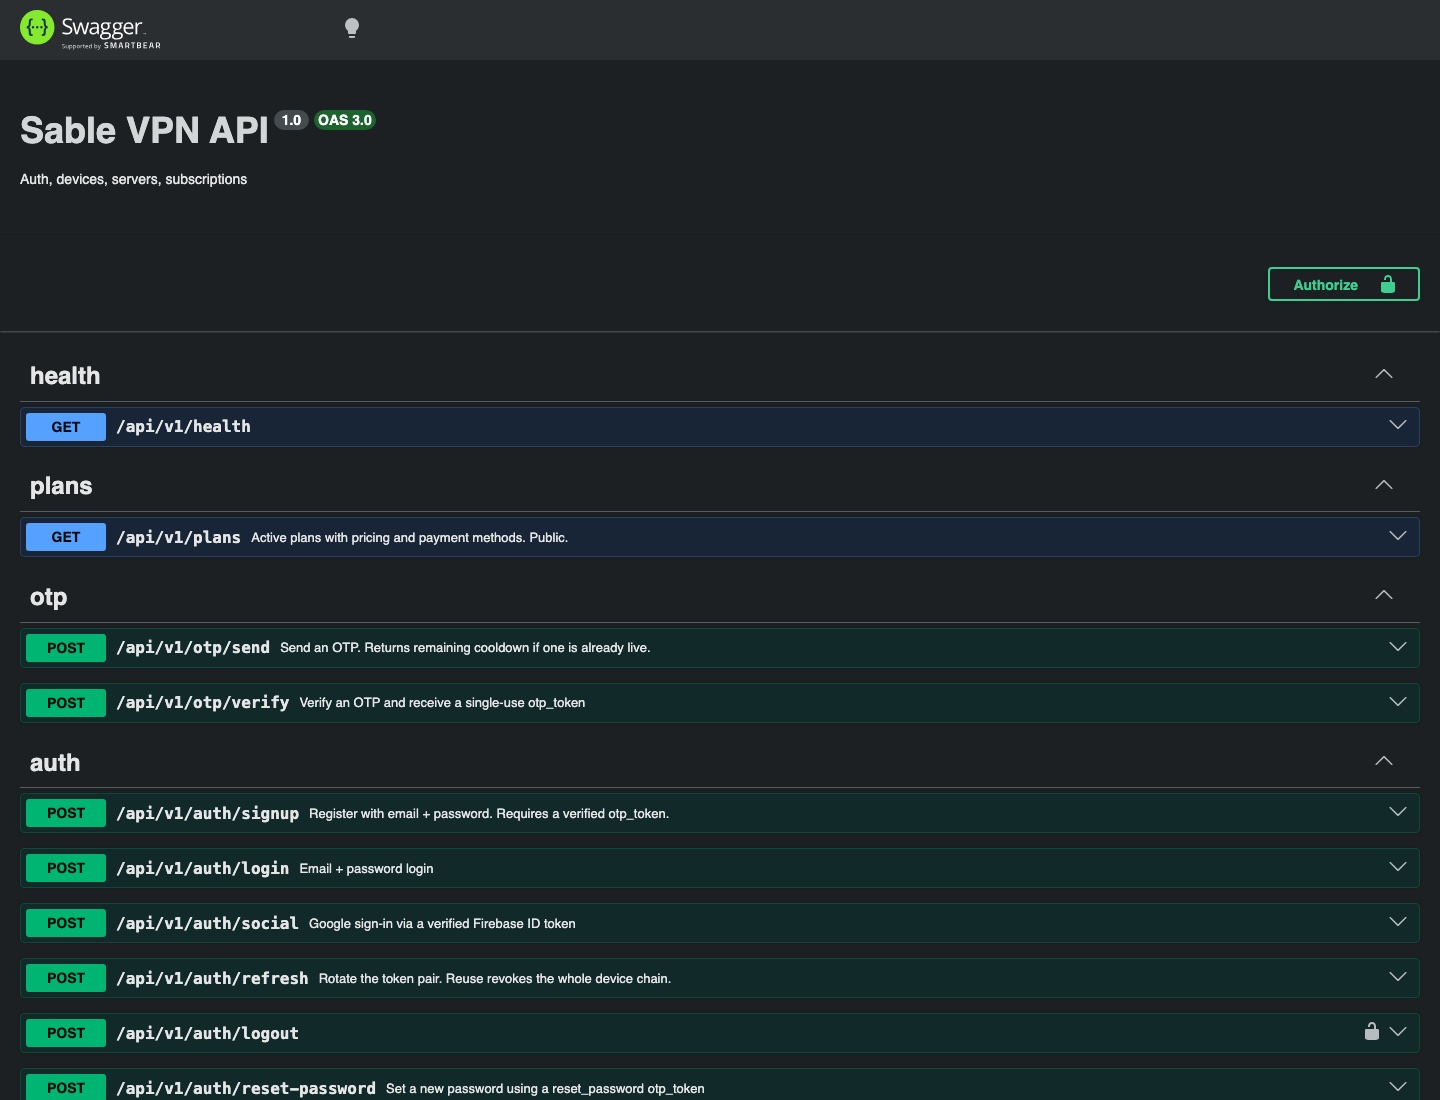
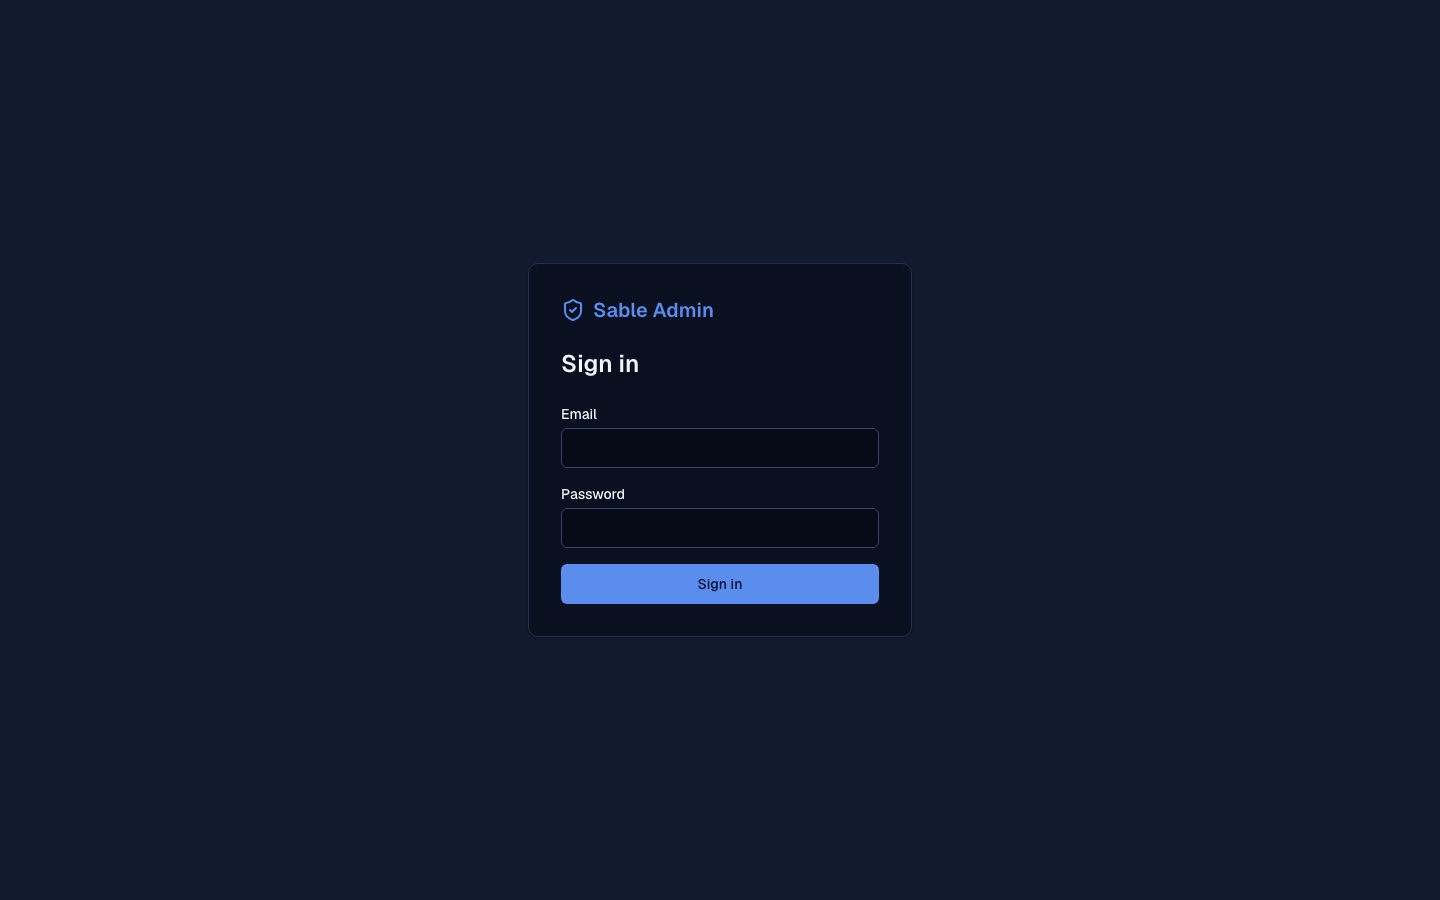
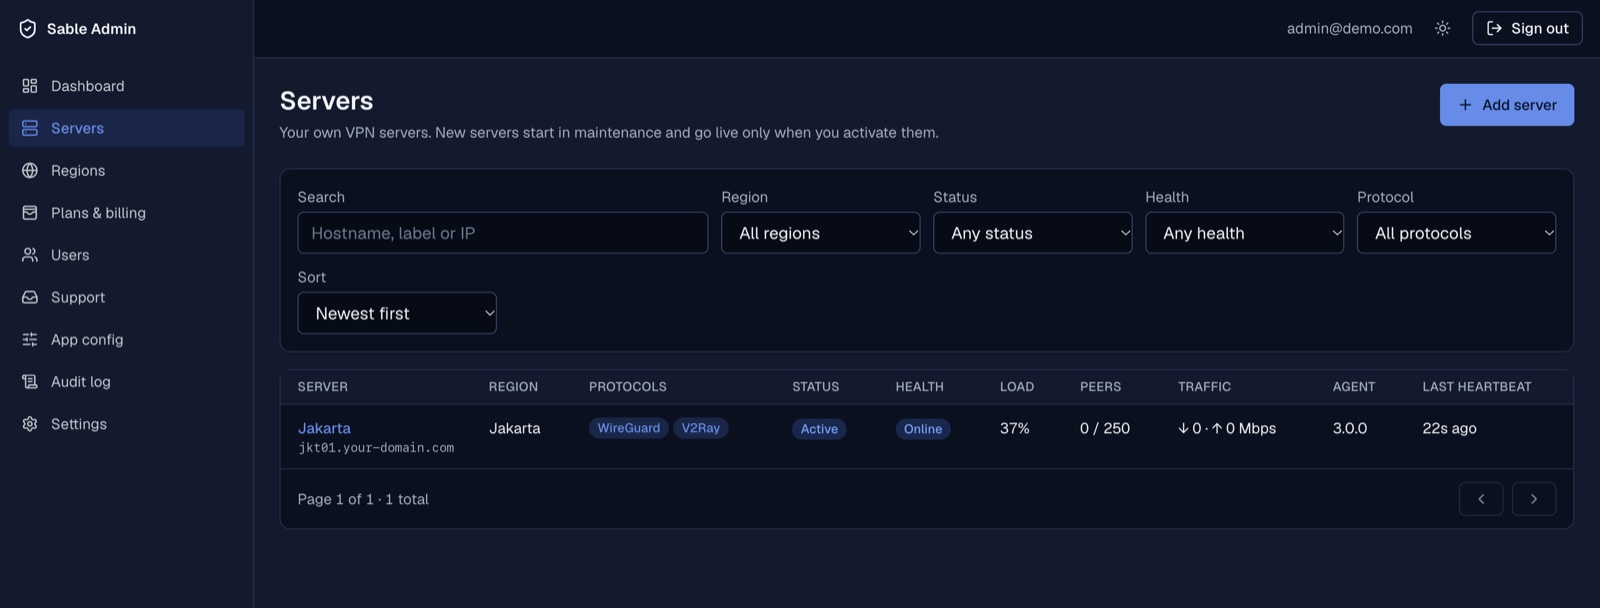
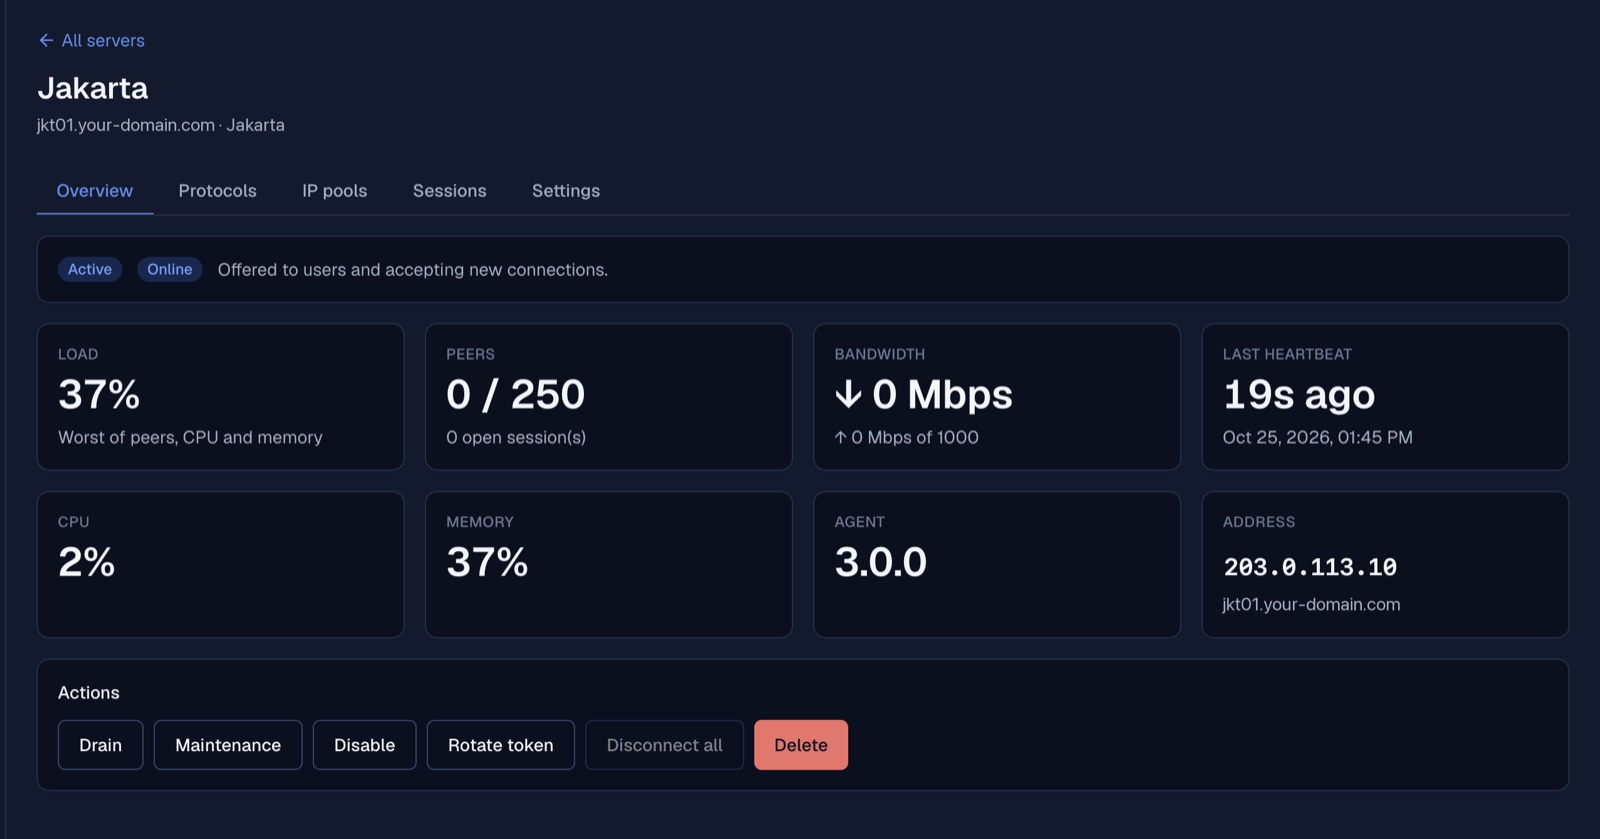
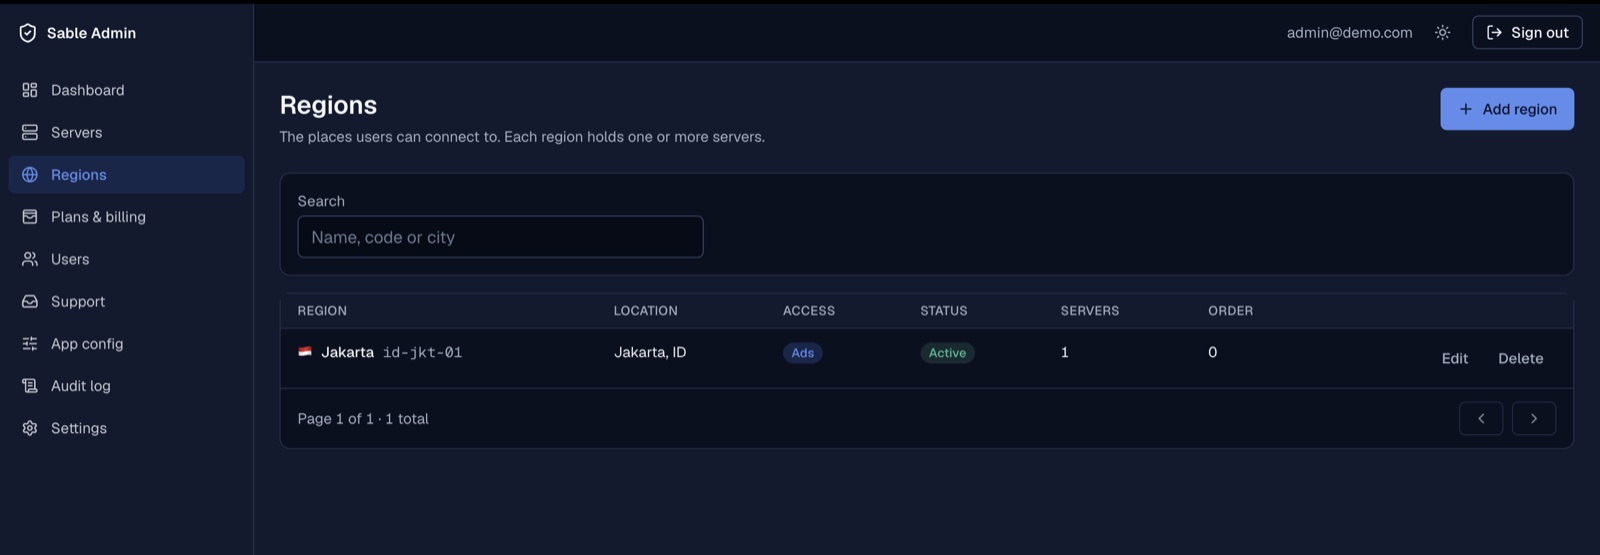
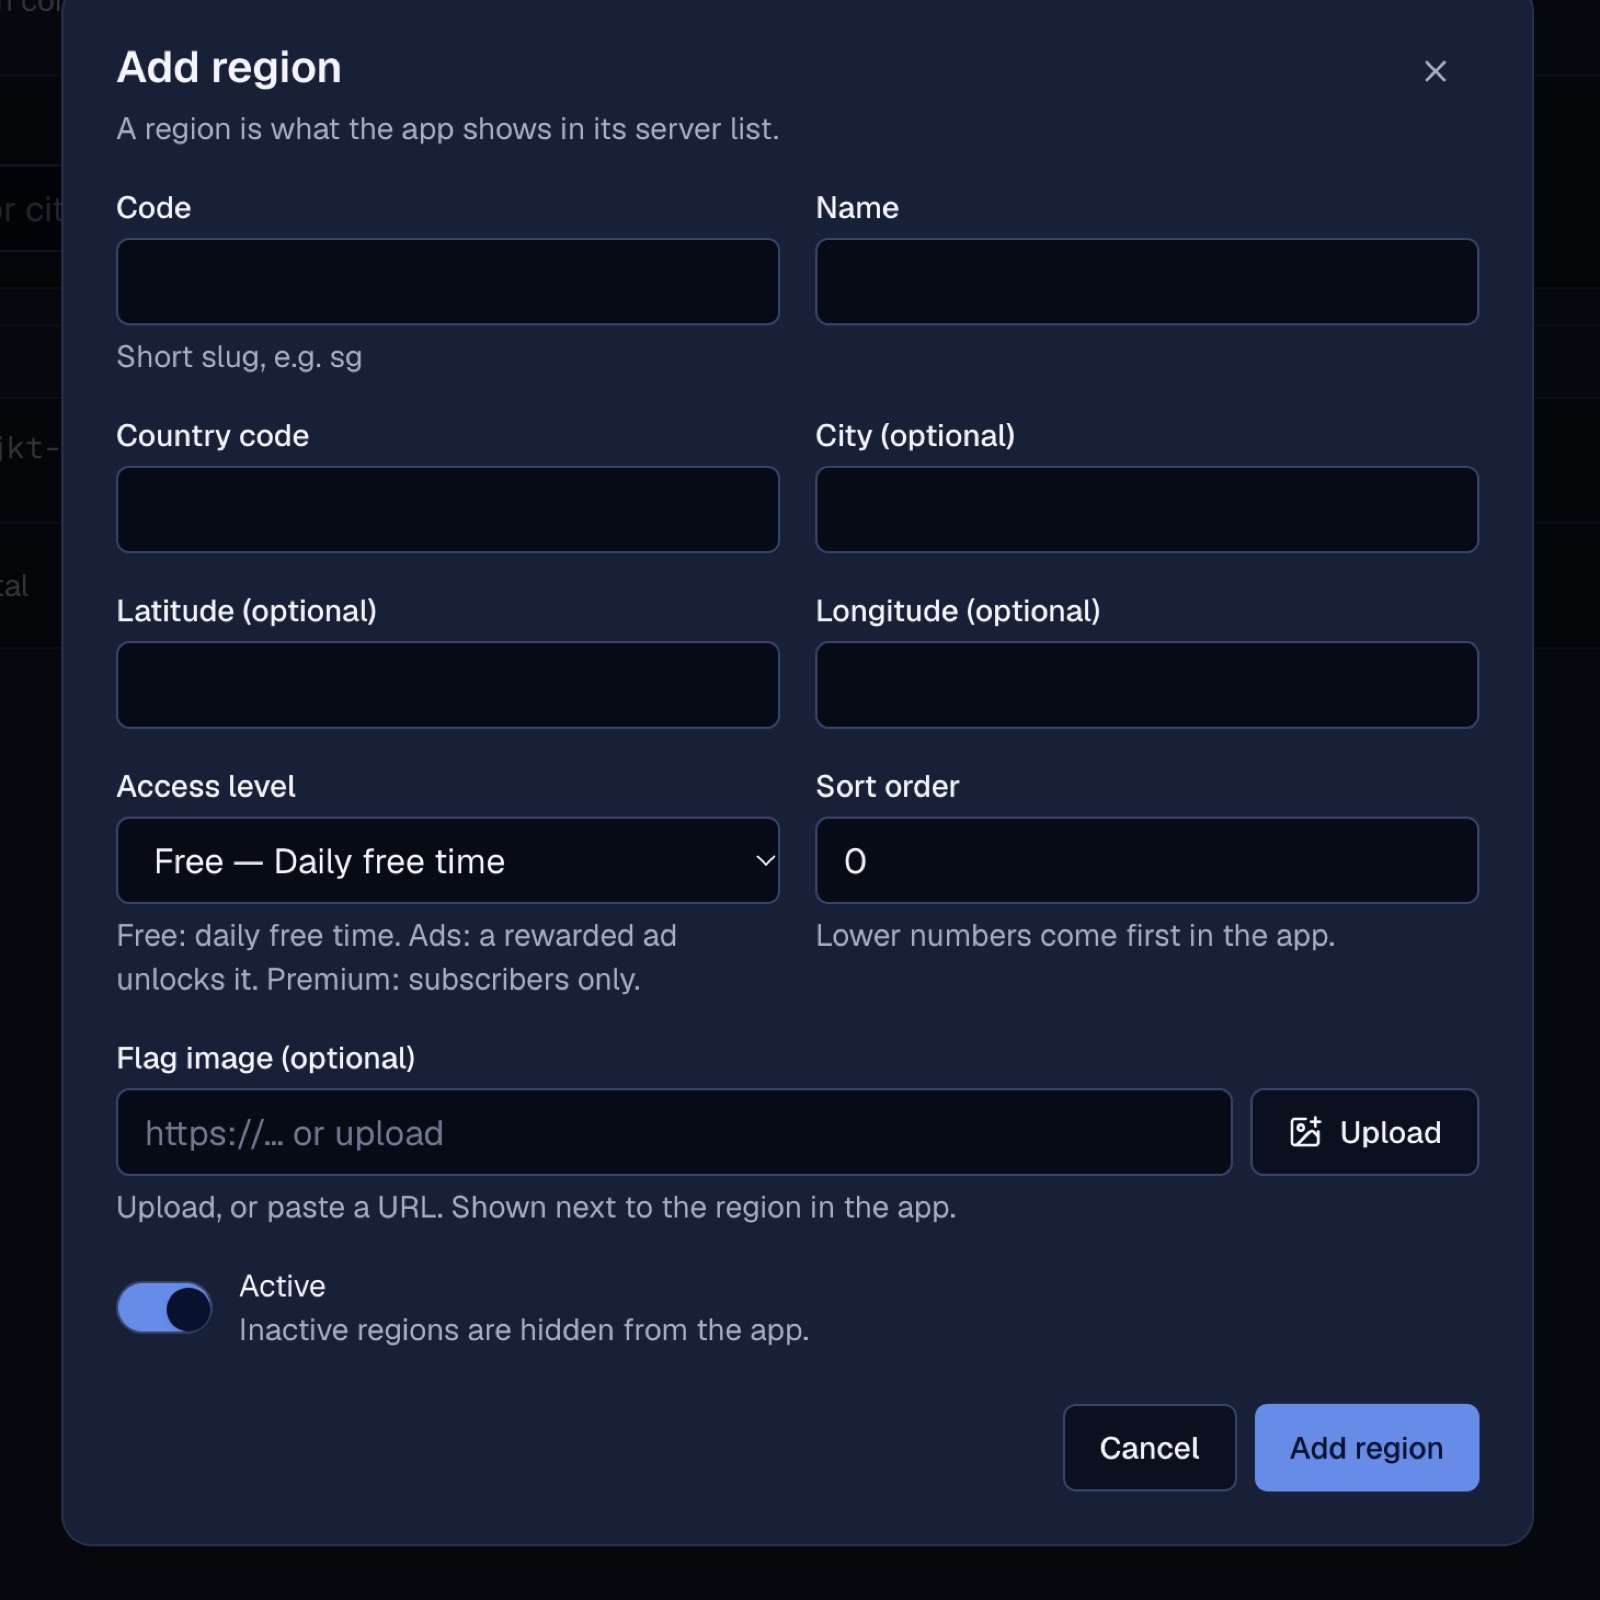
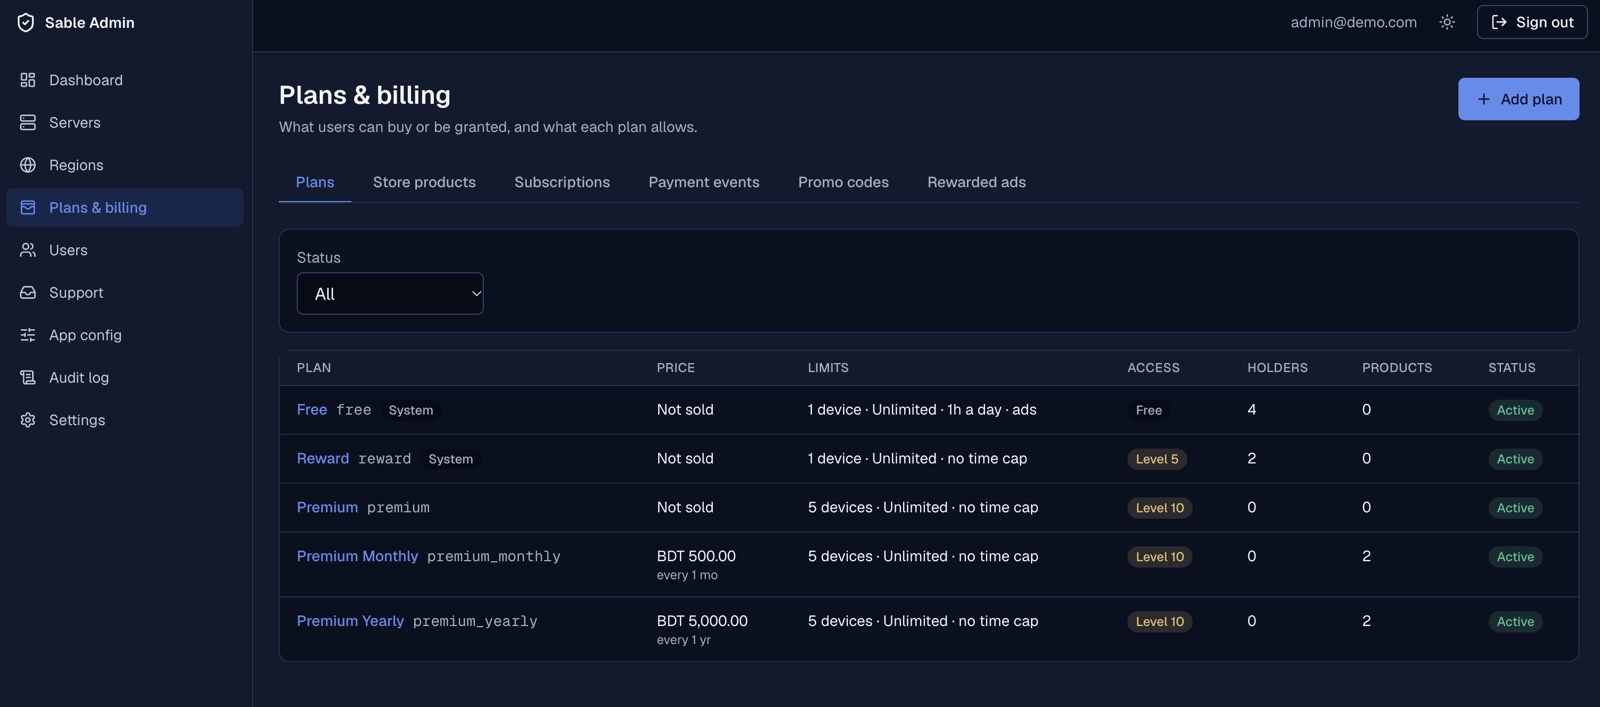
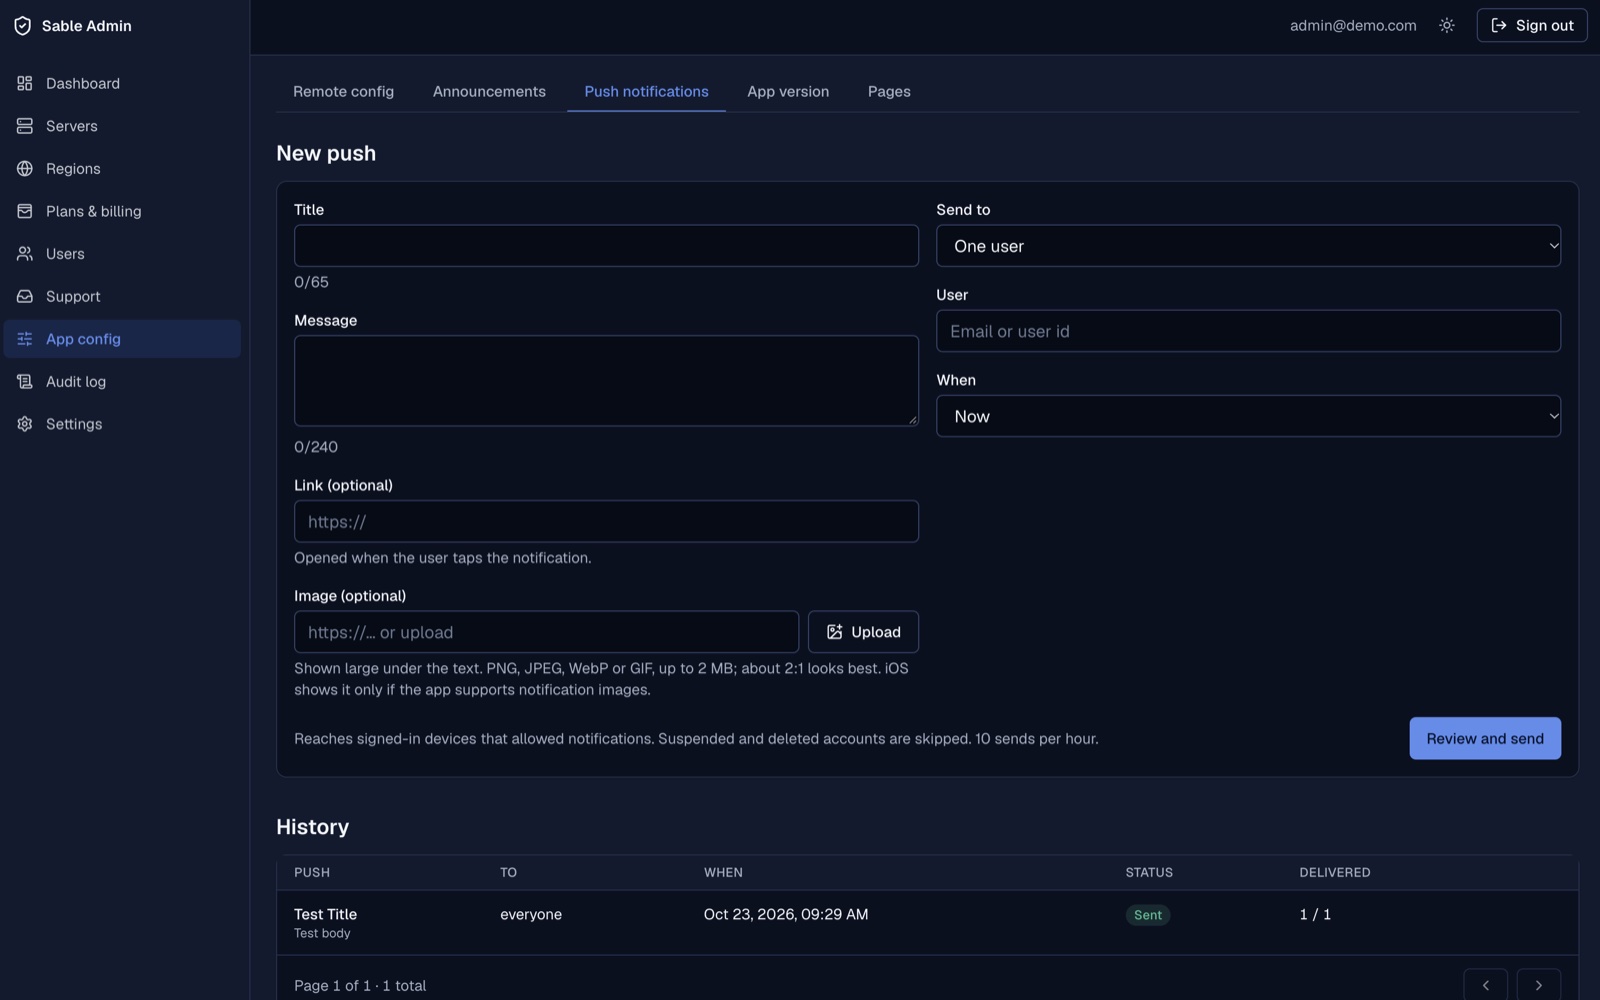
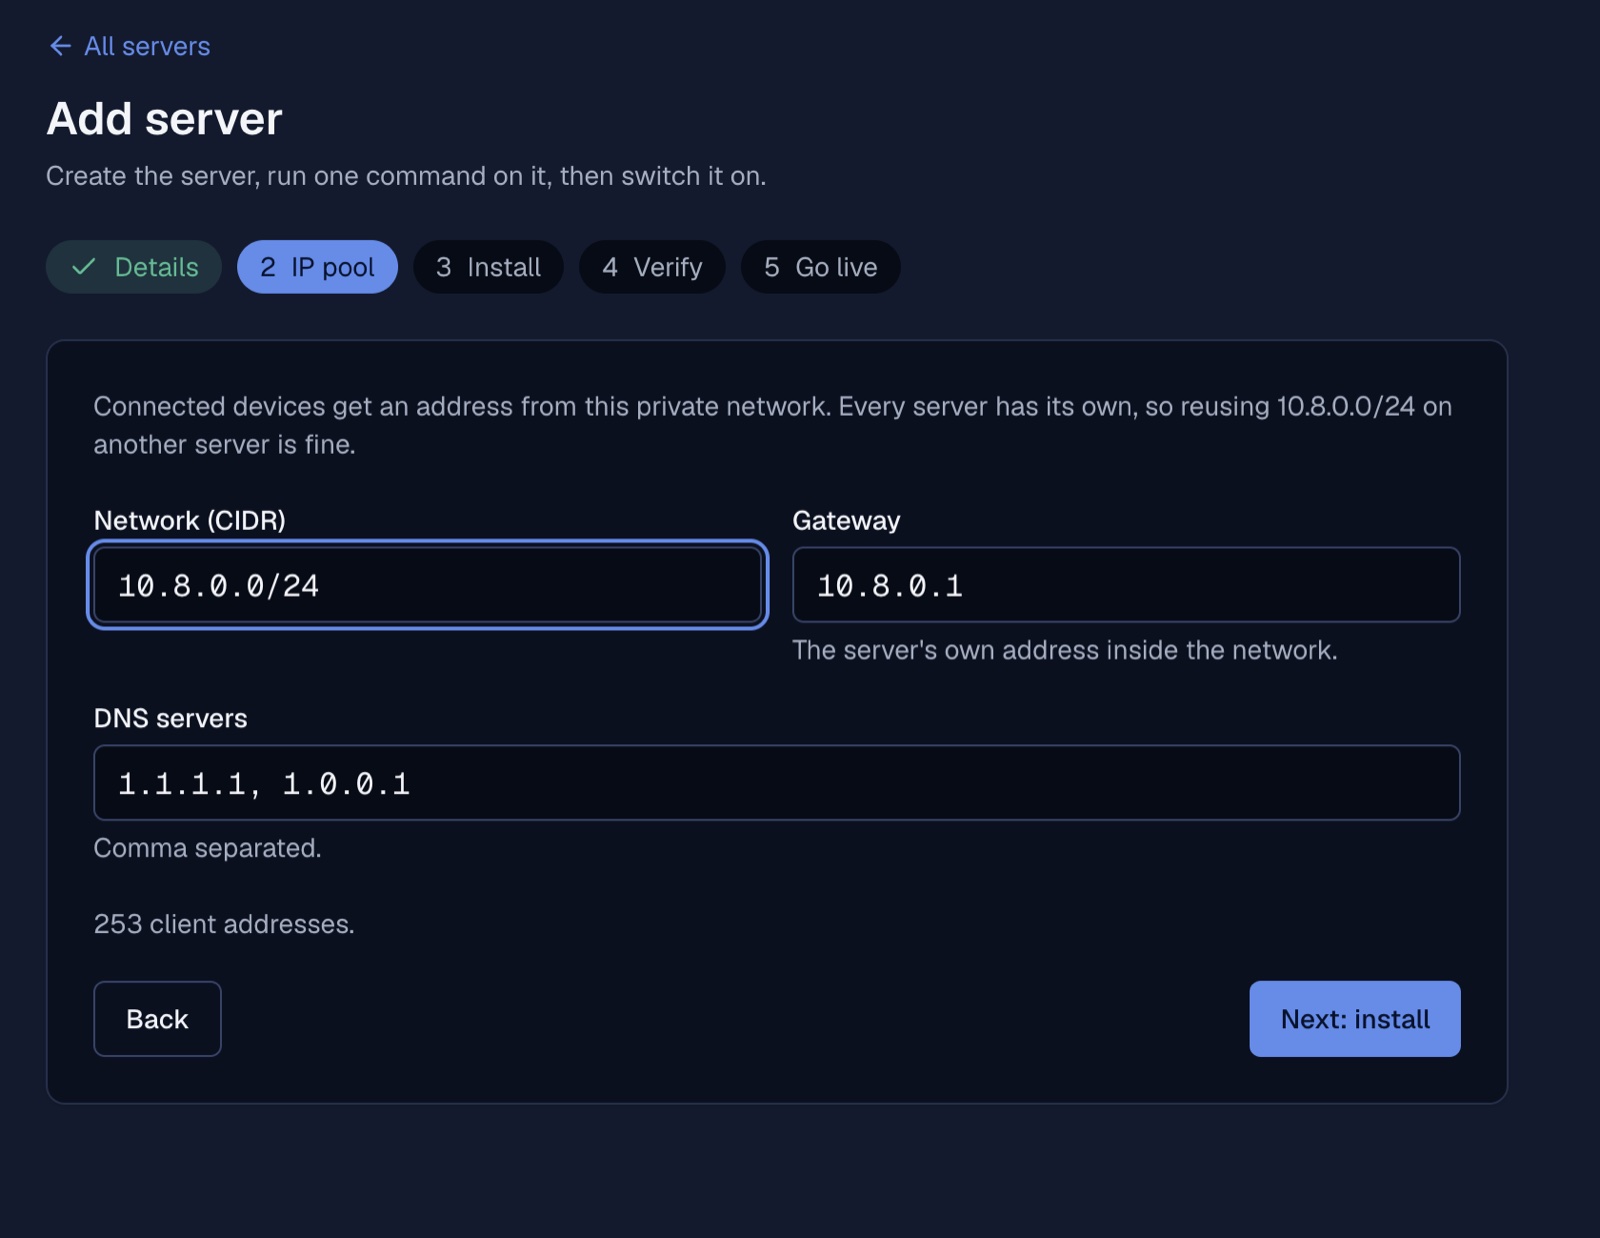
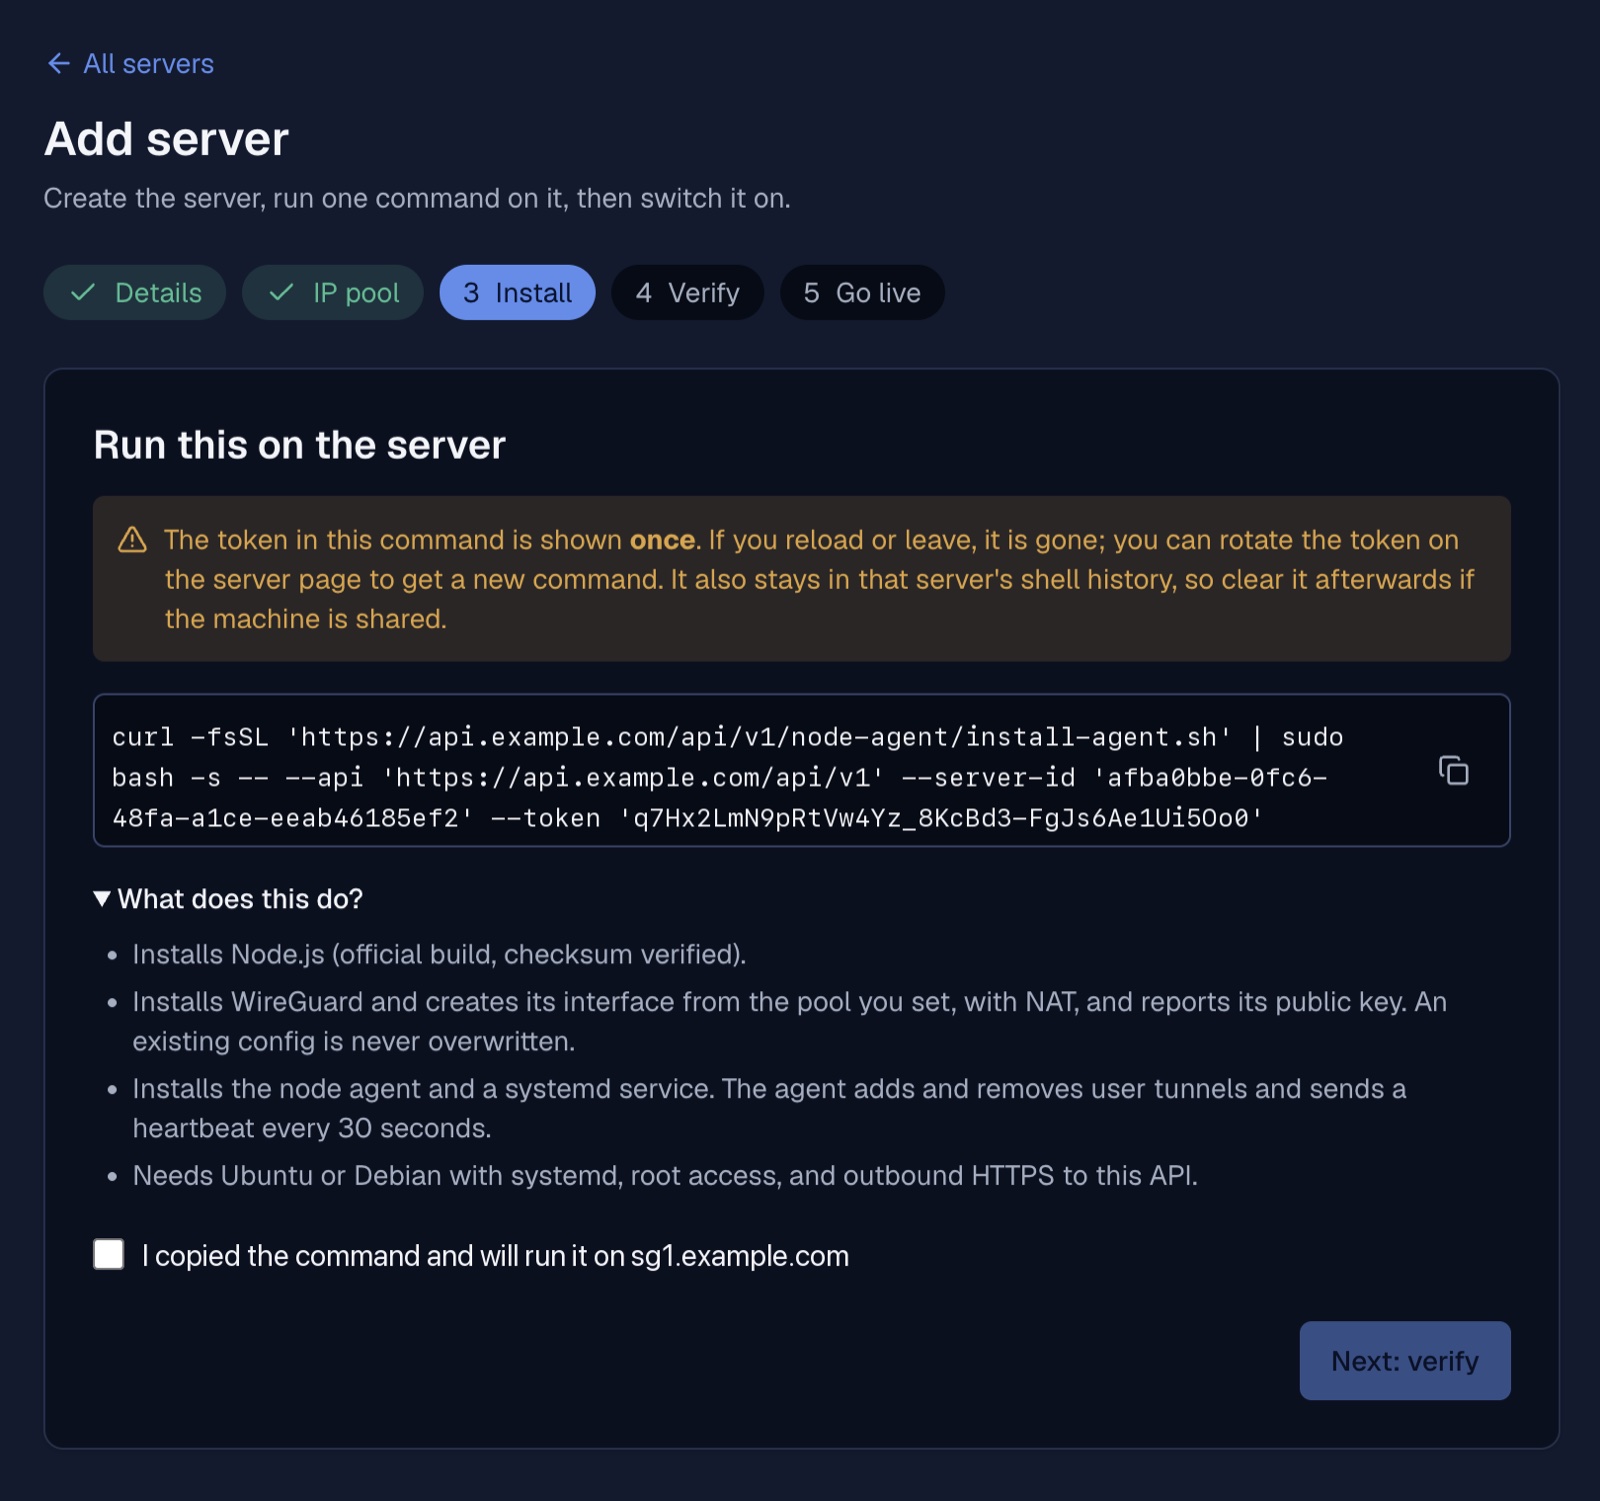
5. Social Sign-In and Push Notifications
Google
cd android && ./gradlew signingReport. Without them sign-in fails with error 10. Downloadgoogle-services.jsonagain afterwards.ios/Runner/Info.plist, replaceYOUR_IOS_CLIENT_IDin two places with the iOS client ID fromGoogleService-Info.plist: theGIDClientIDvalue (<id>.apps.googleusercontent.com) and the URL schemecom.googleusercontent.apps.<id>(theREVERSED_CLIENT_ID).Apple
lib/data/auth/firebase_social_identity.dartfor a future update. Email and Google sign-in are not affected.Apple's App Review Guideline 4.8 asks apps that offer a third-party sign-in such as Google to also offer an equivalent private sign-in option. Email and password sign-in is available in Sable; check the current guideline before you submit and be ready to explain your sign-in options to App Review.
Push notifications
google-services.jsonis in place and the backend has the service account. Notifications use the channelhigh_priority_channel.Info.plist). Create an APNs key in your Apple Developer account and upload it in Firebase: Project settings > Cloud Messaging > Apple app configuration.